
There are many ways to make code easily reusable in Apple platforms. For instance, although not highly recommendable, code can easily be placed in Swift files and copied from one project to another. This method works well in general, but it is hard to manage versions and it is prone to errors.
Introduction to Frameworks and Package Managers
Traditionally, on Apple platforms, reusable code will be packed and distributed as frameworks (bundled files with extension .framework).
In the last few years, other package managers have become very popular, like CocoaPods, Carthage or the new Swift Package Manager.
These package managers do not require for the code to be put inside a framework. They can pack and distribute the code directly without the need for any project whatsoever.
However, in my experience, I have found some major benefits when using frameworks for my libraries and SDKs:
- Frameworks can include Unit Tests without the need for Example projects.
- Frameworks can be distributed via CocoaPods or Carthage.
- Frameworks can include dependencies via CocoaPods and Carthage.
Furthermore, Frameworks can have CocoaPod dependencies installed via Podfile while being distributed as a CocoaPod with a podspec file.
On this article we will cover how to create an Xcode project for a framework for multiple platforms (iOS, OS X and tvOS) while reusing source code and unit tests. We will also cover distribution via CocoaPods and CocoaPod dependencies.
Project Setup
Once you have some reusable code that would do for a good framework, it is time to set up a framework project.
Creating a Git repository
On your terminal (or Finder), create a folder/directory where your Git repository will be located.
$ mkdir ~/dev/MyFramework.swift
$ cd ~/dev/MyFramework.swift
And initialize Git:
$ git init
Alternatively, if you are using GitHub, you can directly create the repository in GitHub and clone it in your computer. The benefit of this approach is that you can have GitHub generate the README, .gitignore and LICENSE files for you.
I personally like the .gitignore that GitHub provides, with many exceptions already included on it. See GitHub .gitignore template example
Configuring the shared Sources and Tests folders
Before creating the Xcode project, we are going to set up two folders where our source code and unit tests will live. These folders will be shared across all three frameworks (iOS, OS X and tvOS).
$ mkdir Sources
$ mkdir Tests
At this point, the content of your repository root should look something like this:
.git
.gitignore
LICENSE
README.md
Sources/
Tests/
Creating the Xcode 7 Project
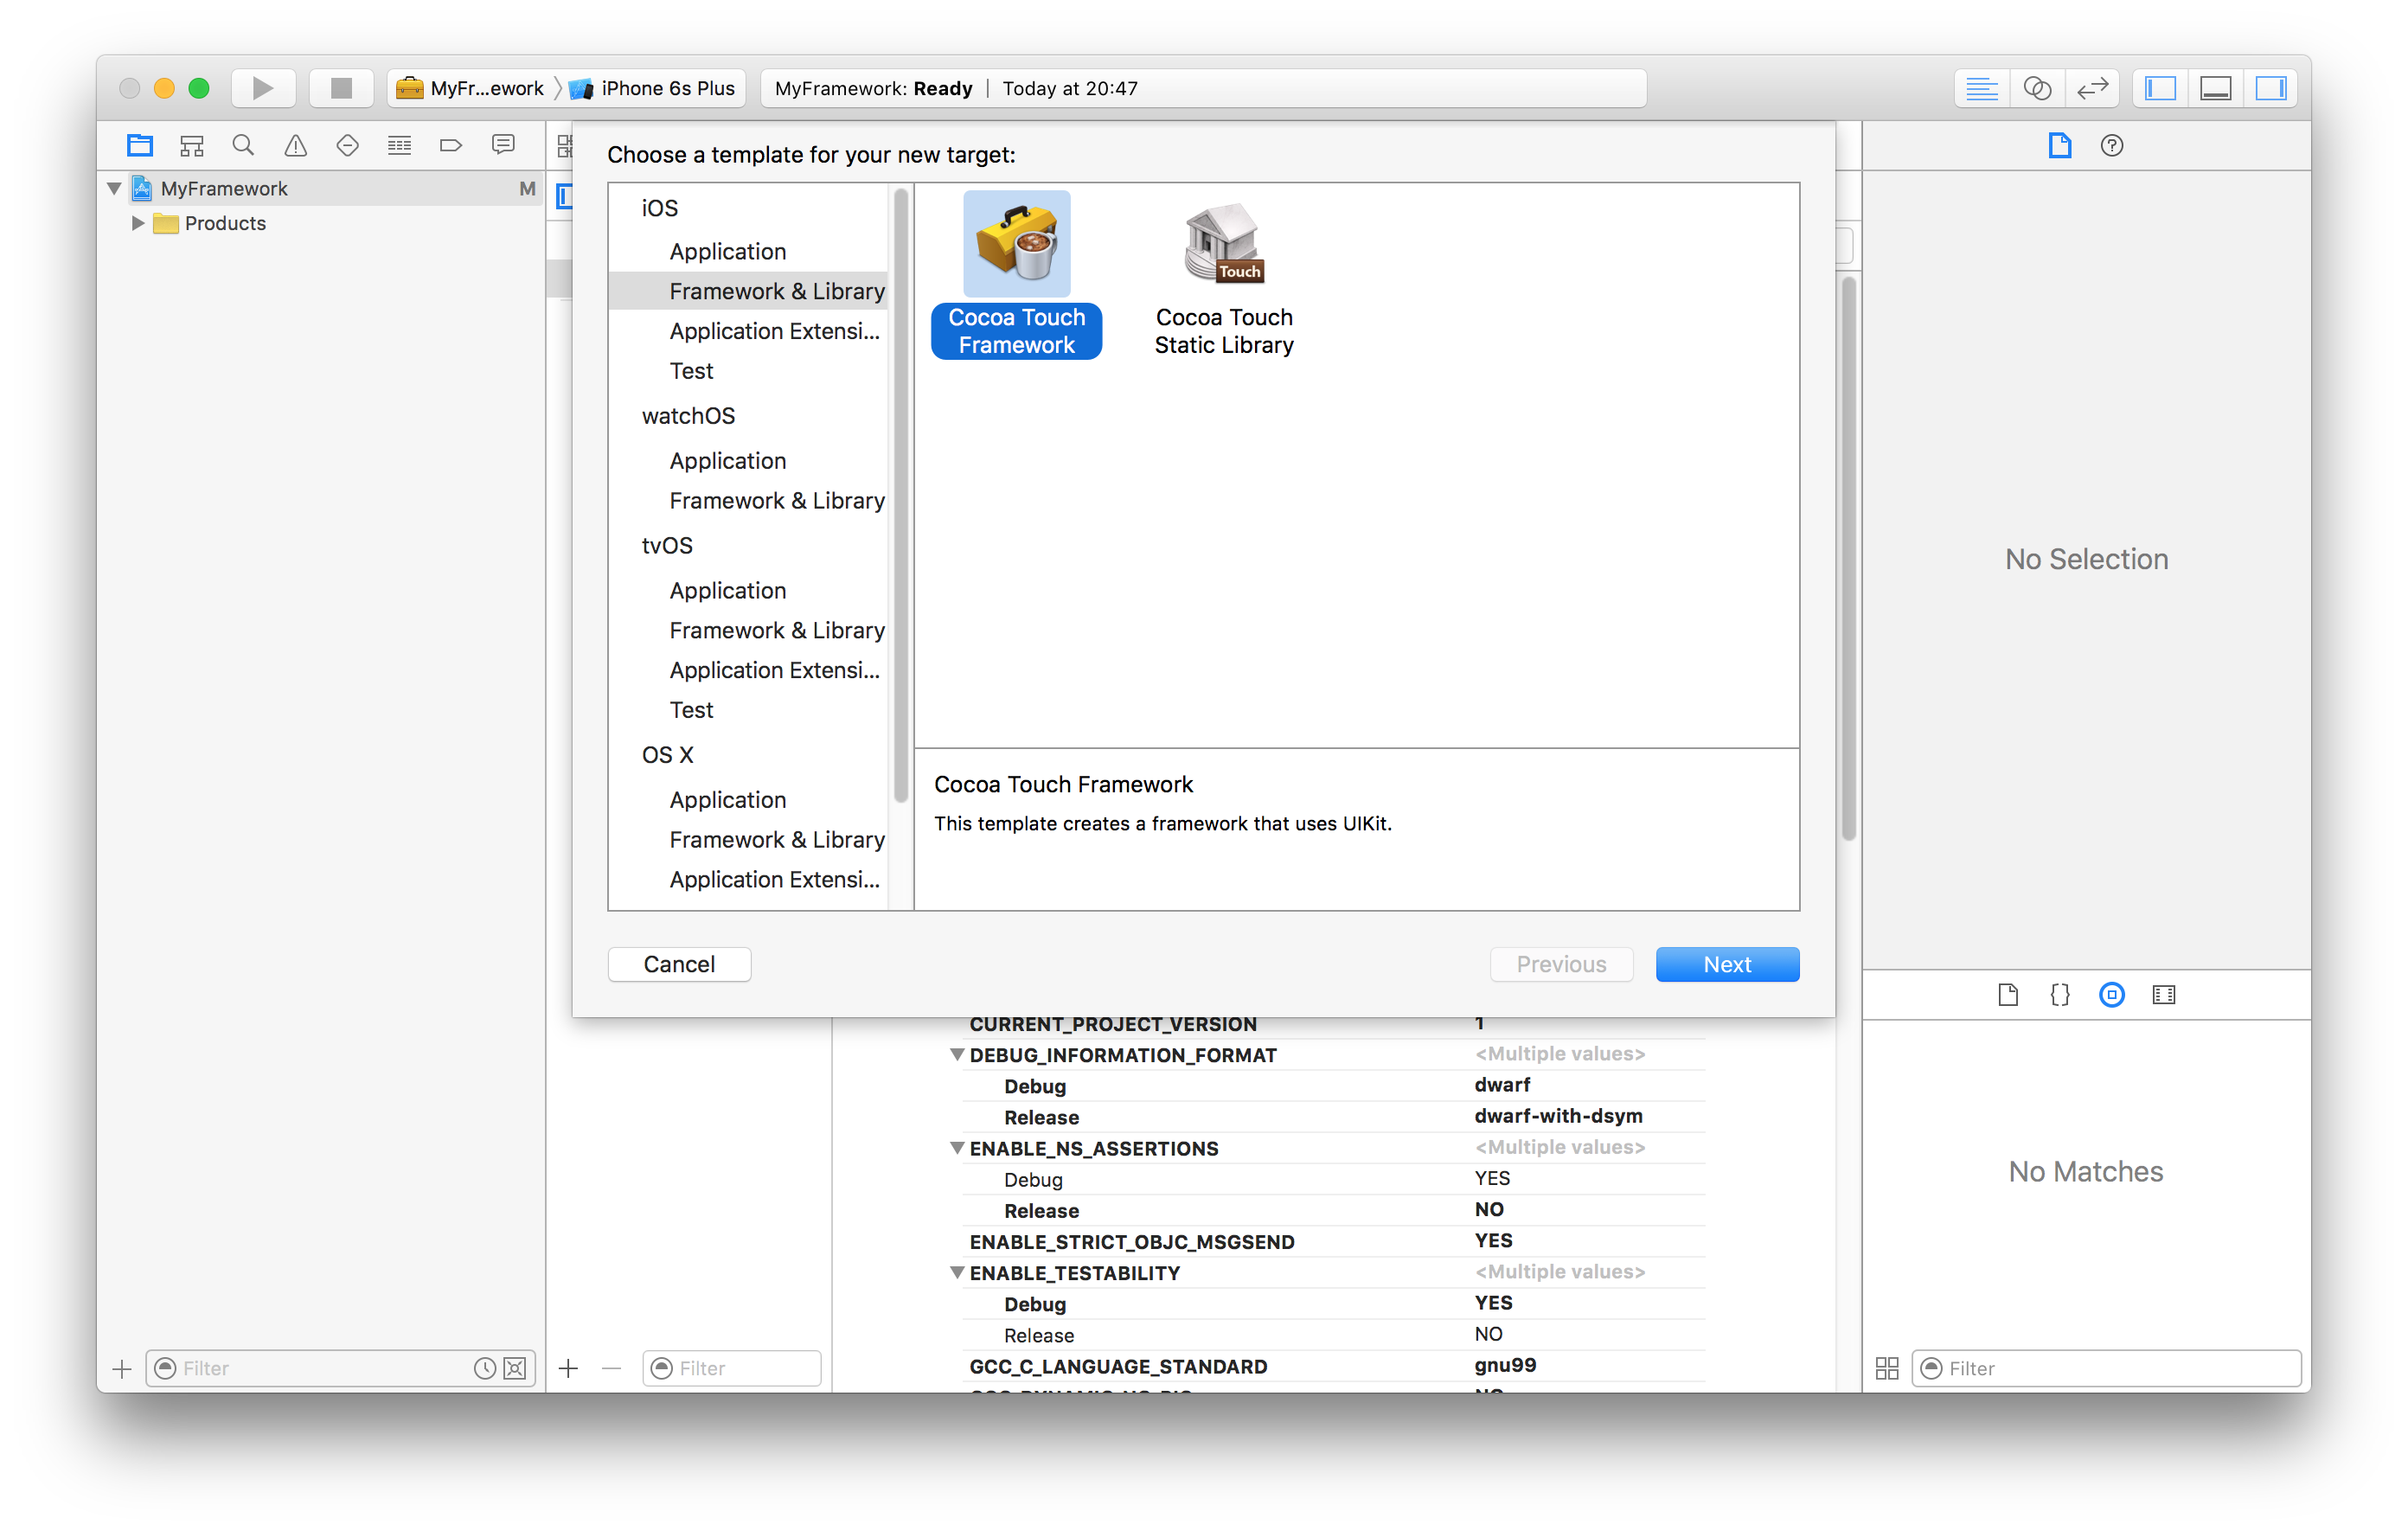
Open Xcode 7 and press ⇧ + ⌘ + N to create a new project. For now, choose Cocoa Touch Framework under iOS -> Framework & Library category 1.
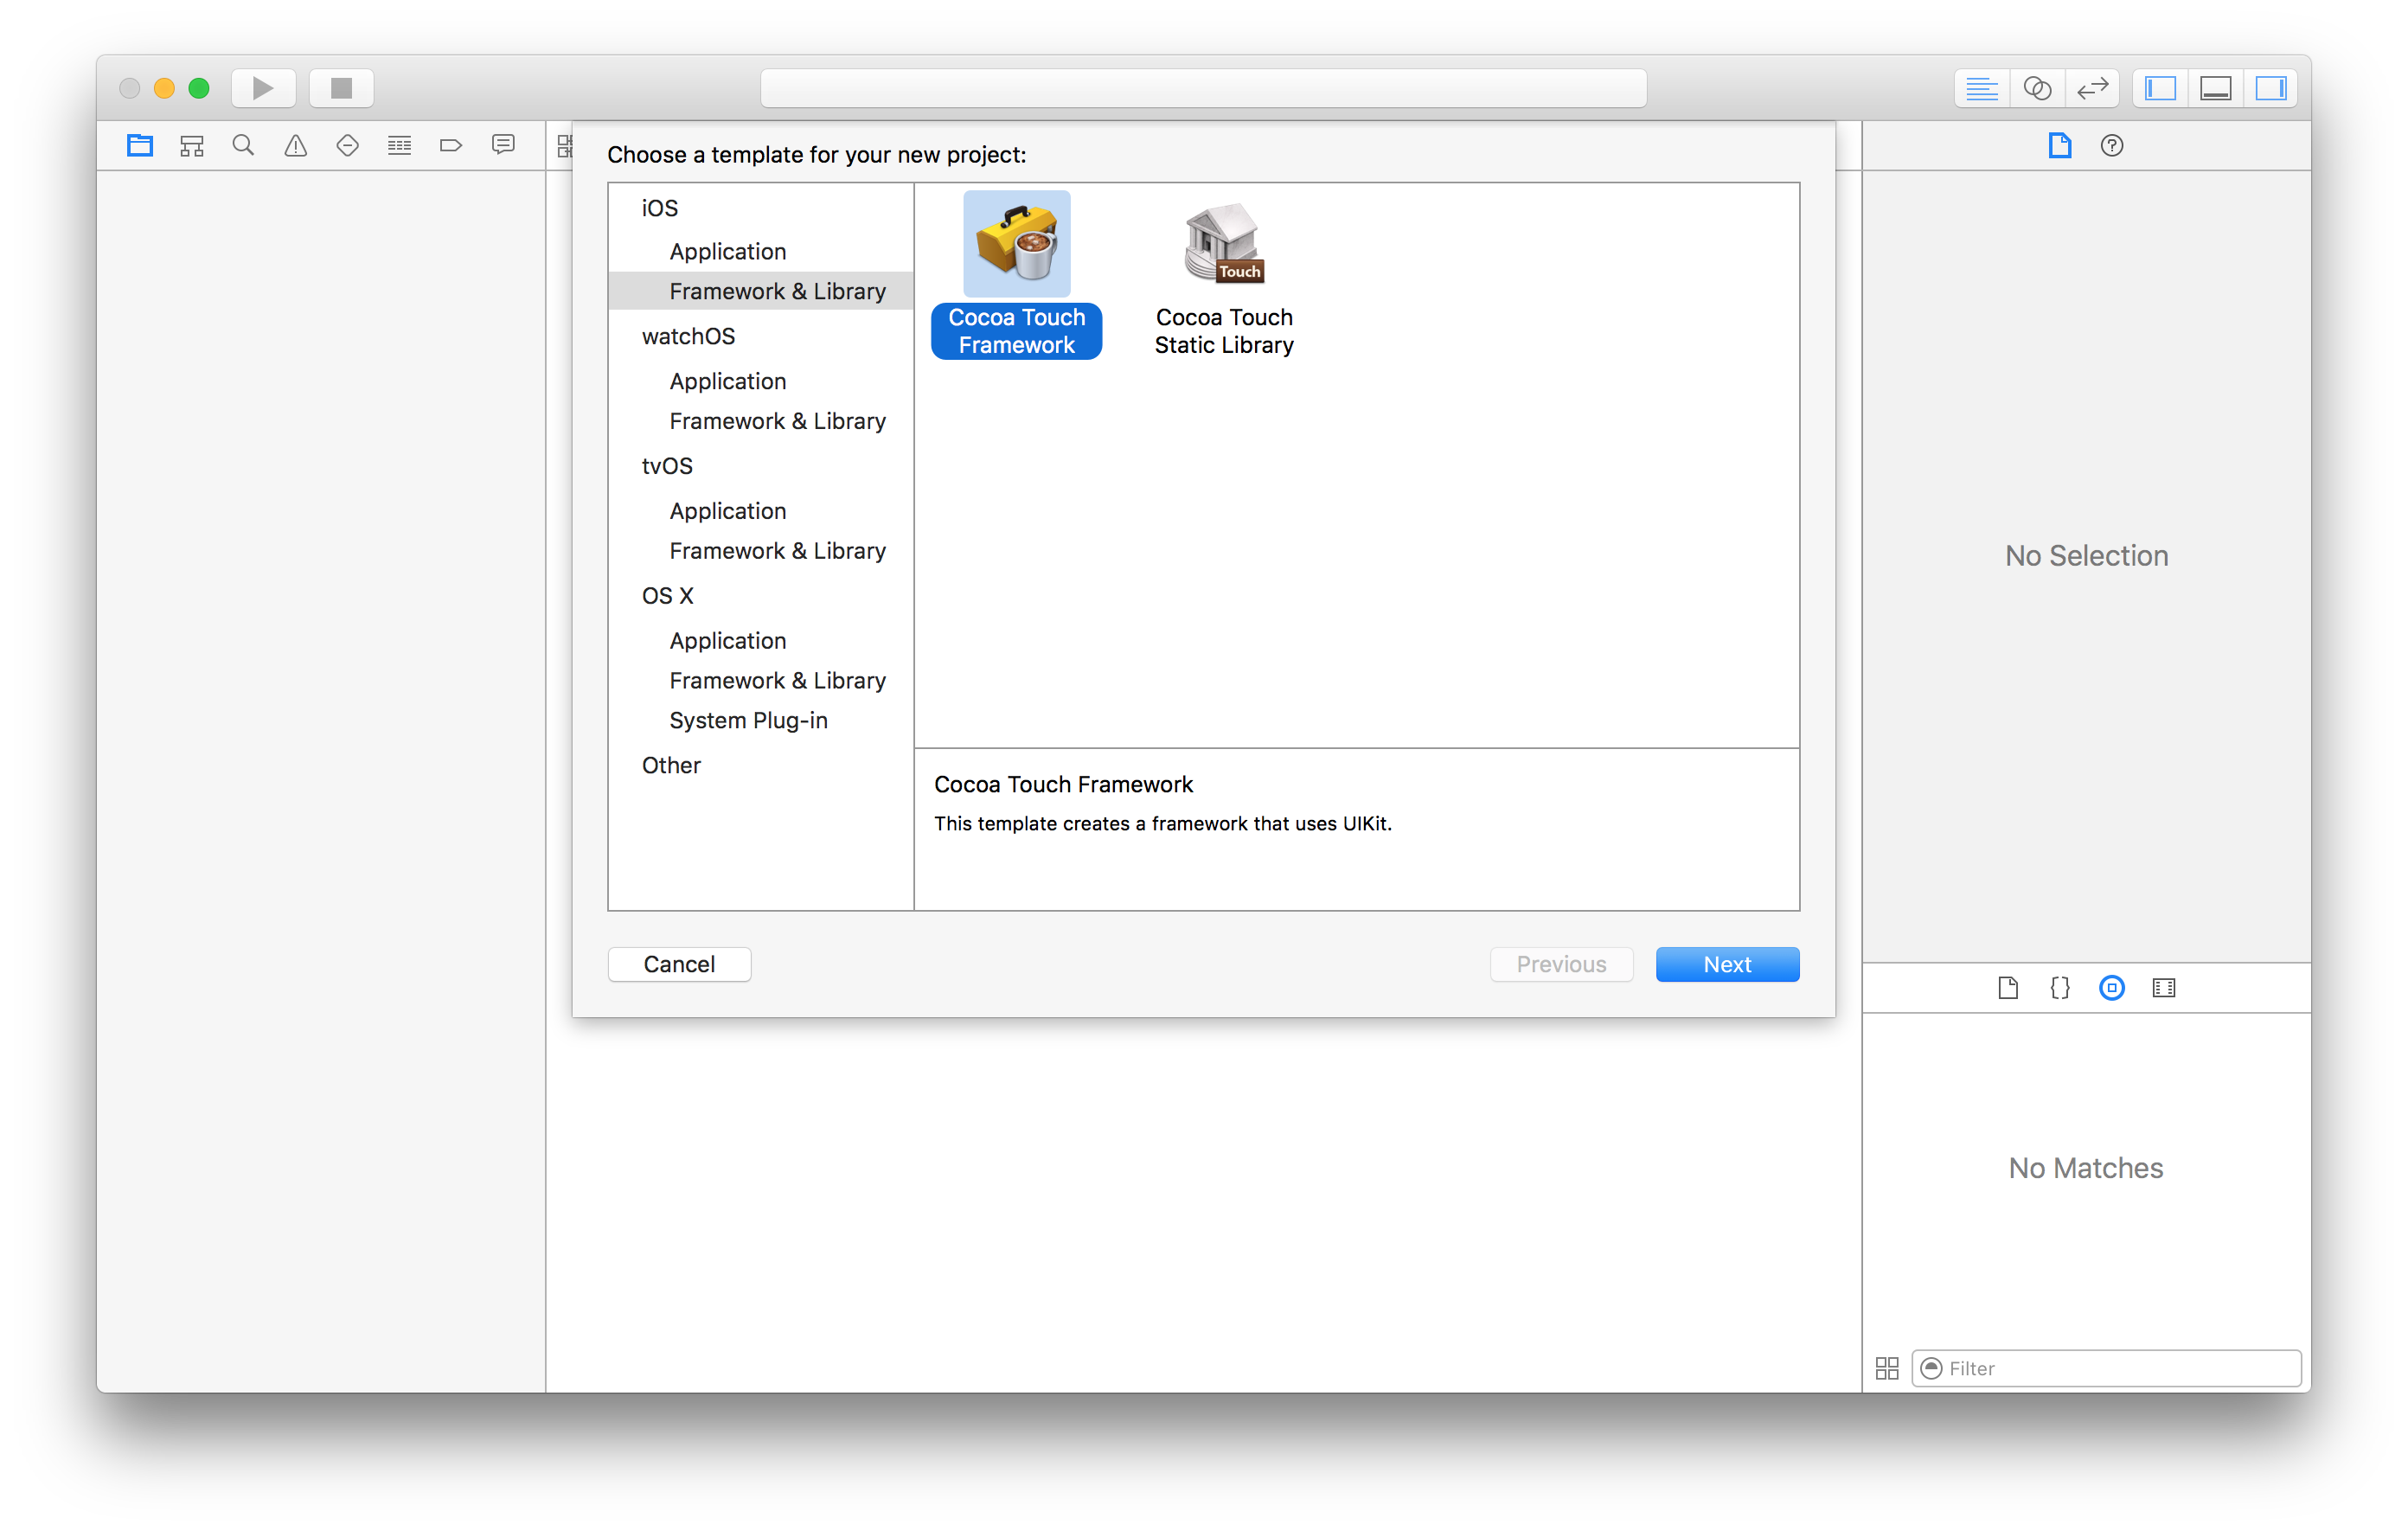 Creating a Framework Project in Xcode 7
Enter the name of your Framework. This should be the name you would like to use when distributing your Framework. This will be the name of the Swift module other developers will have to use when importing the framework into their applications 2.
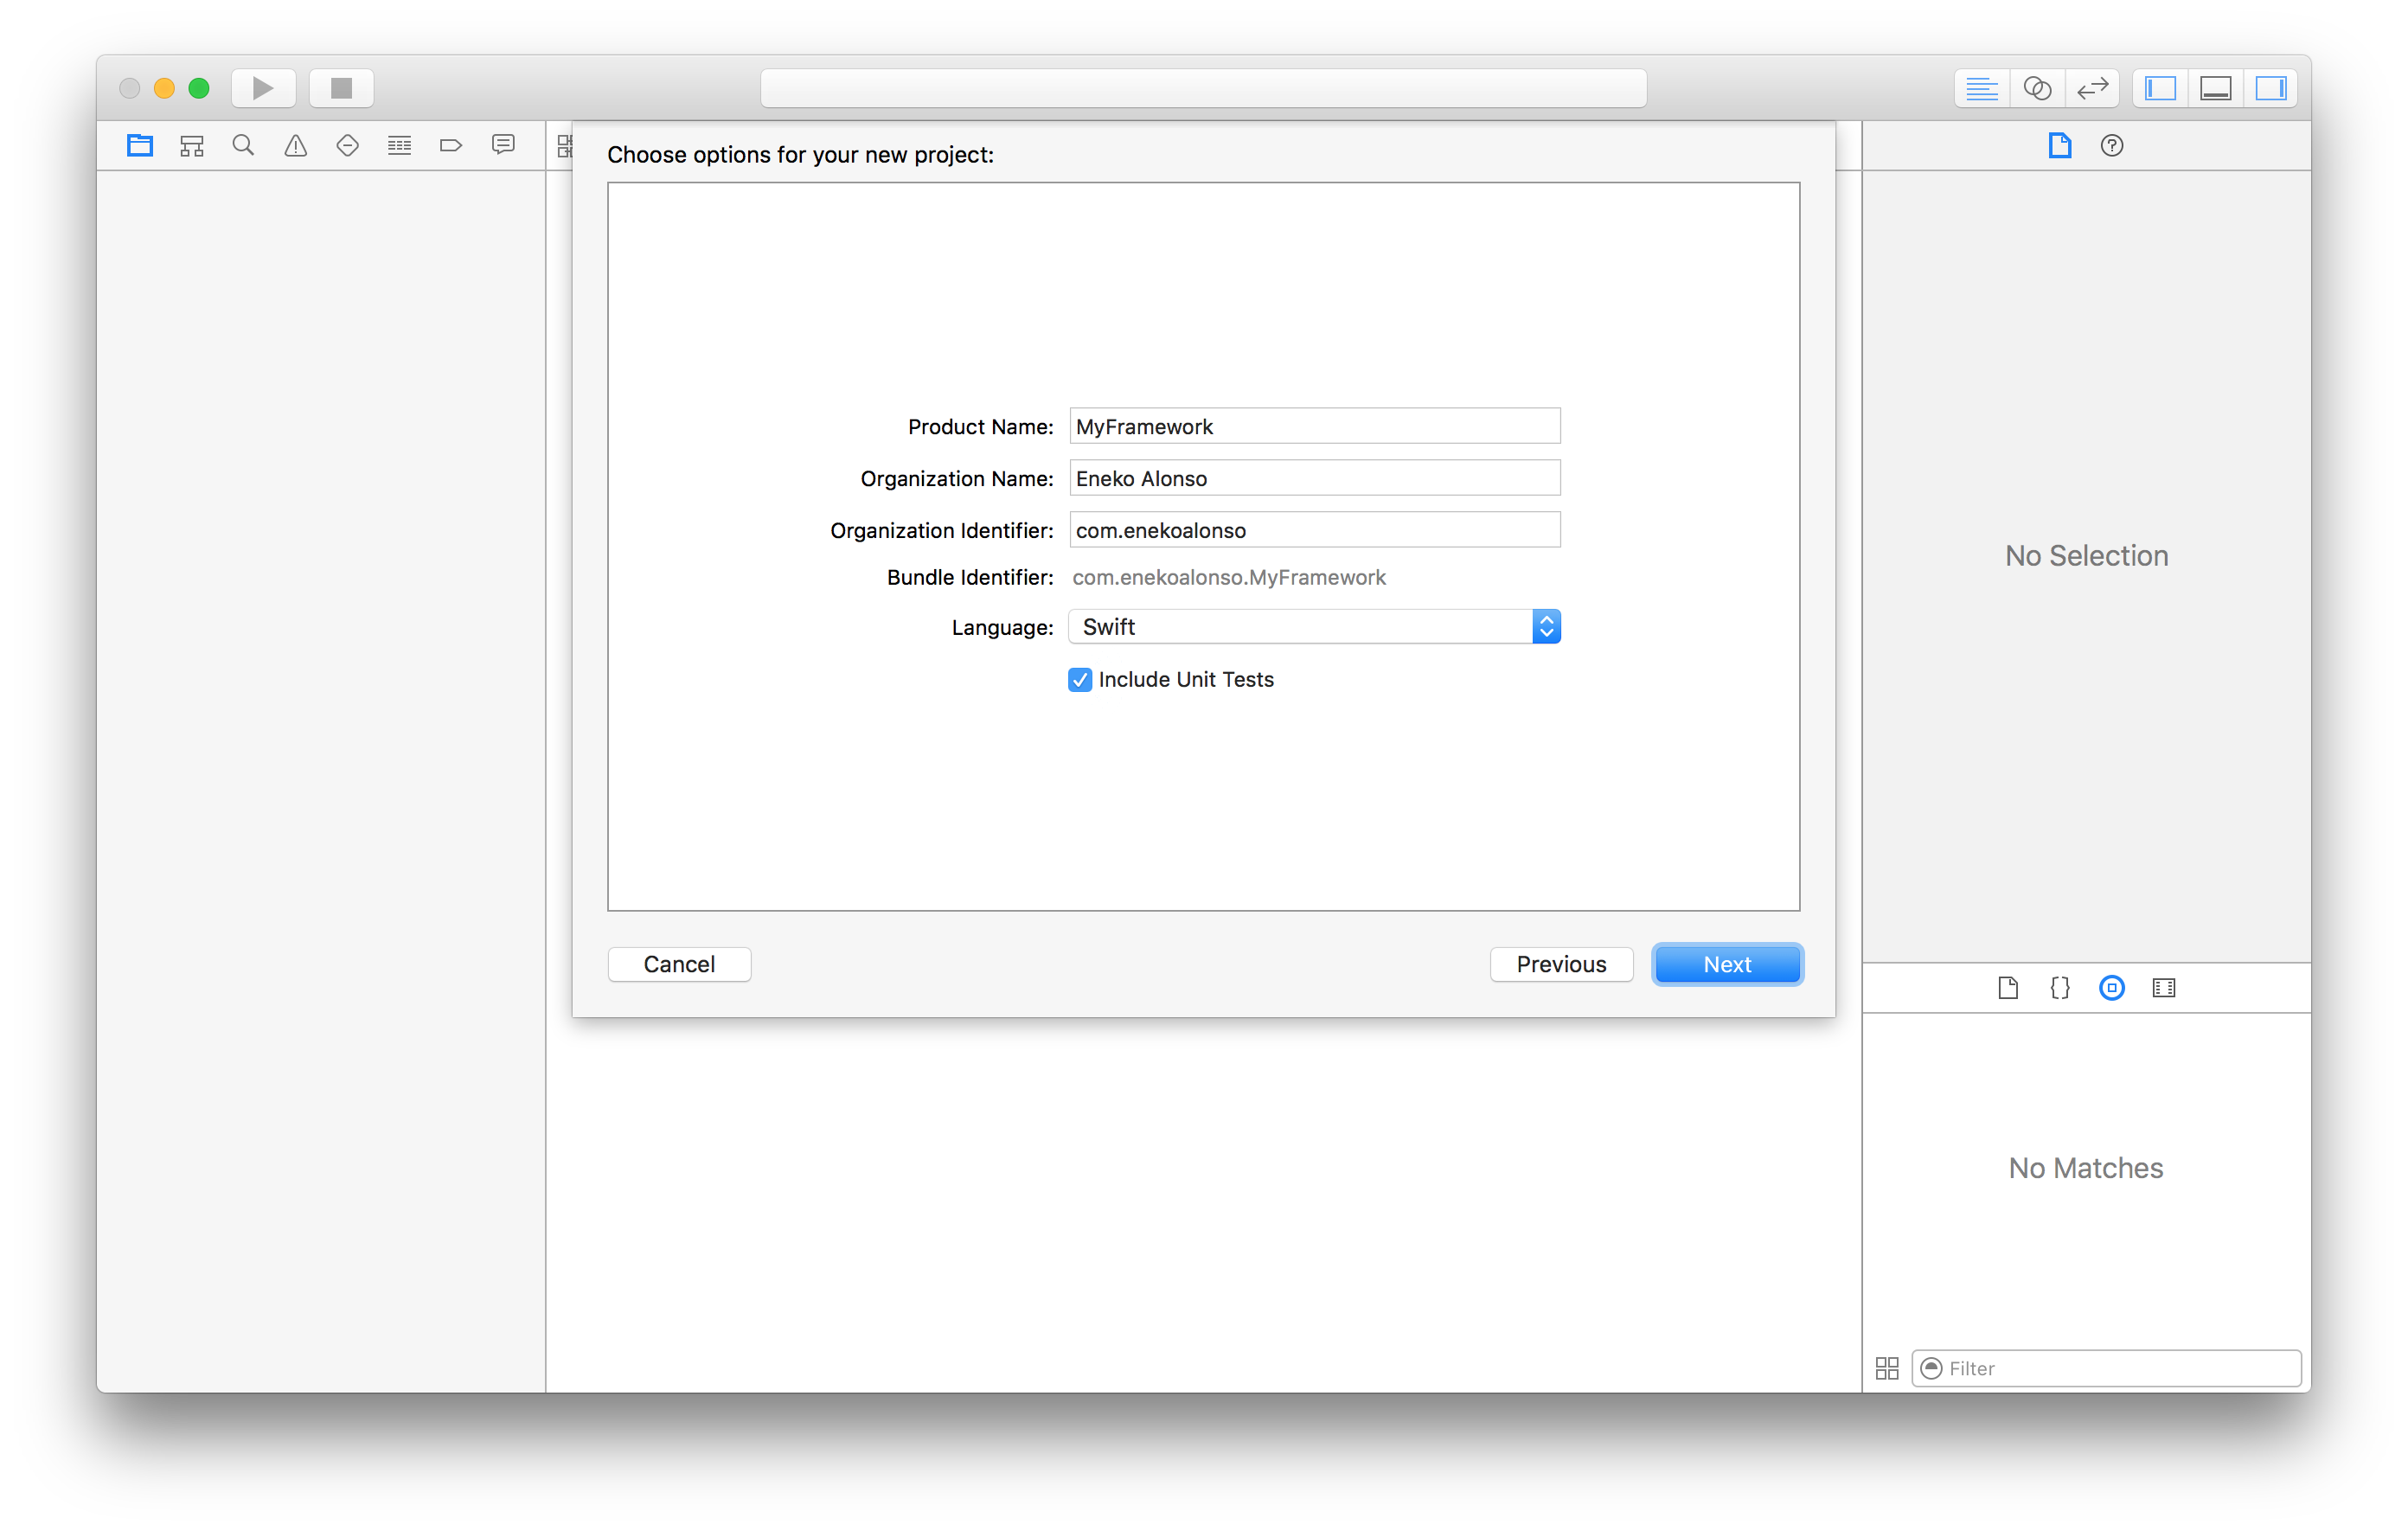 Framework Name
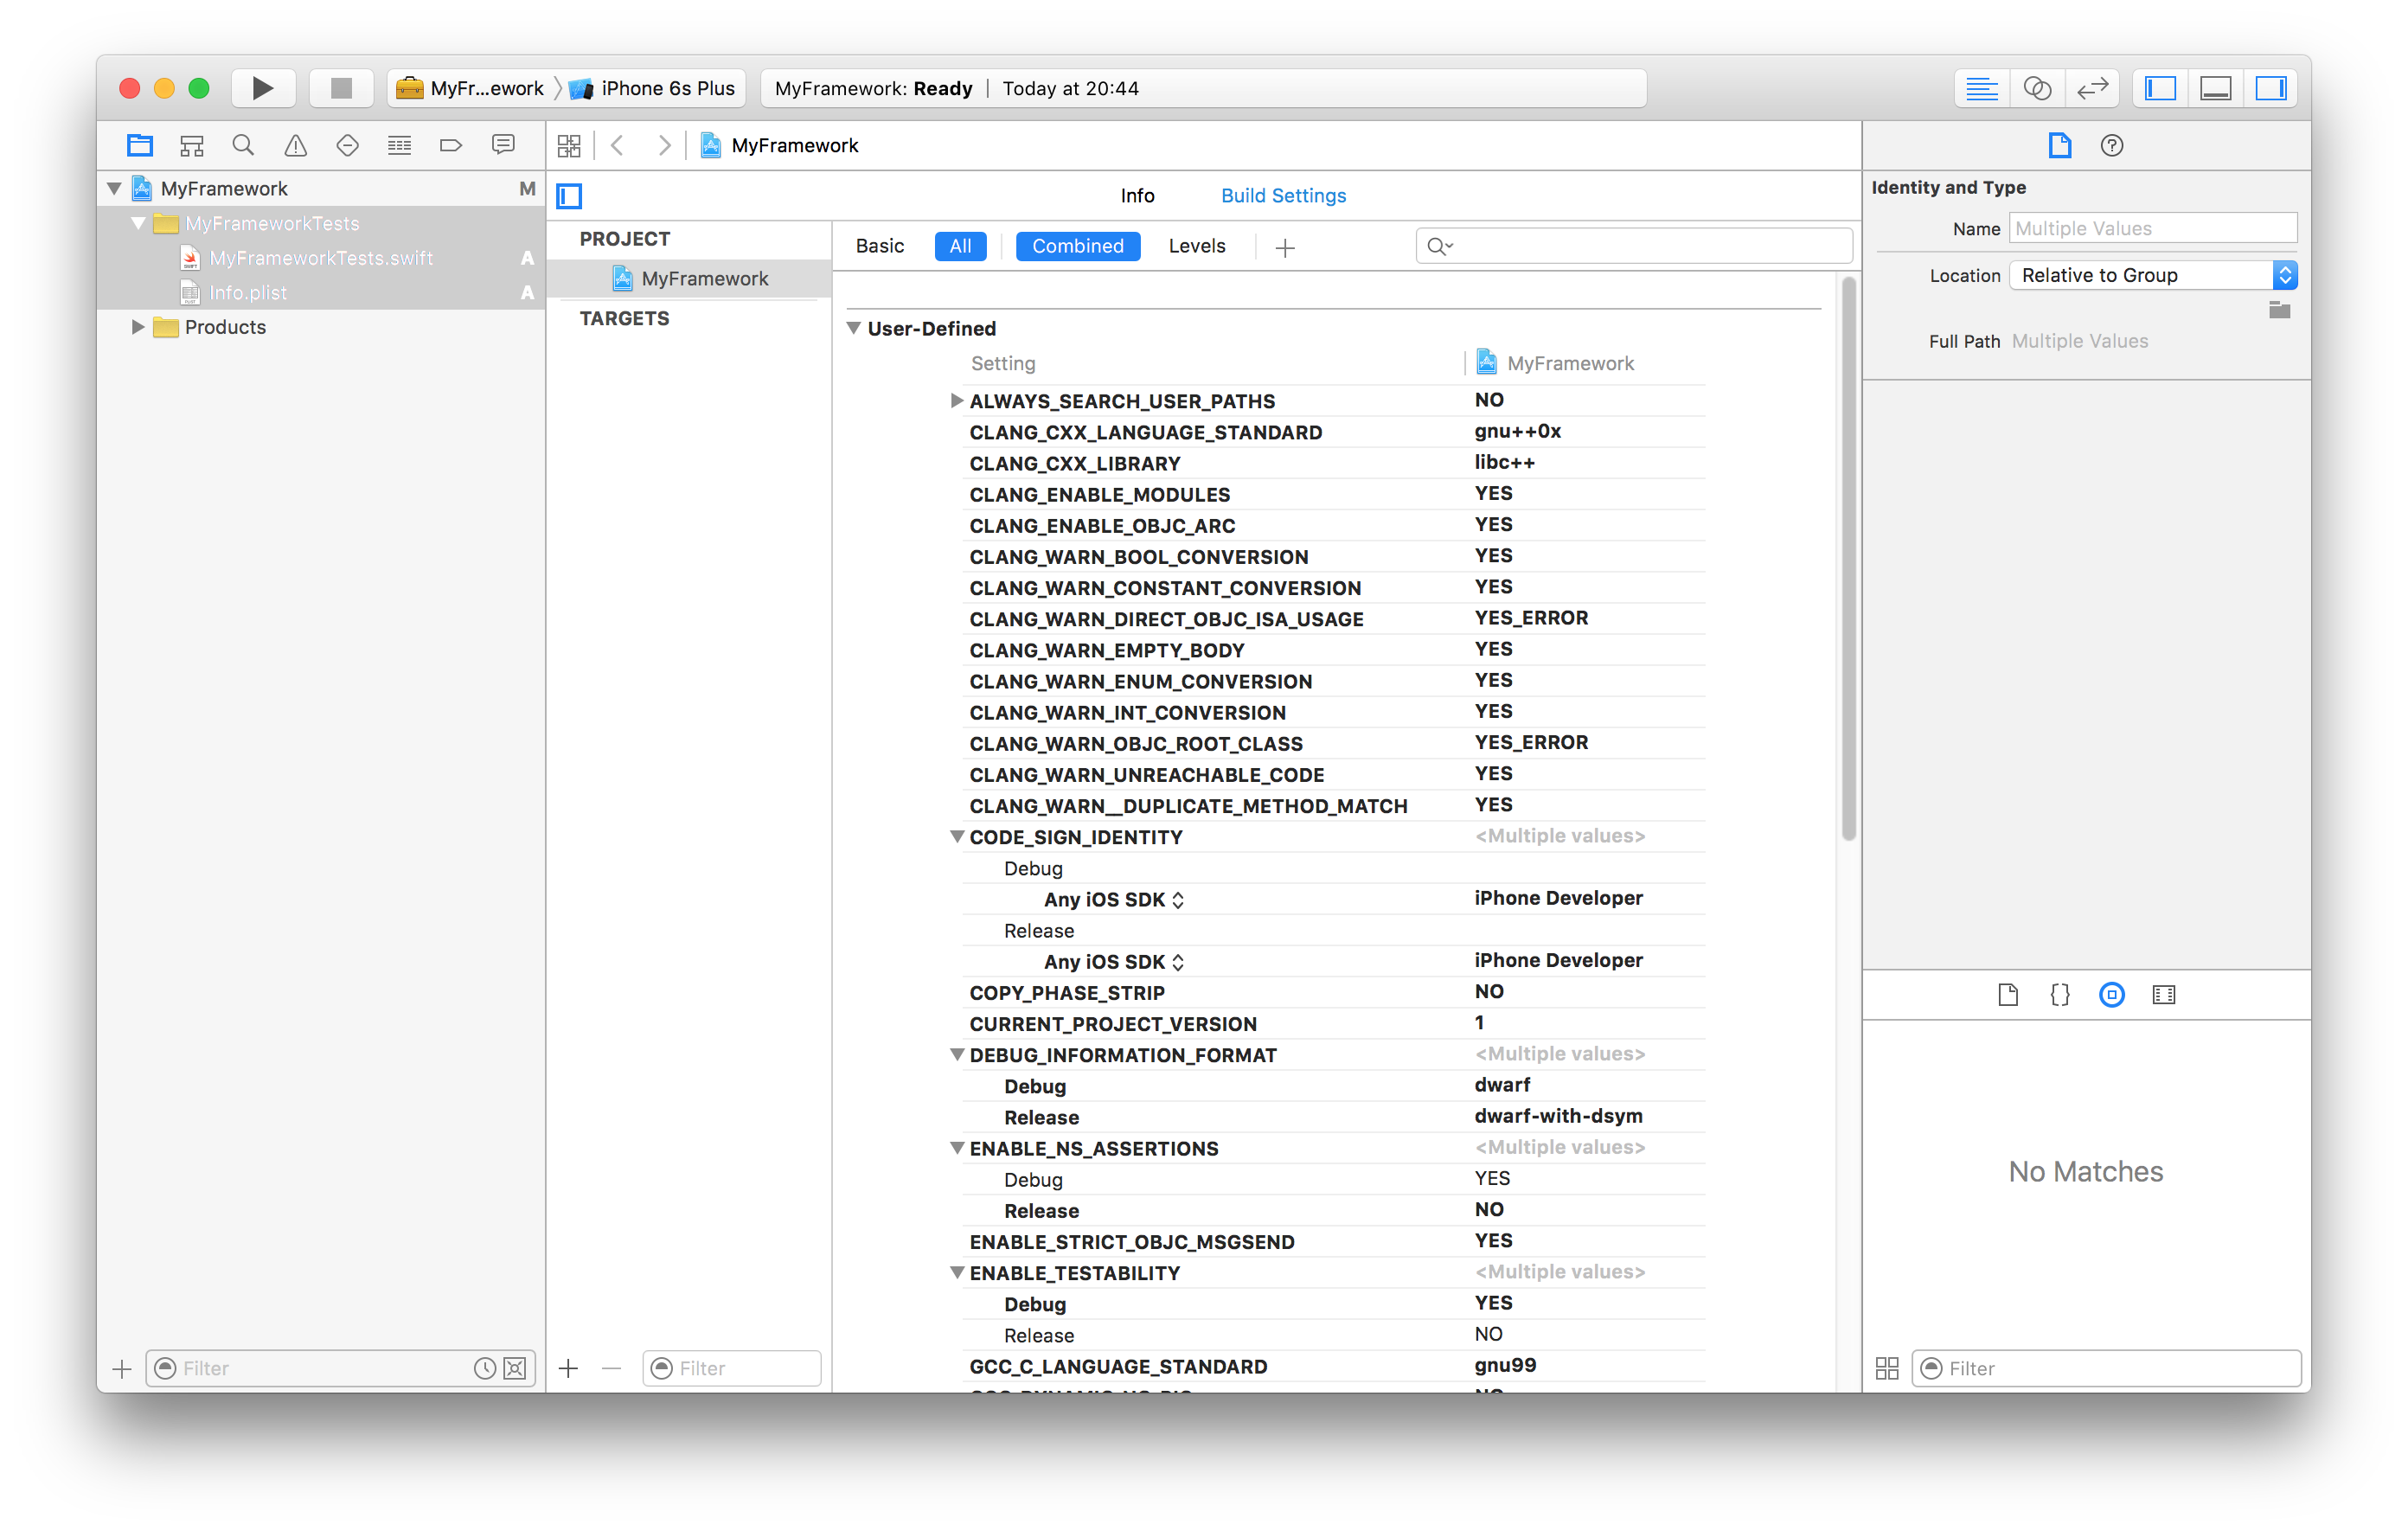
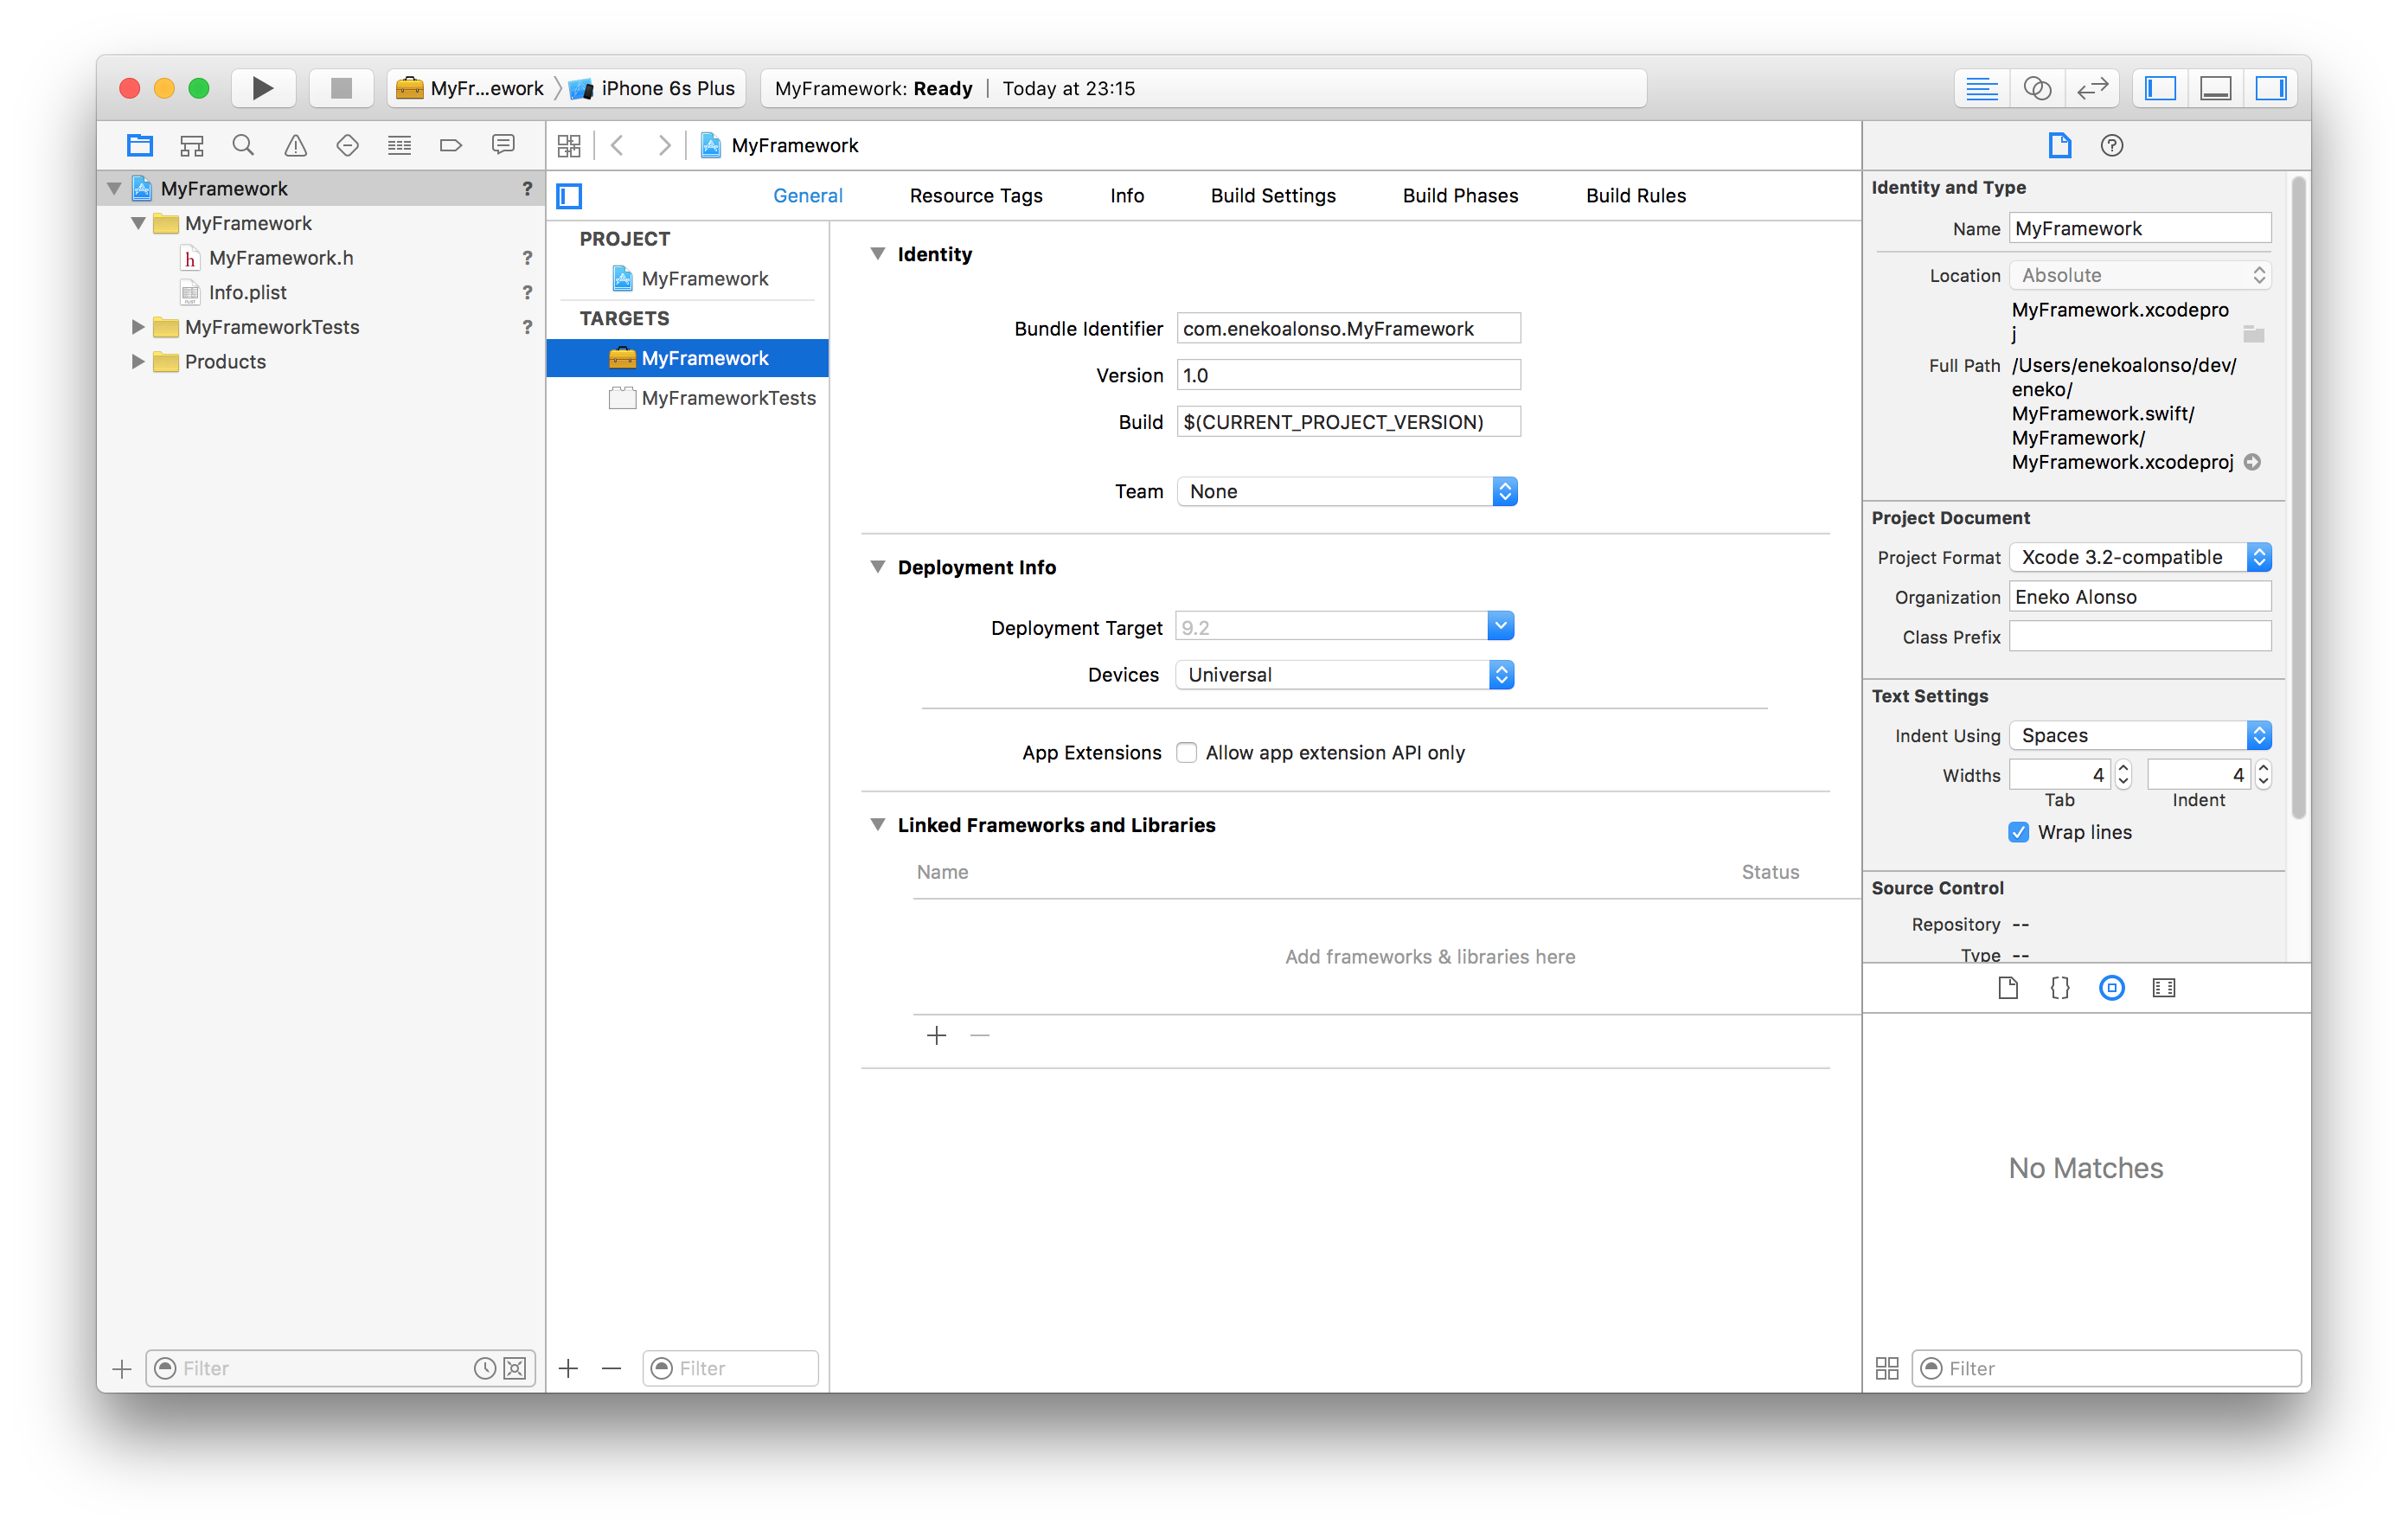 Framework Project
Removing the default target
In order to make our framework available in different platforms, we need to create one target for each platform. I like giving them names that relate to each of the platforms, like this:
- MyFrameworkiOS
- MyFrameworkOSX
- MyFrameworkTVOS
When we created the project in the previous step, we already selected an iOS framework type of project. This means our project will already contains a target for iOS. In my experience, I found it easier to just remove that target than to rename it and the files associated.
Select the framework and unit test targets on the project target list and delete them by pressing on the - button at the bottom of the target list.
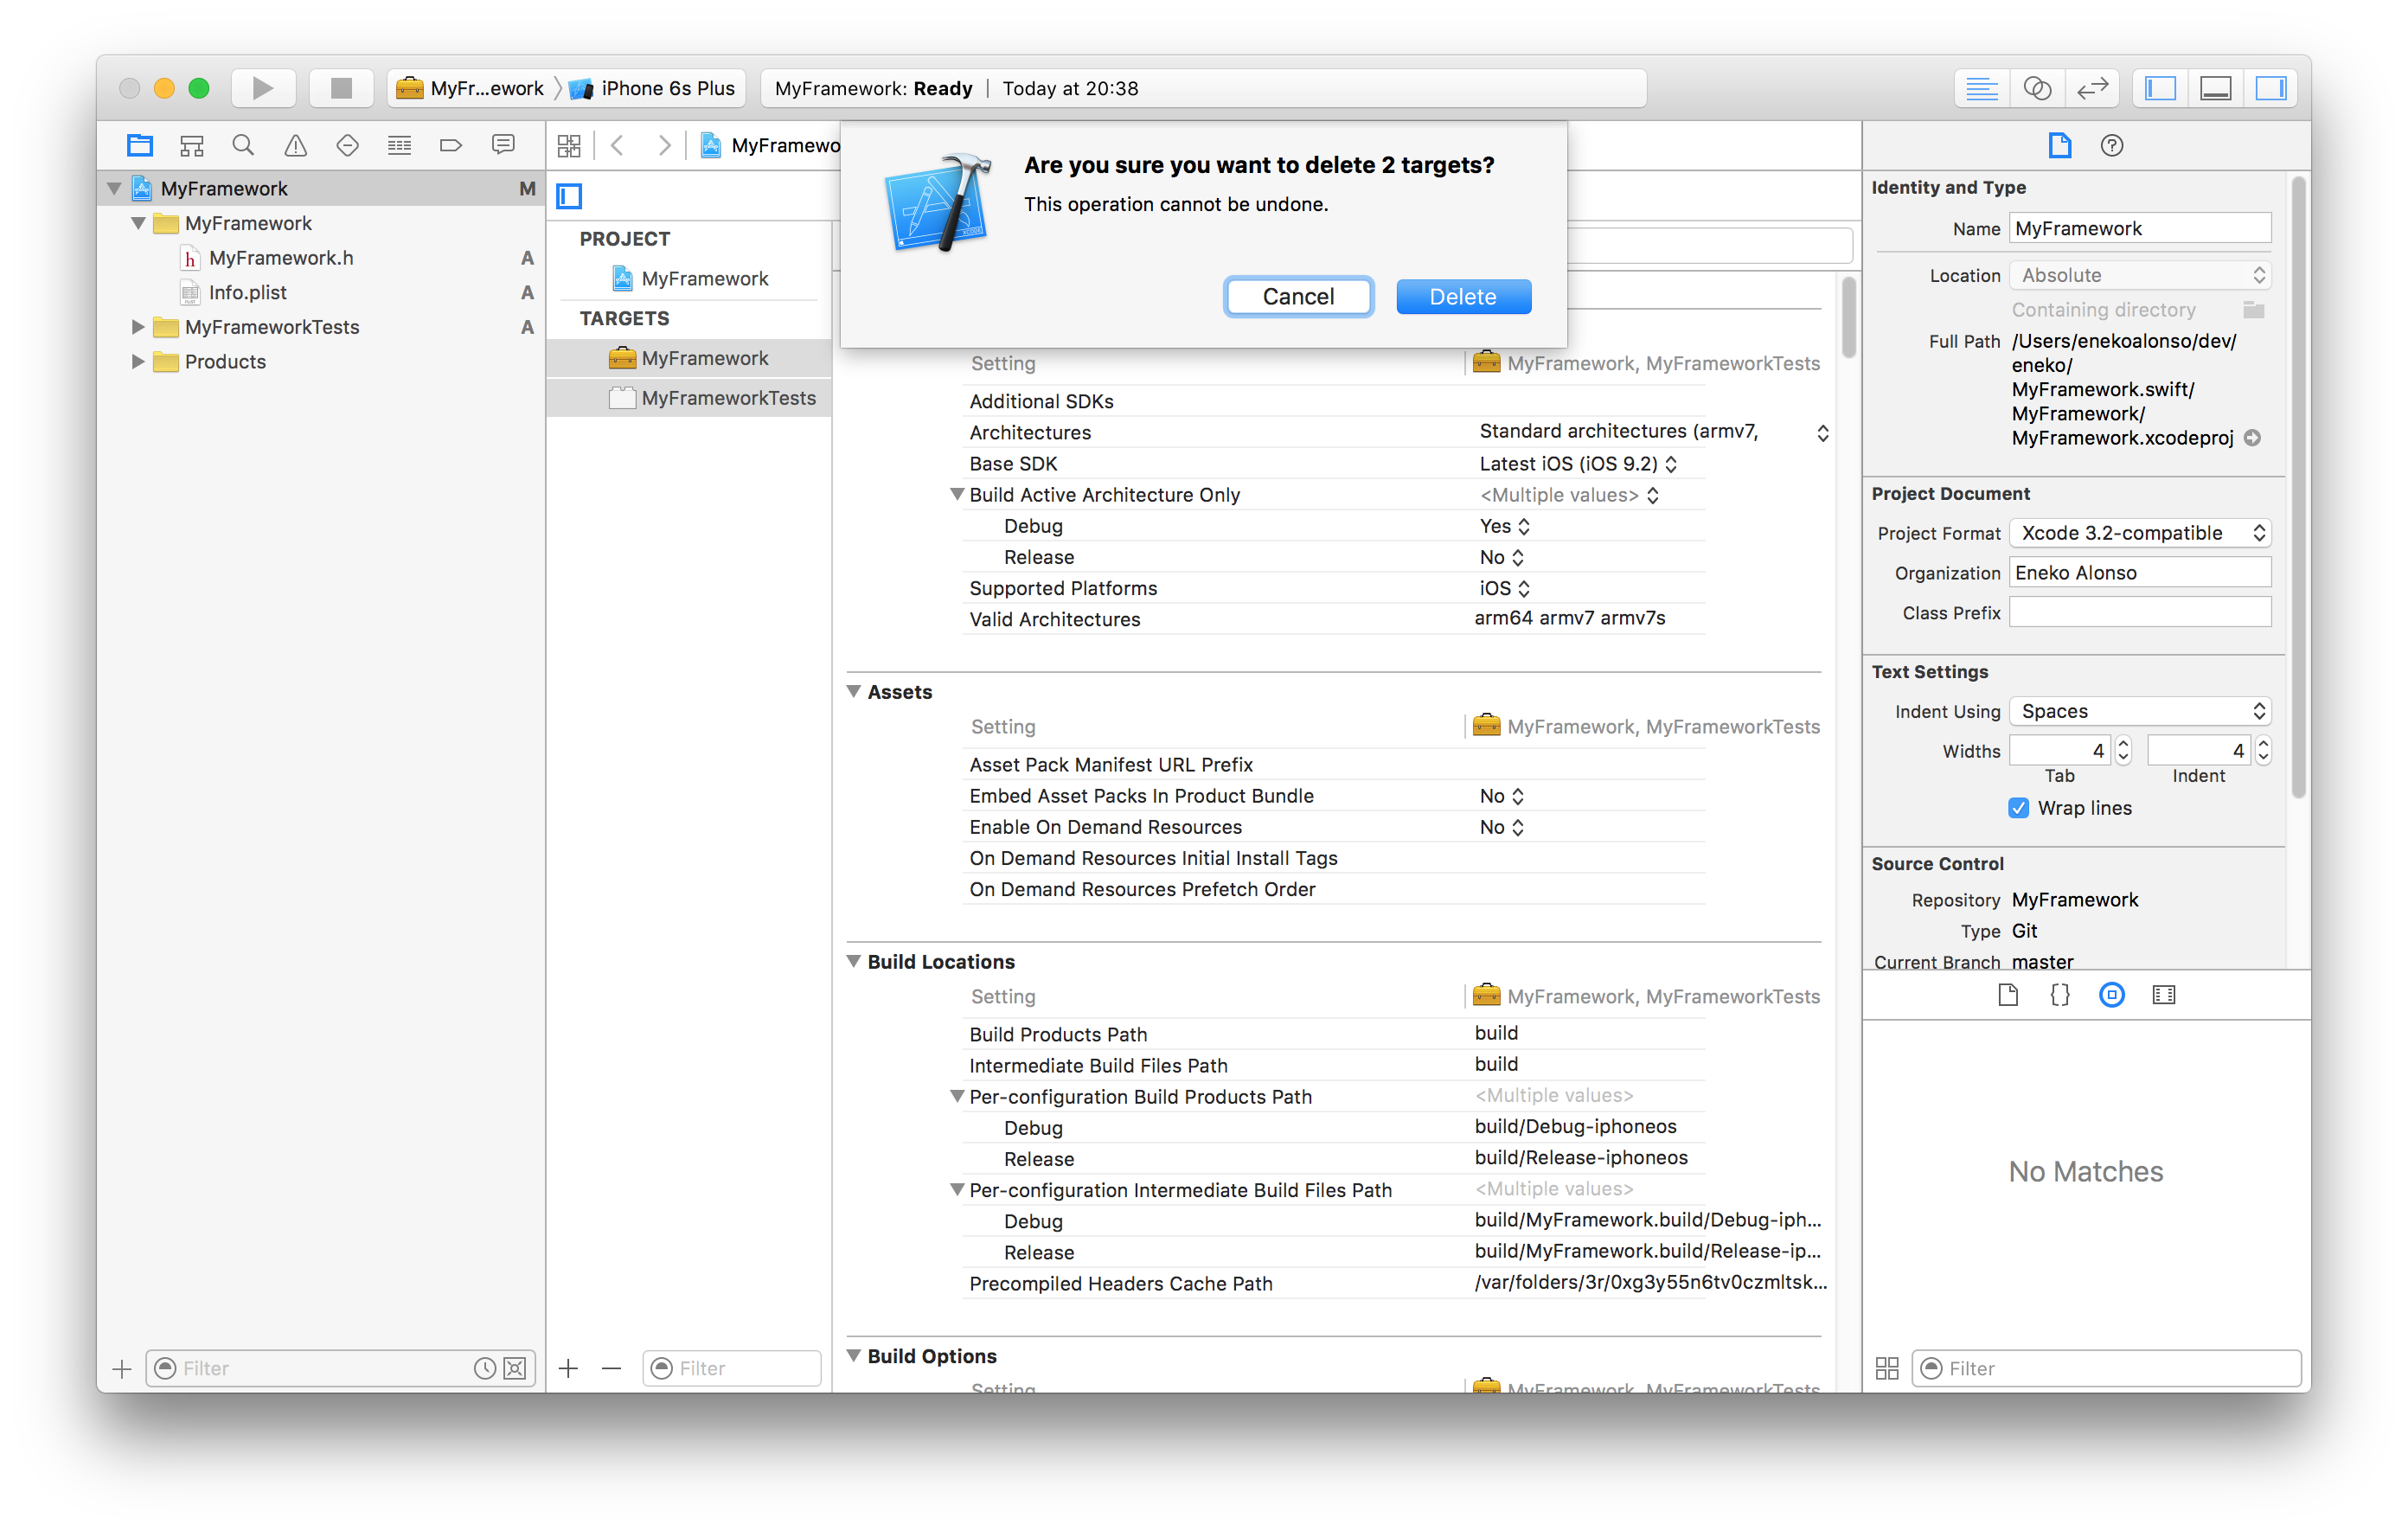 Remove both framework and unit tests targets
On the project navigator, select the project source files, including the group, and delete them. When asked, select “Move to trash”.
 Remove framework sources
Select the unit test source files, including the group, and delete them. When asked, select “Move to trash”.
 Remove unit test sources
Adding a target for iOS
Now that our project has no targets, we are going to add three targets. To add a new target for iOS, select the + icon on the project target list, or File -> New -> Target.... Then choose iOS -> Framework & Library -> Cocoa Touch Framework.
 Add new iOS Framework target
When entering the name, type MyFrameworkiOS.
Adding a target for OS X
Now, let’s add a new target for OS X. Select the + icon on the project target list, or File -> New -> Target.... Then choose OS X -> Framework & Library -> Cocoa Framework.
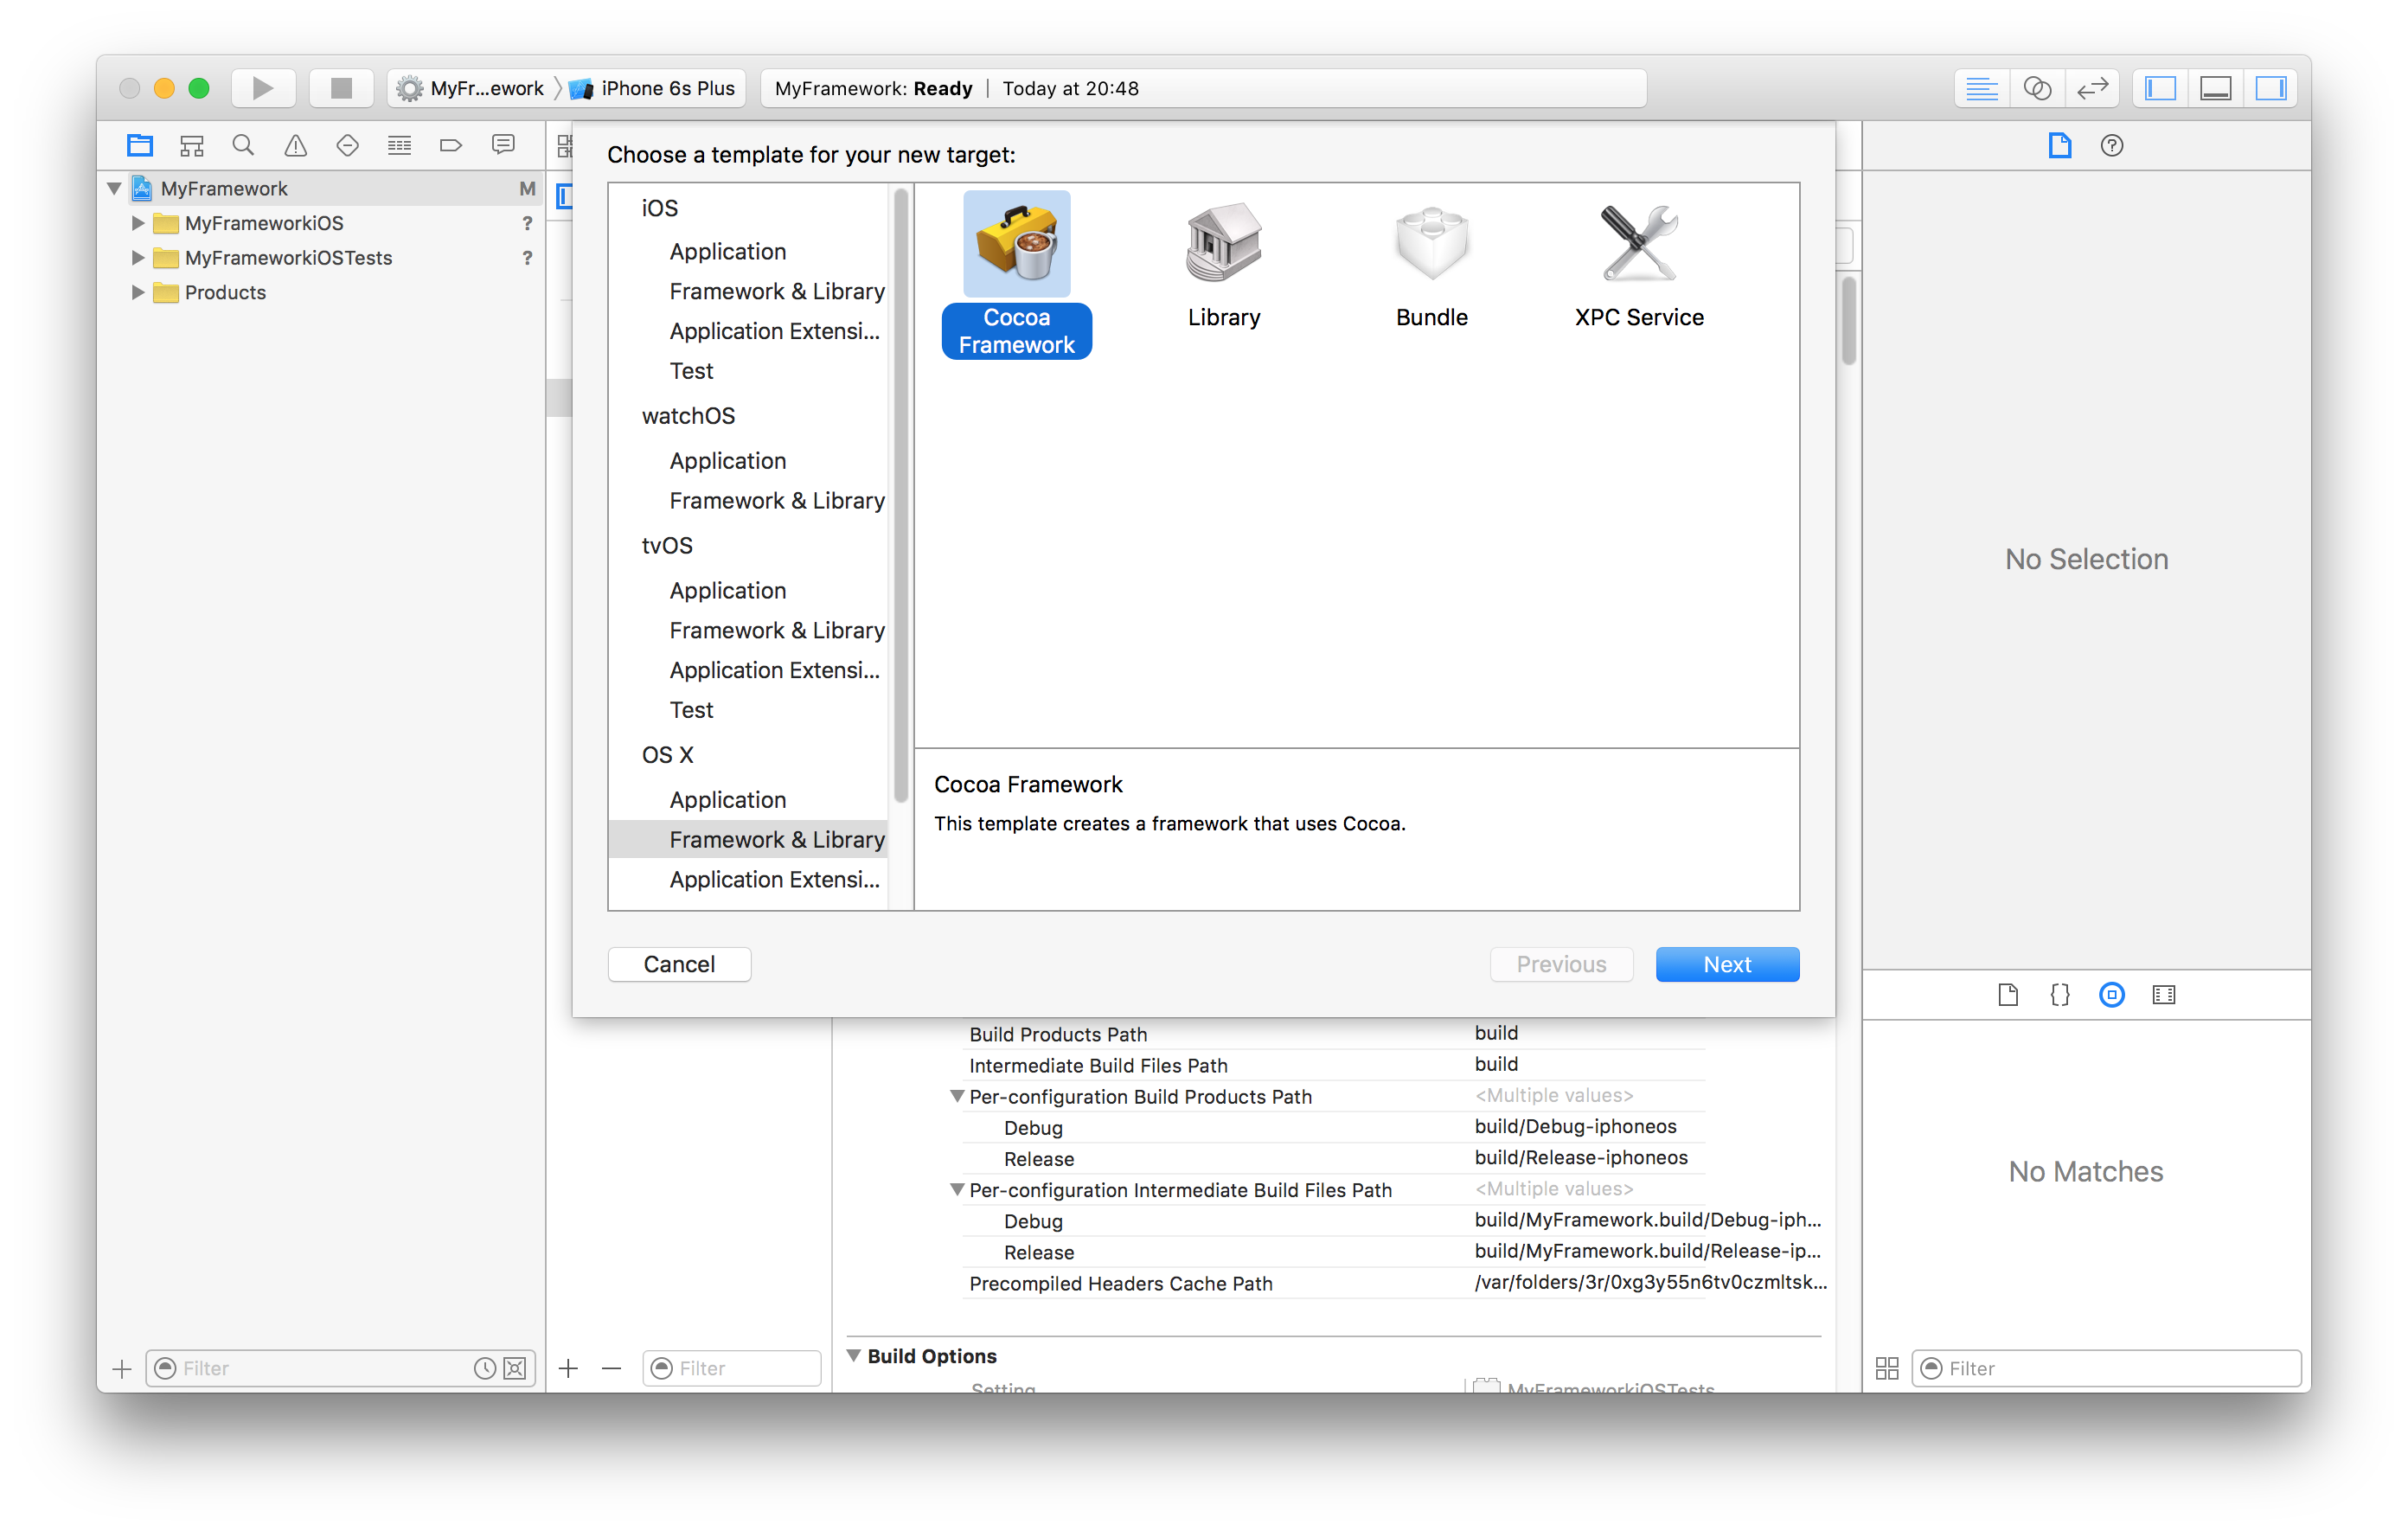 Add new OS X Framework target
When entering the name, type MyFrameworkOSX.
Adding a target for tvOS
Finally, add a new target for tvOS. Select the + icon on the project target list, or File -> New -> Target.... Then choose tvOS -> Framework & Library -> TV Framework.
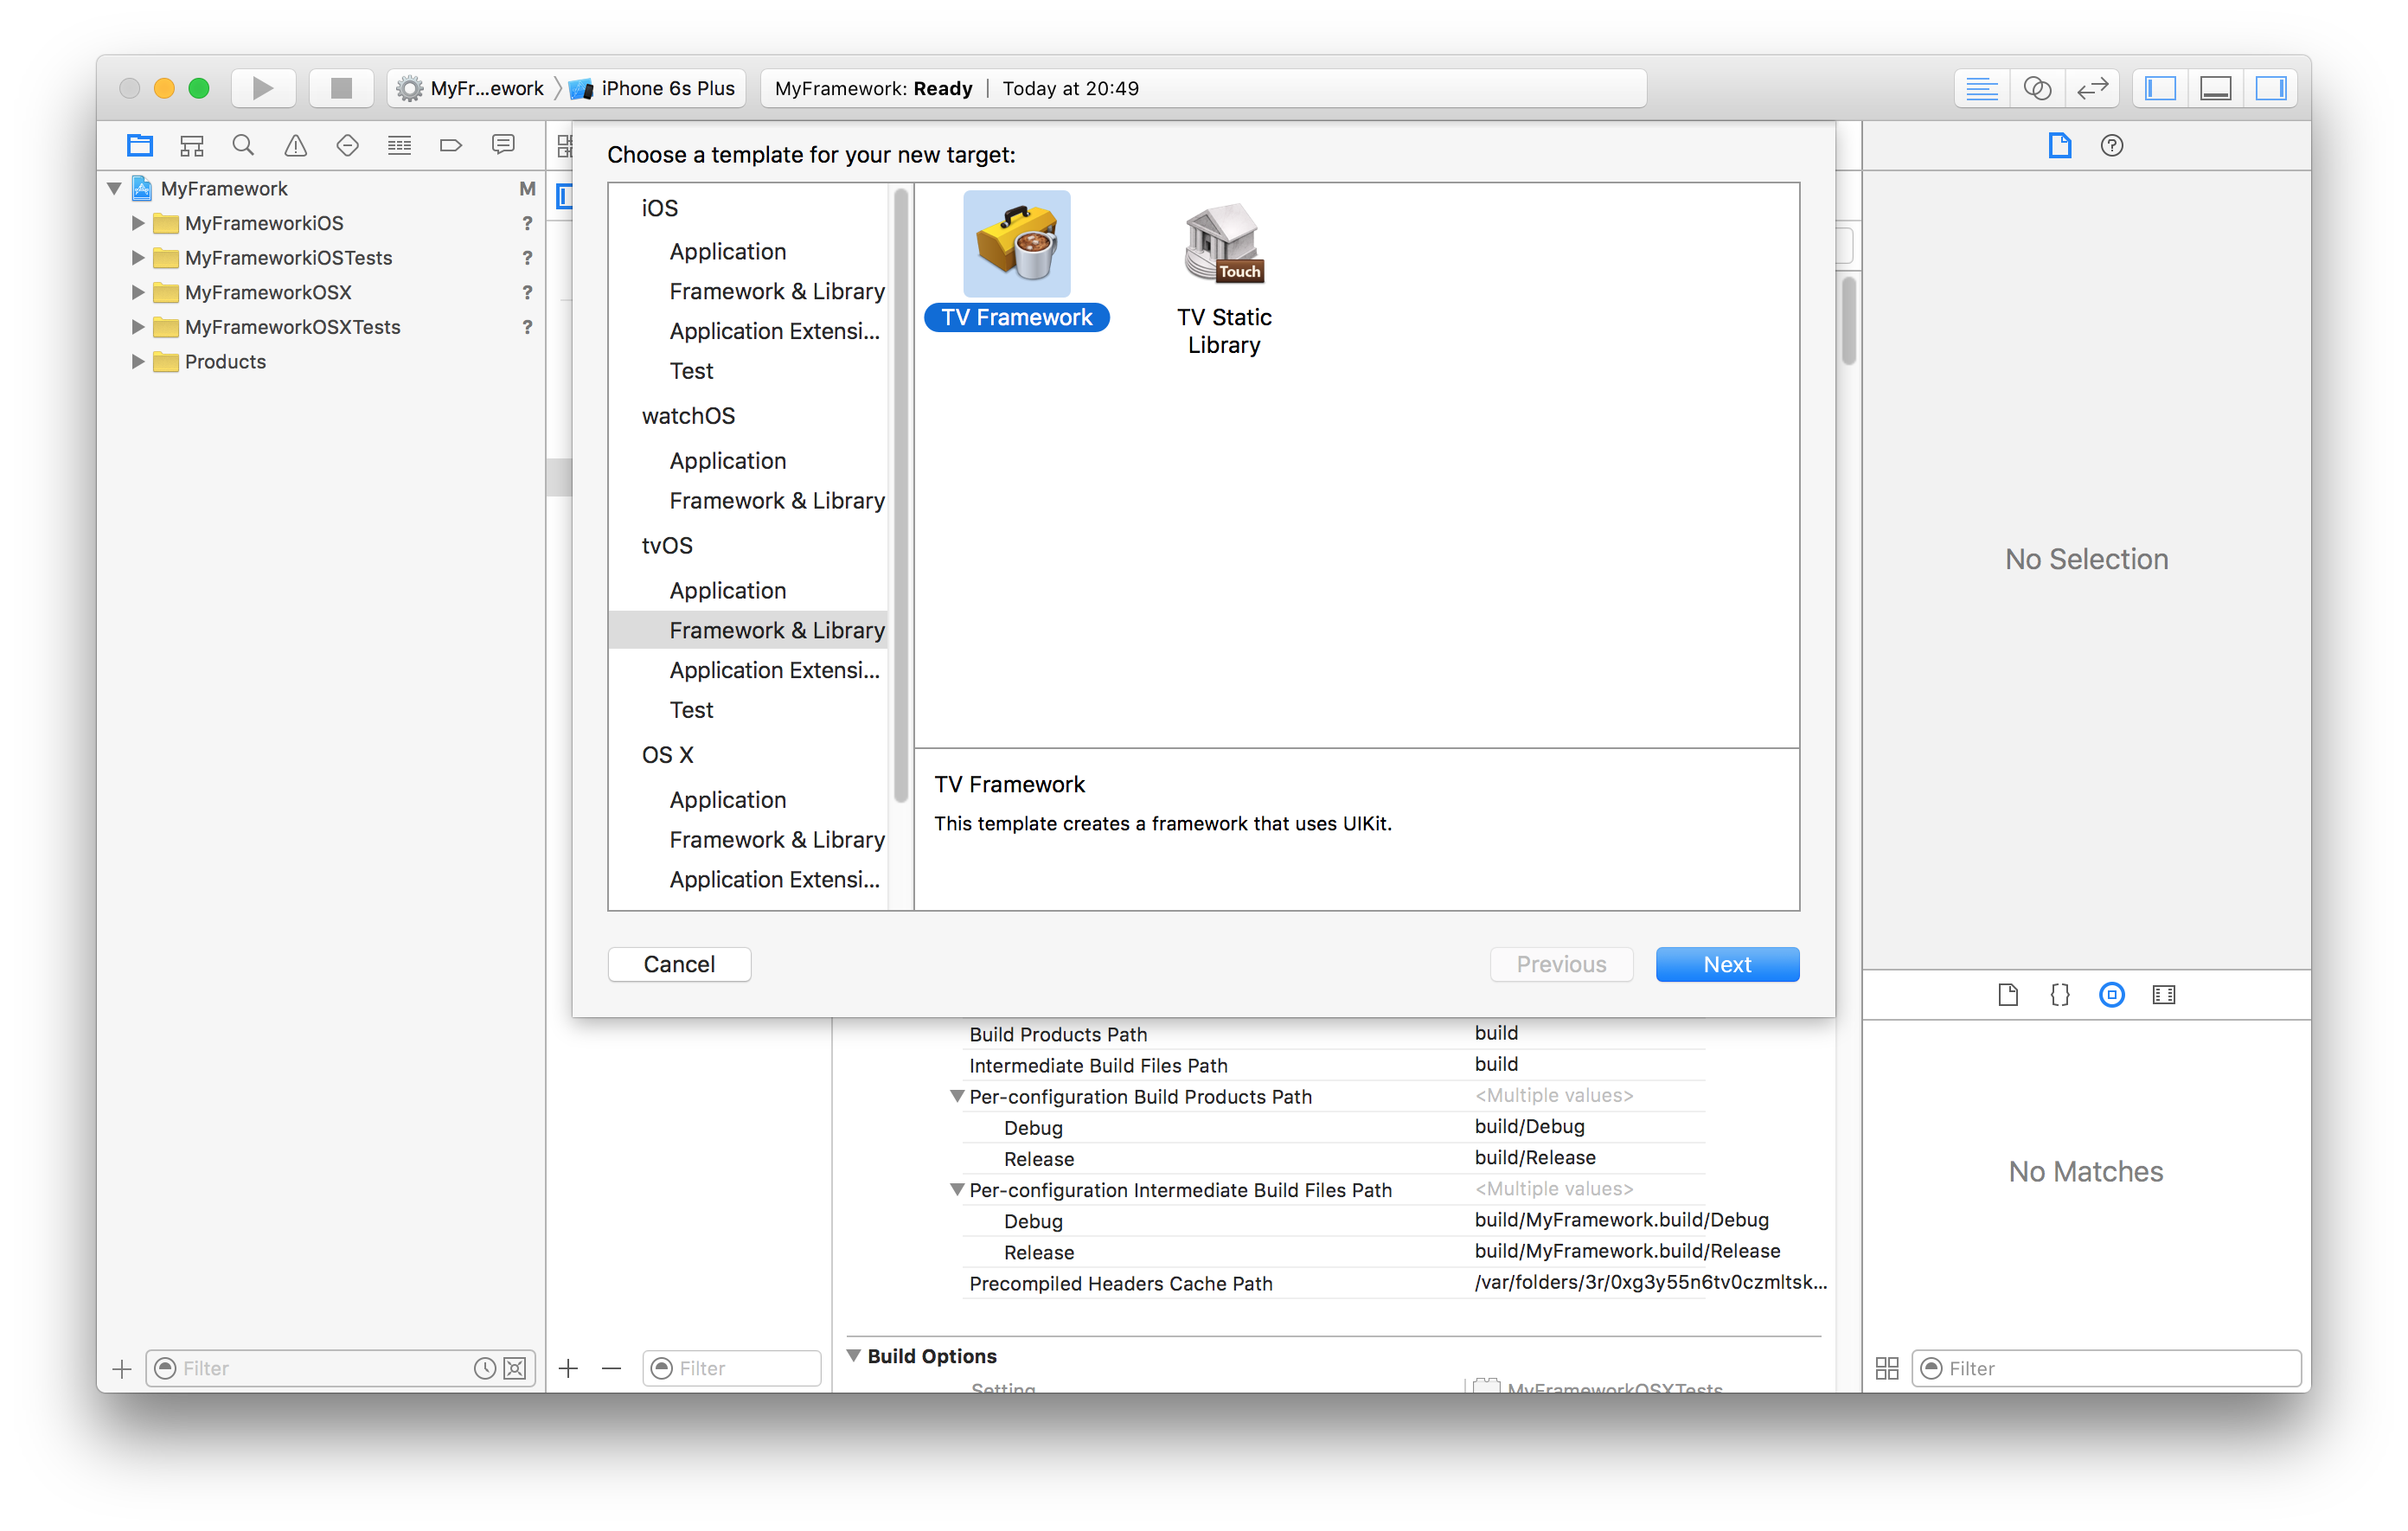 Add new tvOS Framework target
When entering the name, type MyFrameworkTVOS.
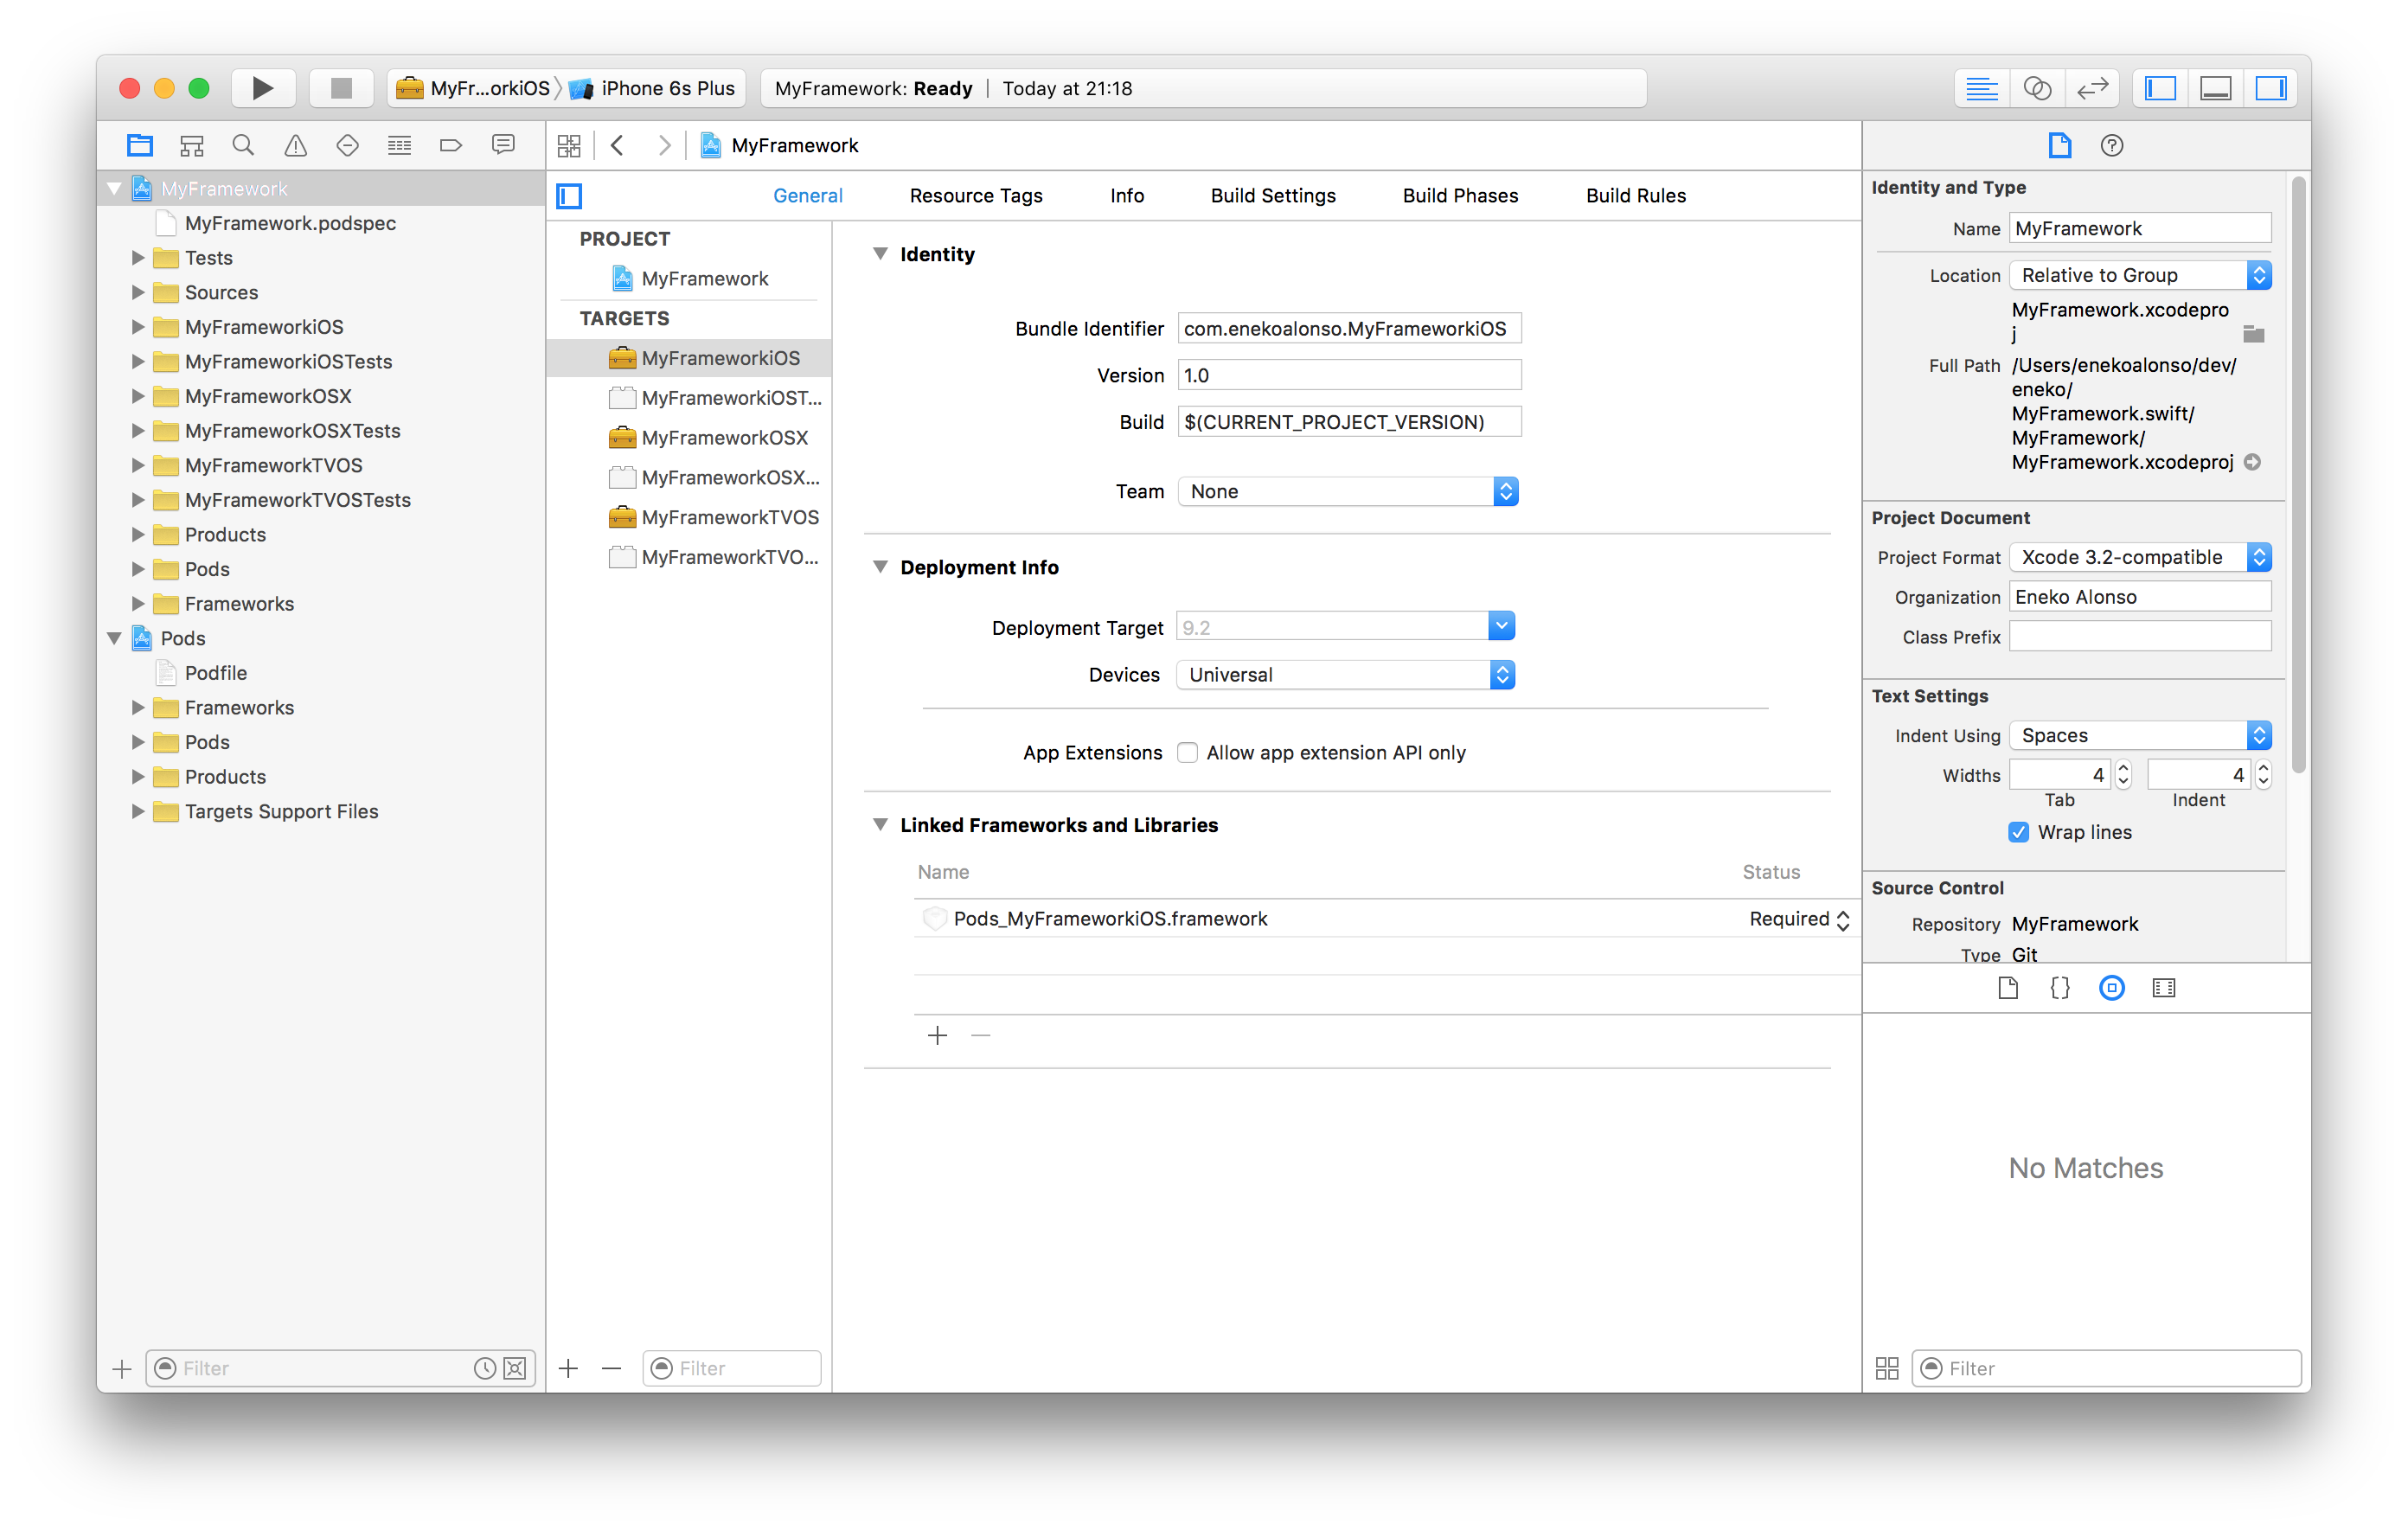
Project review
Both the project navigator and your project target list should contain these 6 items:
- MyFrameworkiOS
- MyFrameworkiOSTests
- MyFrameworkOSX
- MyFrameworkOSXTests
- MyFrameworkTVOS
- MyFrameworkTVOSTests
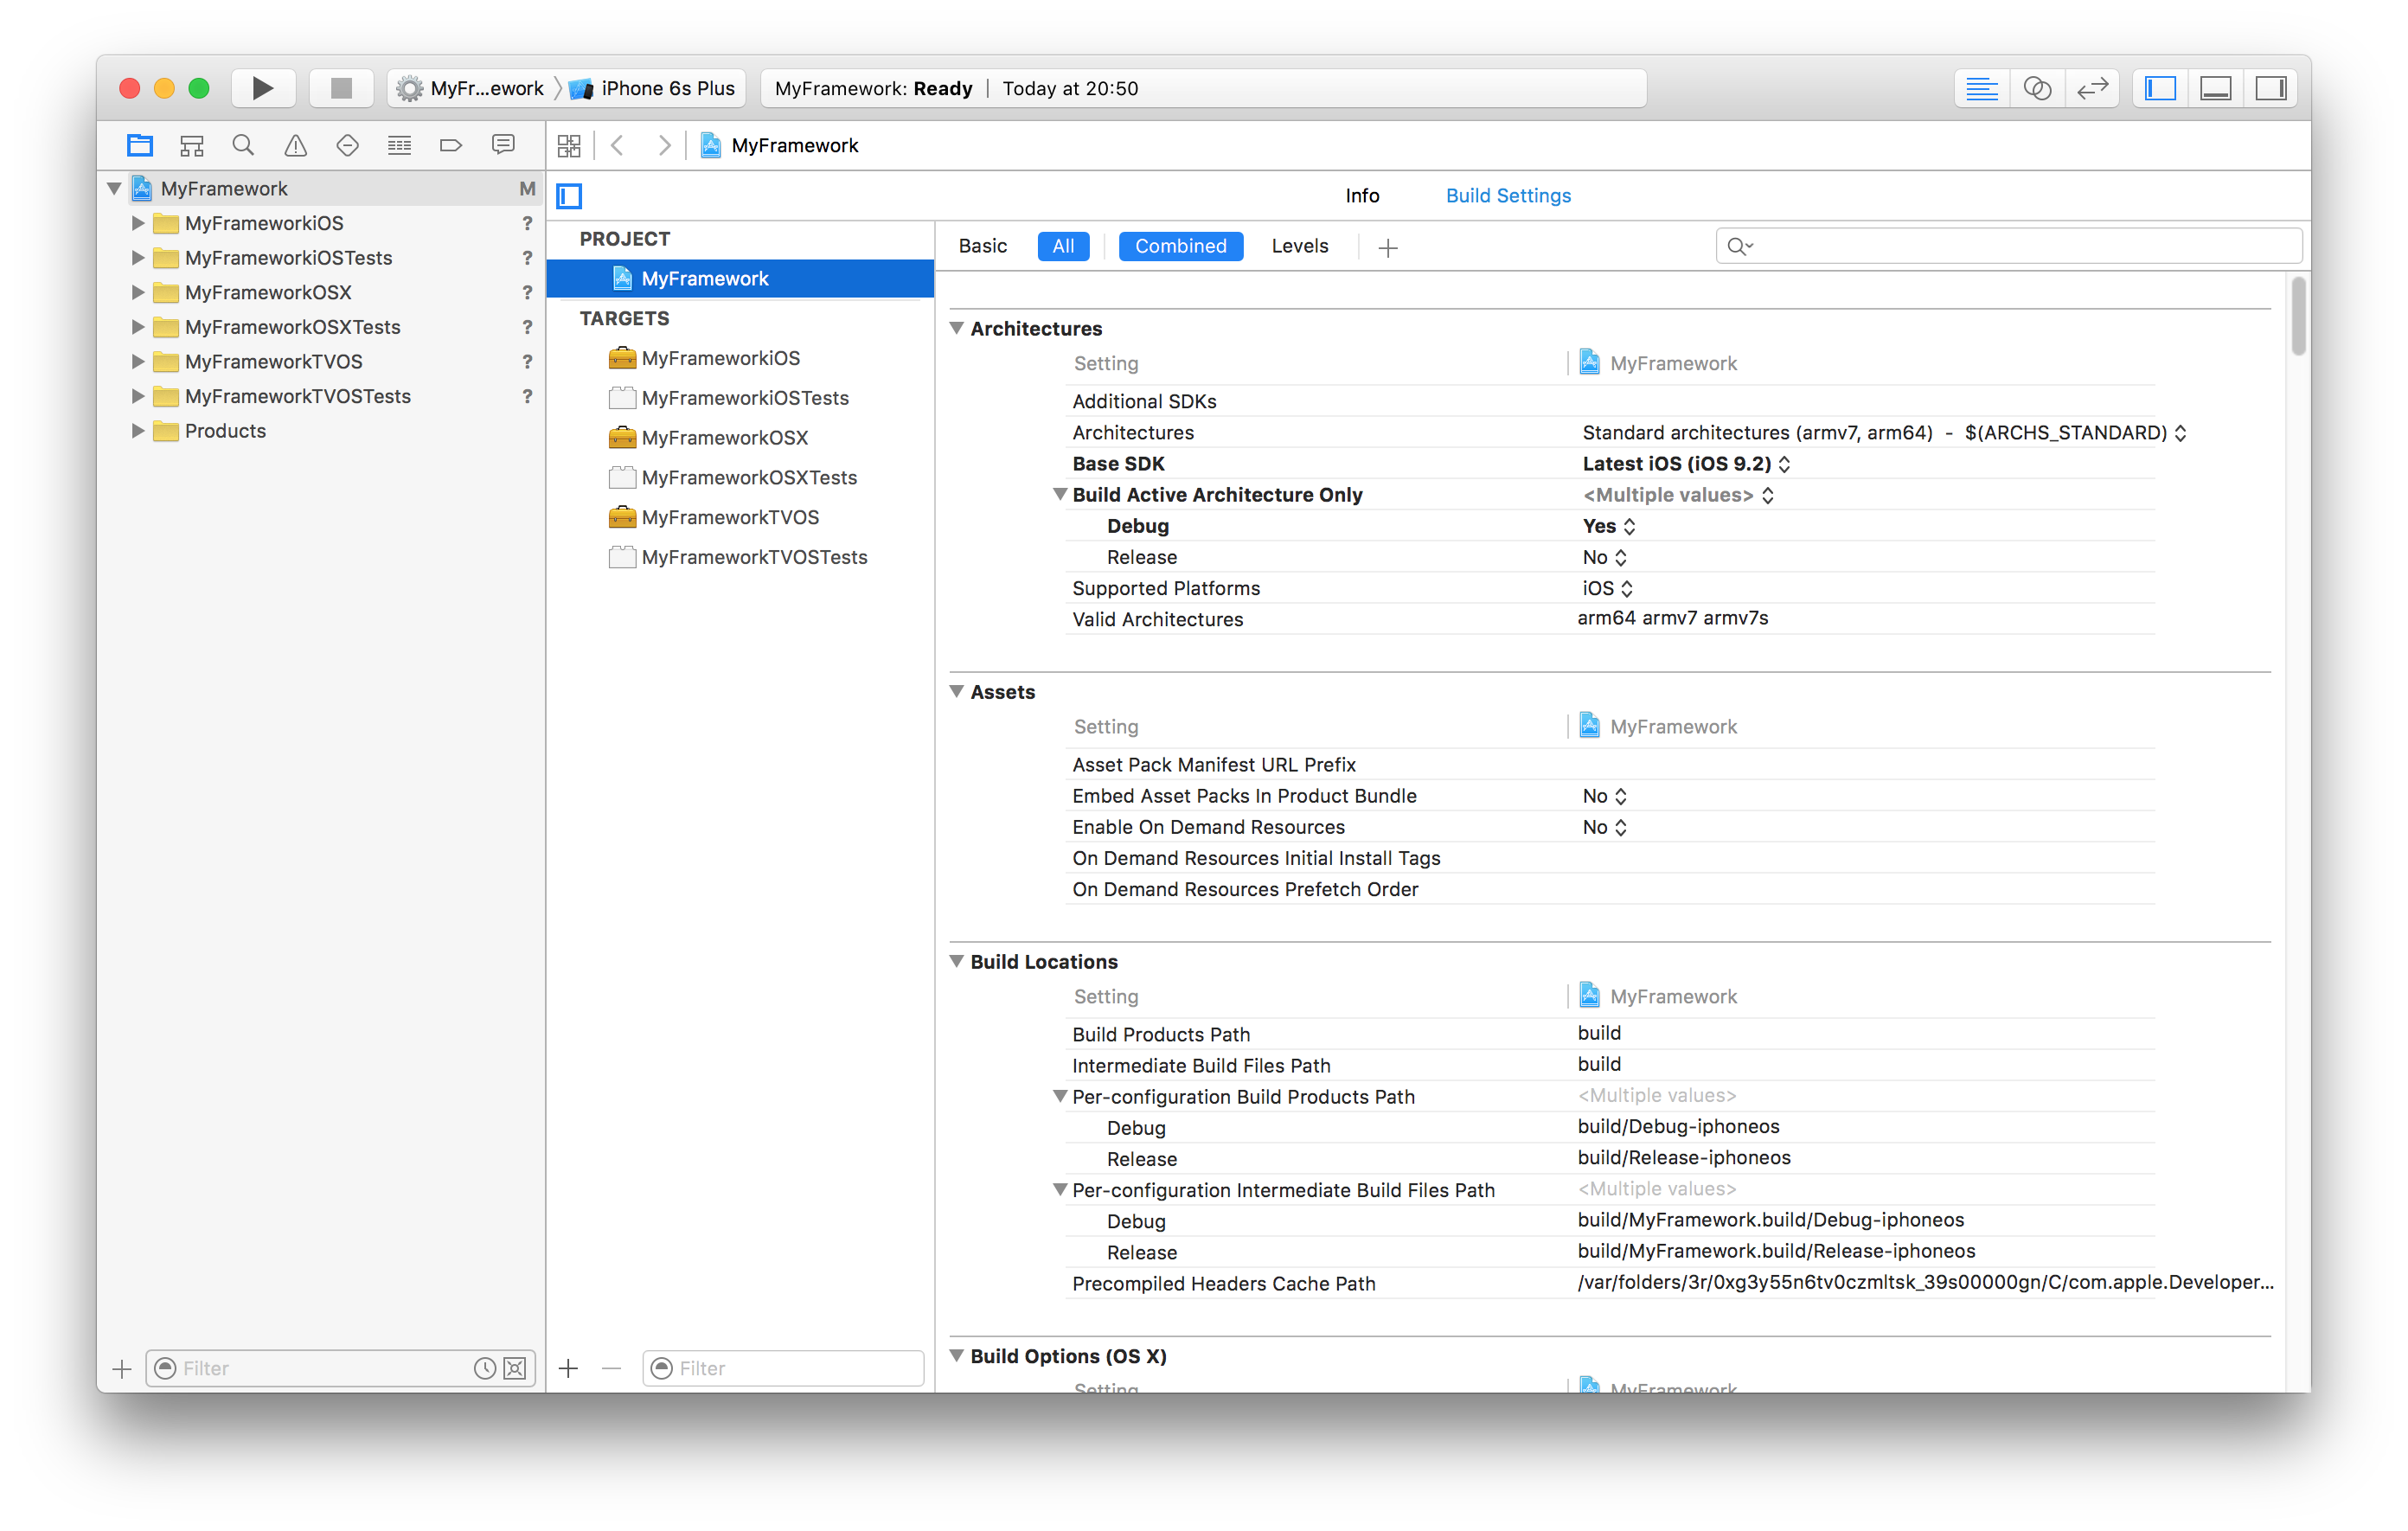 Project Screen with all three targets created
Configuring shared build schemes
For continuous integration, we are going to configure one scheme for each target.
 Non-shared schemes (before configuration)
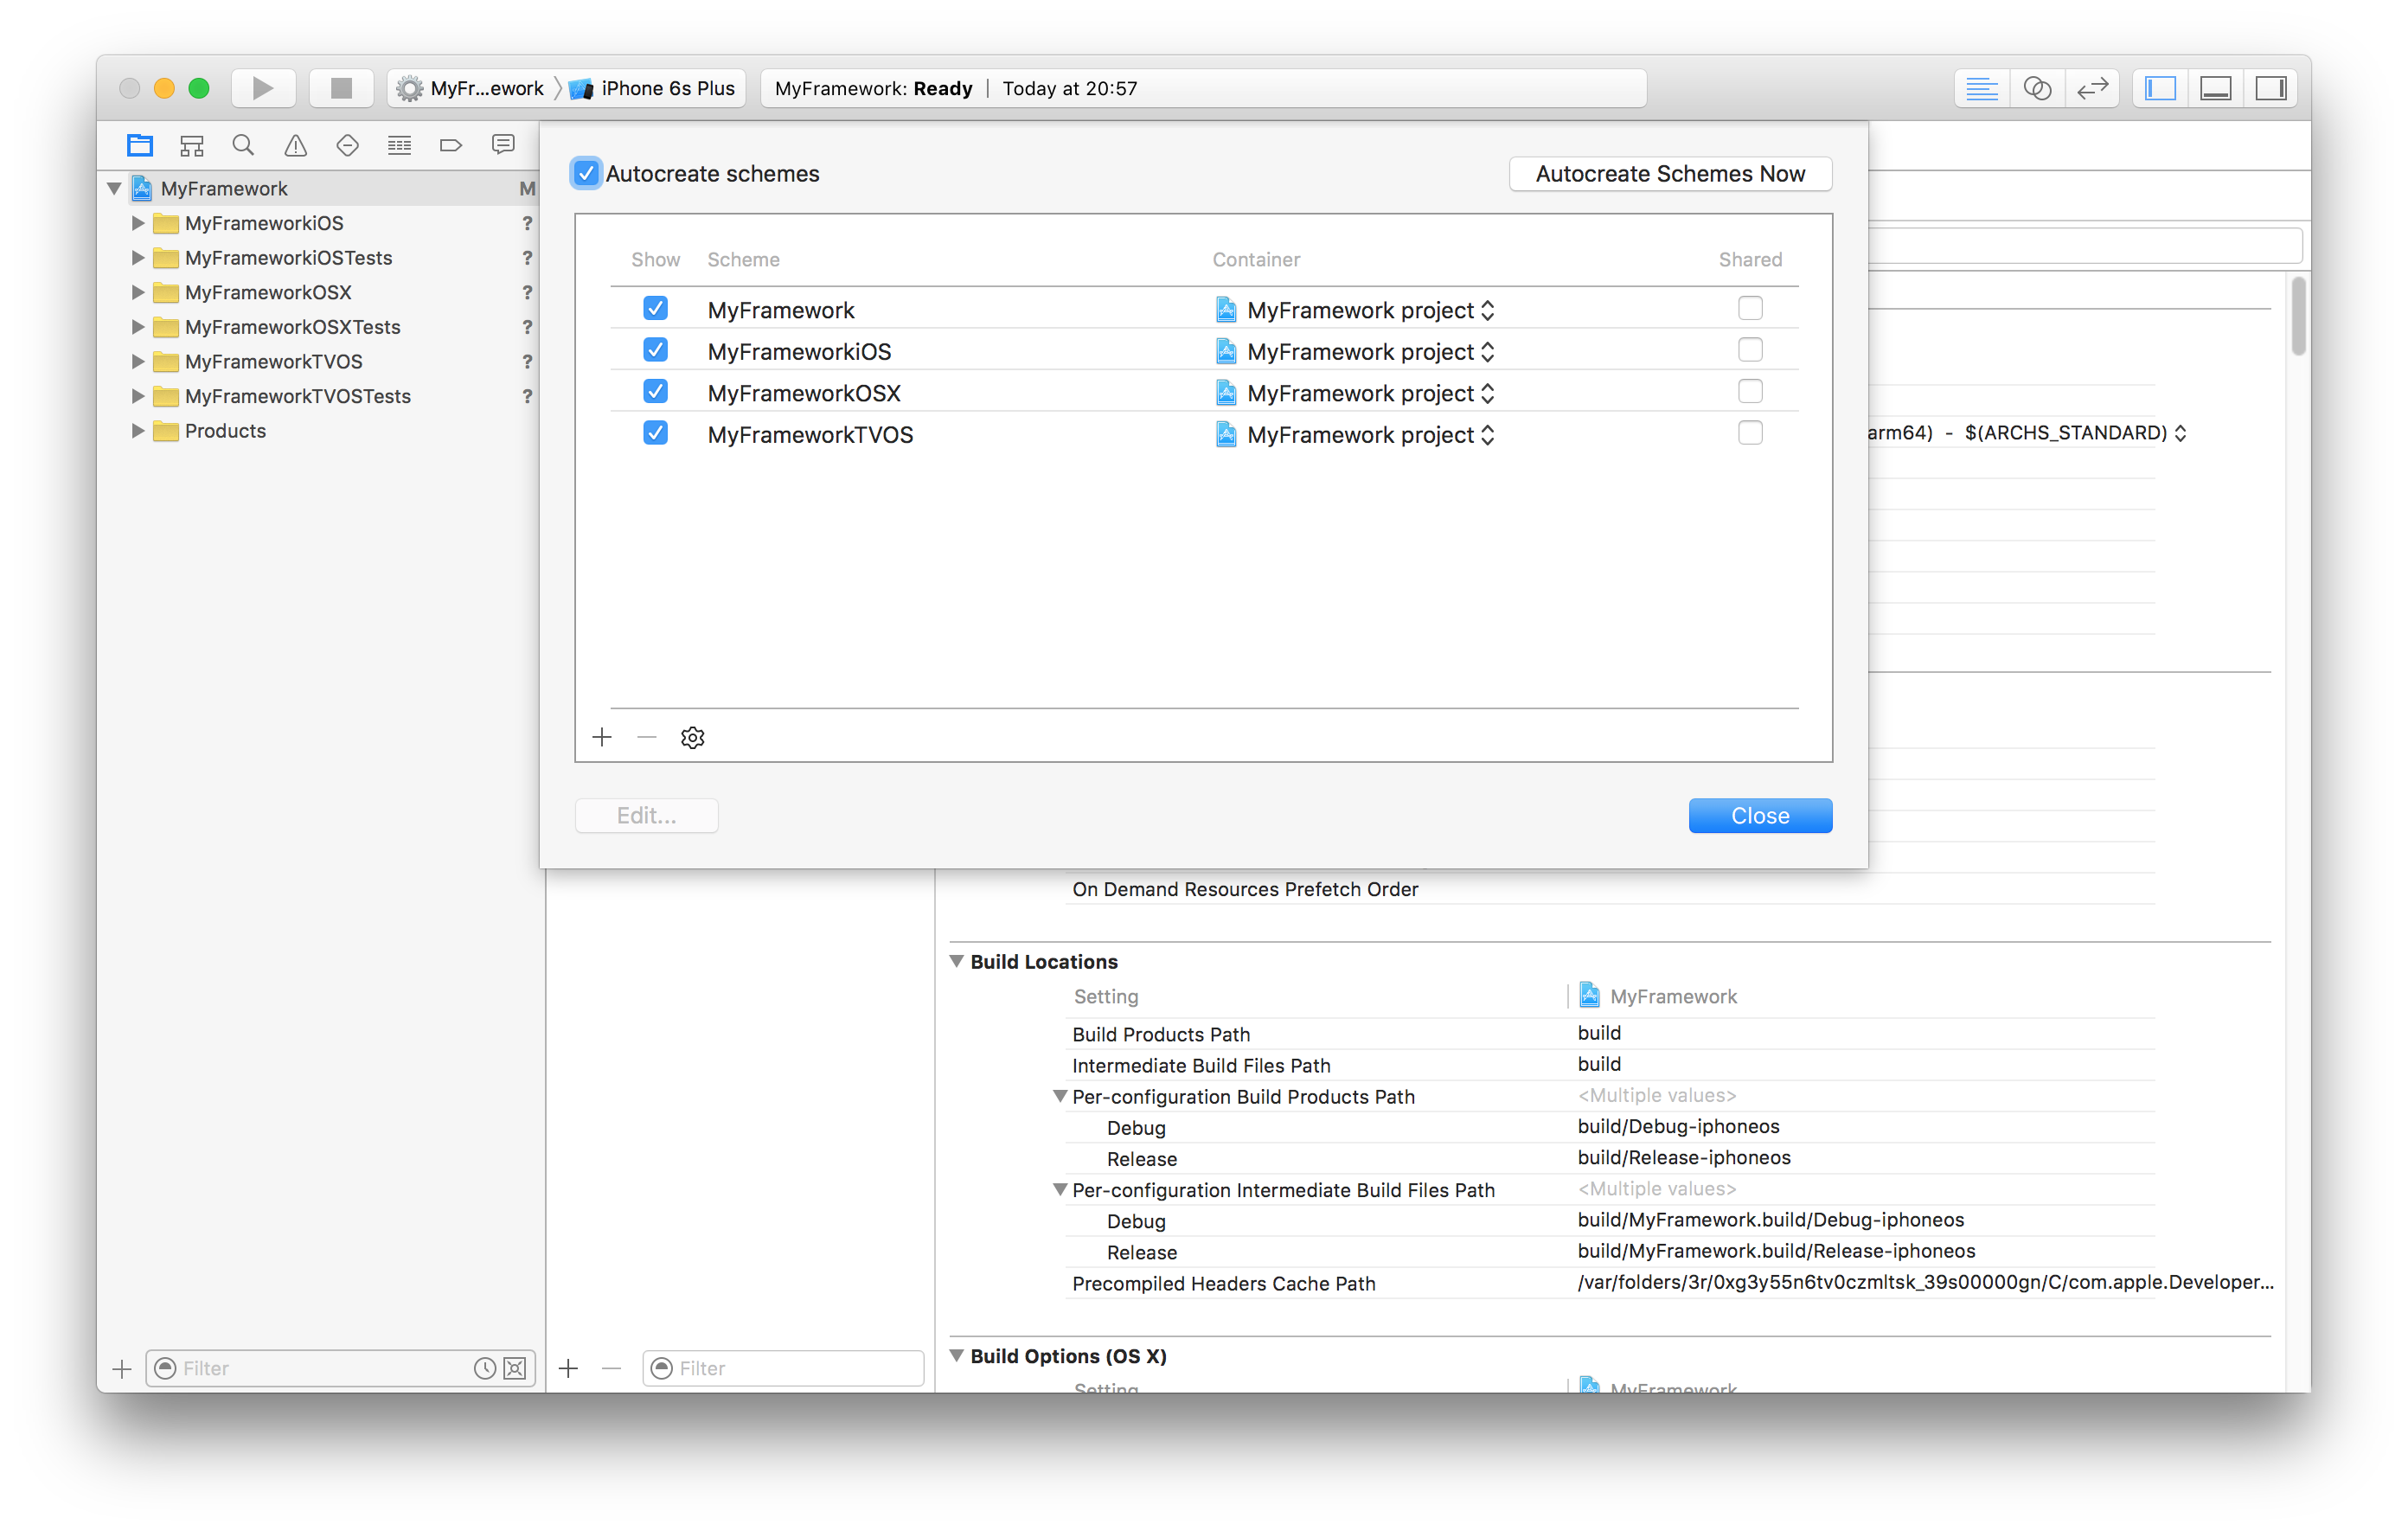
Open Product -> Scheme -> Manage Schemes... and check the checkbox on each one of the schemes matching the targets we just created. In addition, remove the scheme from the old target that we no longer have (MyFramework).
Configured shared schemes for each target
In addition, it is a good idea to enable code coverage for each of the three schemes. Select one scheme after another and press Edit Scheme.... Then, under ‘Tests’, select the checkbox that says Gather coverage data.
 Enabling Code Coverage in Xcode 7
Development
Now that we have our project set up, it is time to add some source code!
Our goal is to share as much source code as possible between all three frameworks. To do this, we will add our shared source files into the Sources folder we created when setting up the project and then assign the source files to all three framework targets.
Let’s add a sample class to track our car miles:
public class Car: CustomStringConvertible {

    var name: String
    var miles: Int

    public init(name: String, miles: Int) {
        self.name = name
        self.miles = miles
    }

    public func addMiles(miles: Int) {
        self.miles += miles
    }

    public var description: String {
        return "Car '\(name)' has \(miles) miles."
    }

}
In our application, we will use the car like this:
let car = Car("Toyota Camry", miles: 190000)
print(car) //  Car 'Toyota Camry' has 190000 miles
car.addMiles(1000)
print(car) //  Car 'Toyota Camry' has 191000 miles
Note that because both name and miles properties are non-public, we wont be able to access them from our main application.
Adding source files
Let’s create the file and add it to the project.
On the project navigator, right-click on the project item and choose “New Group” and call it Sources.
Next, right-click on Sources and select New File... -> iOS -> Swift File.
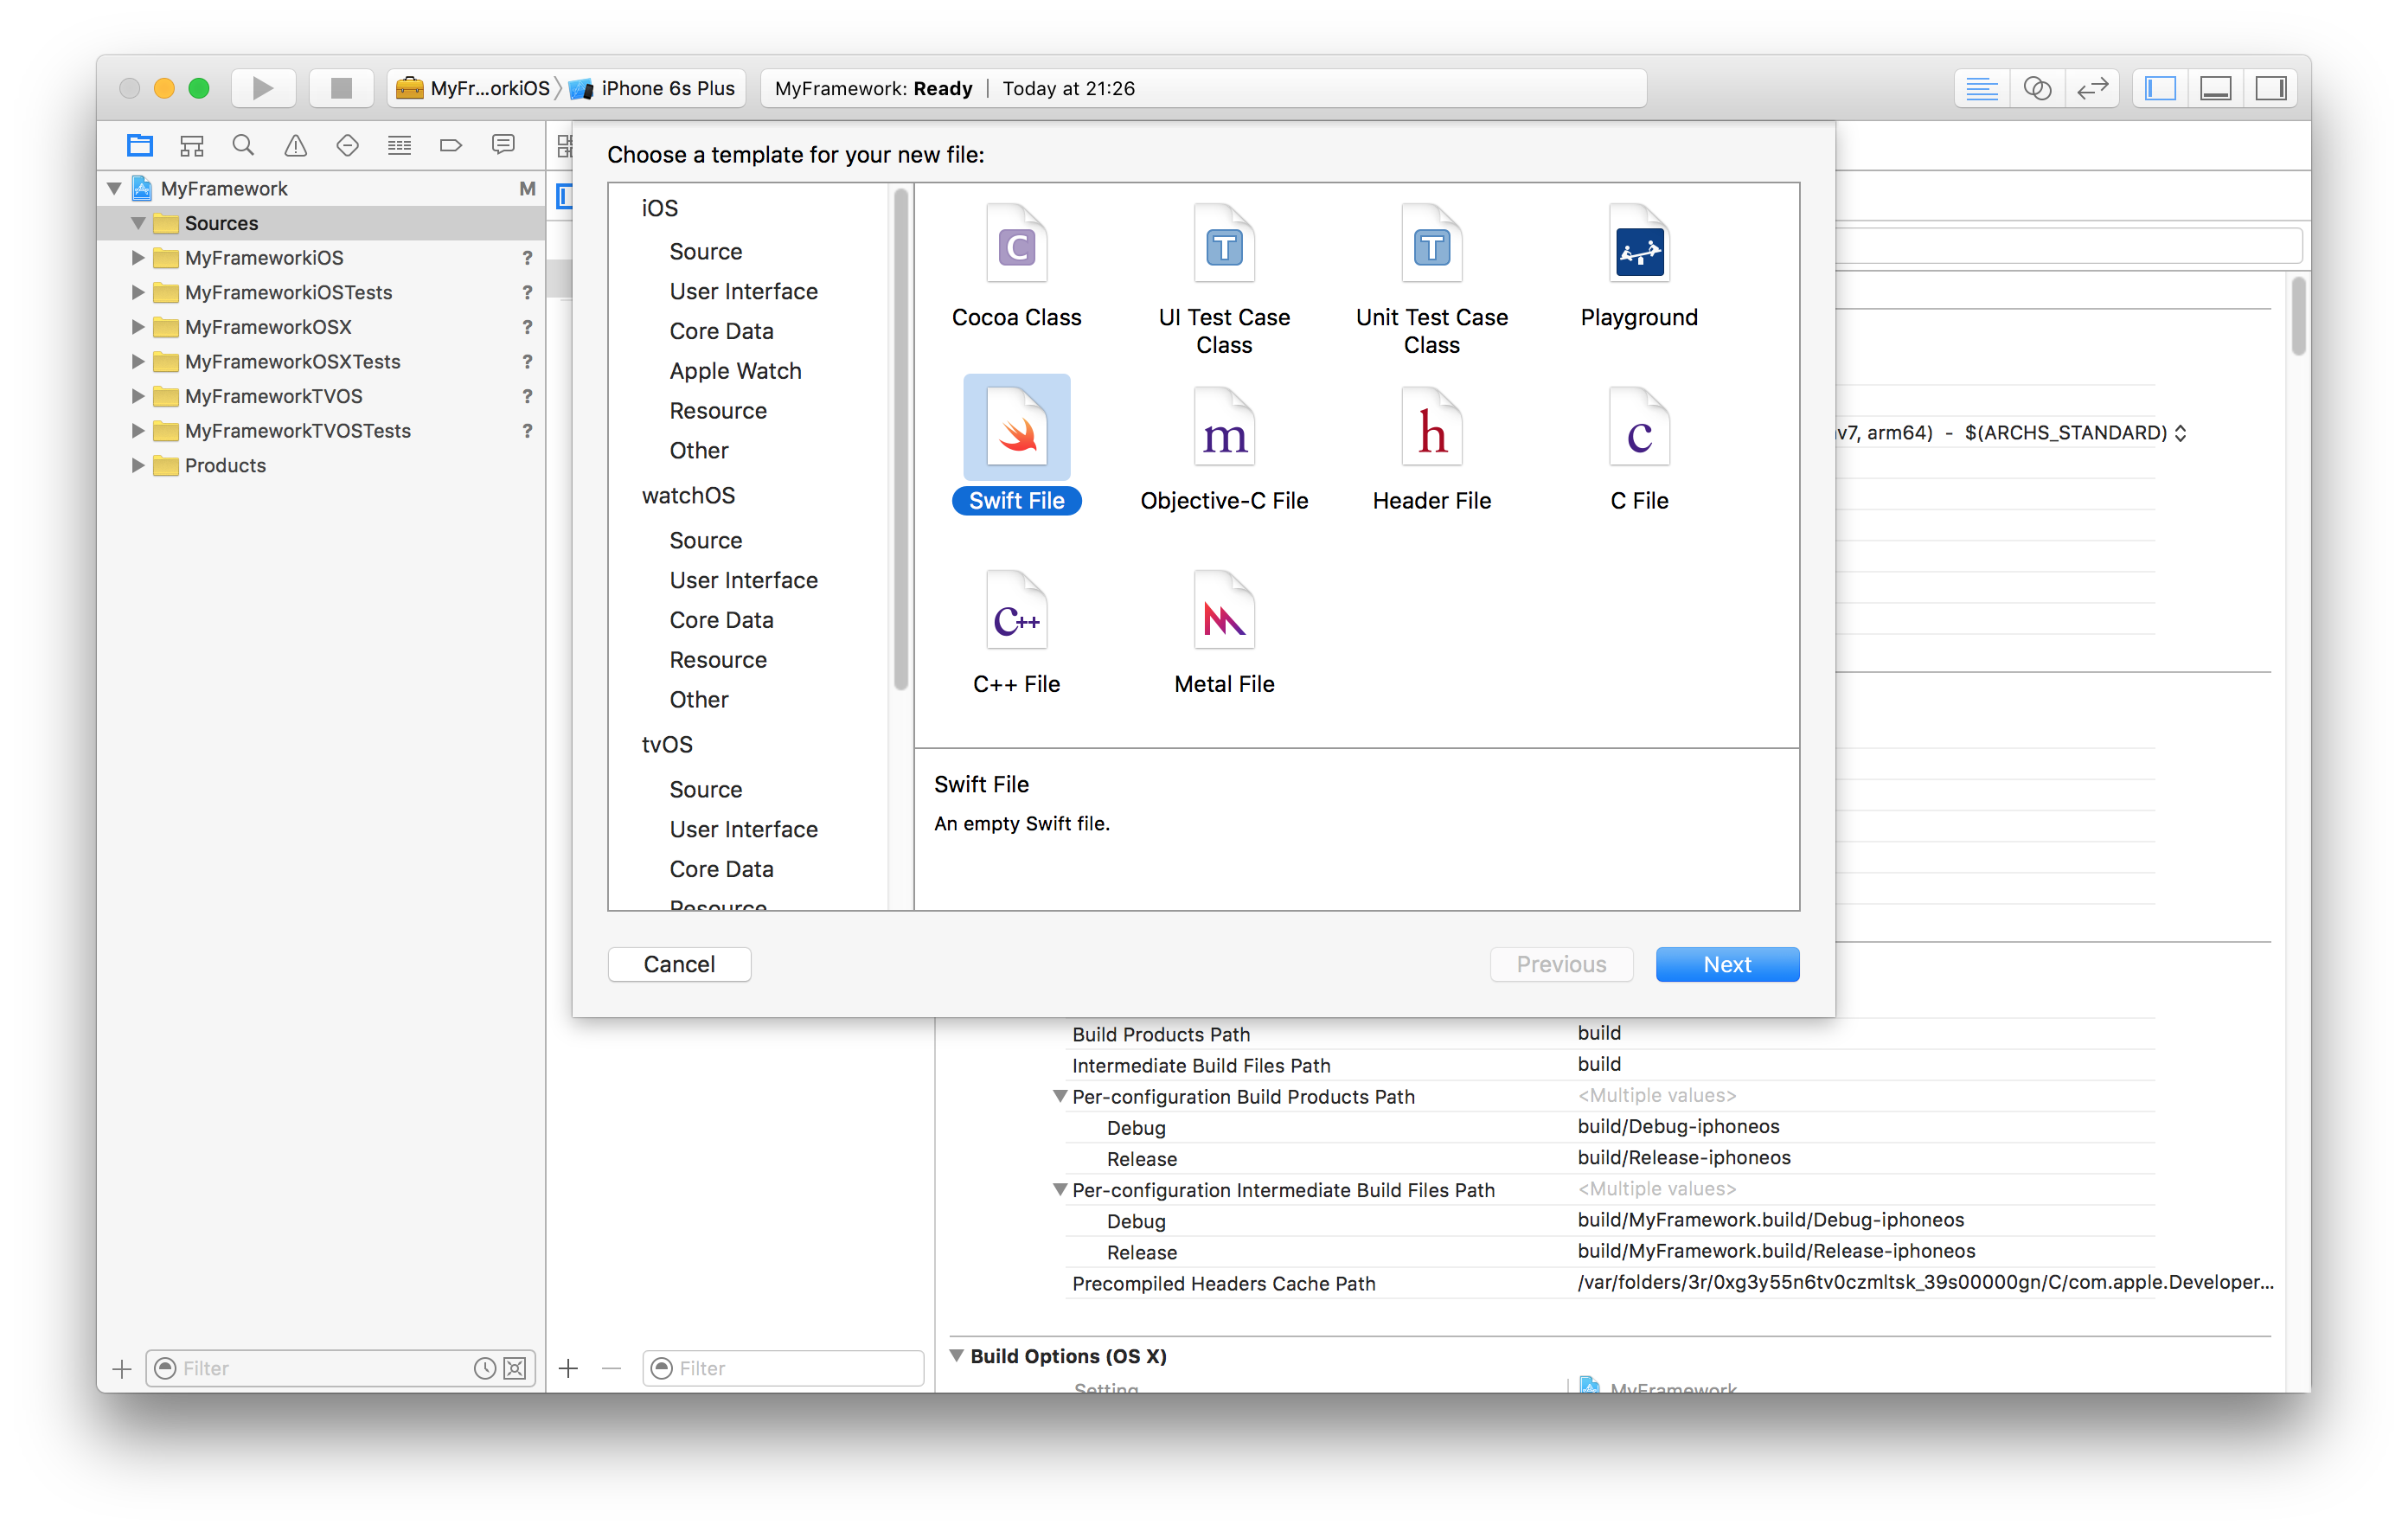 Creating a new Swift source file
Name the file Car.swift and save it in the Sources folder. Check that it is being added to the Sources group and that all framework targets are selected.
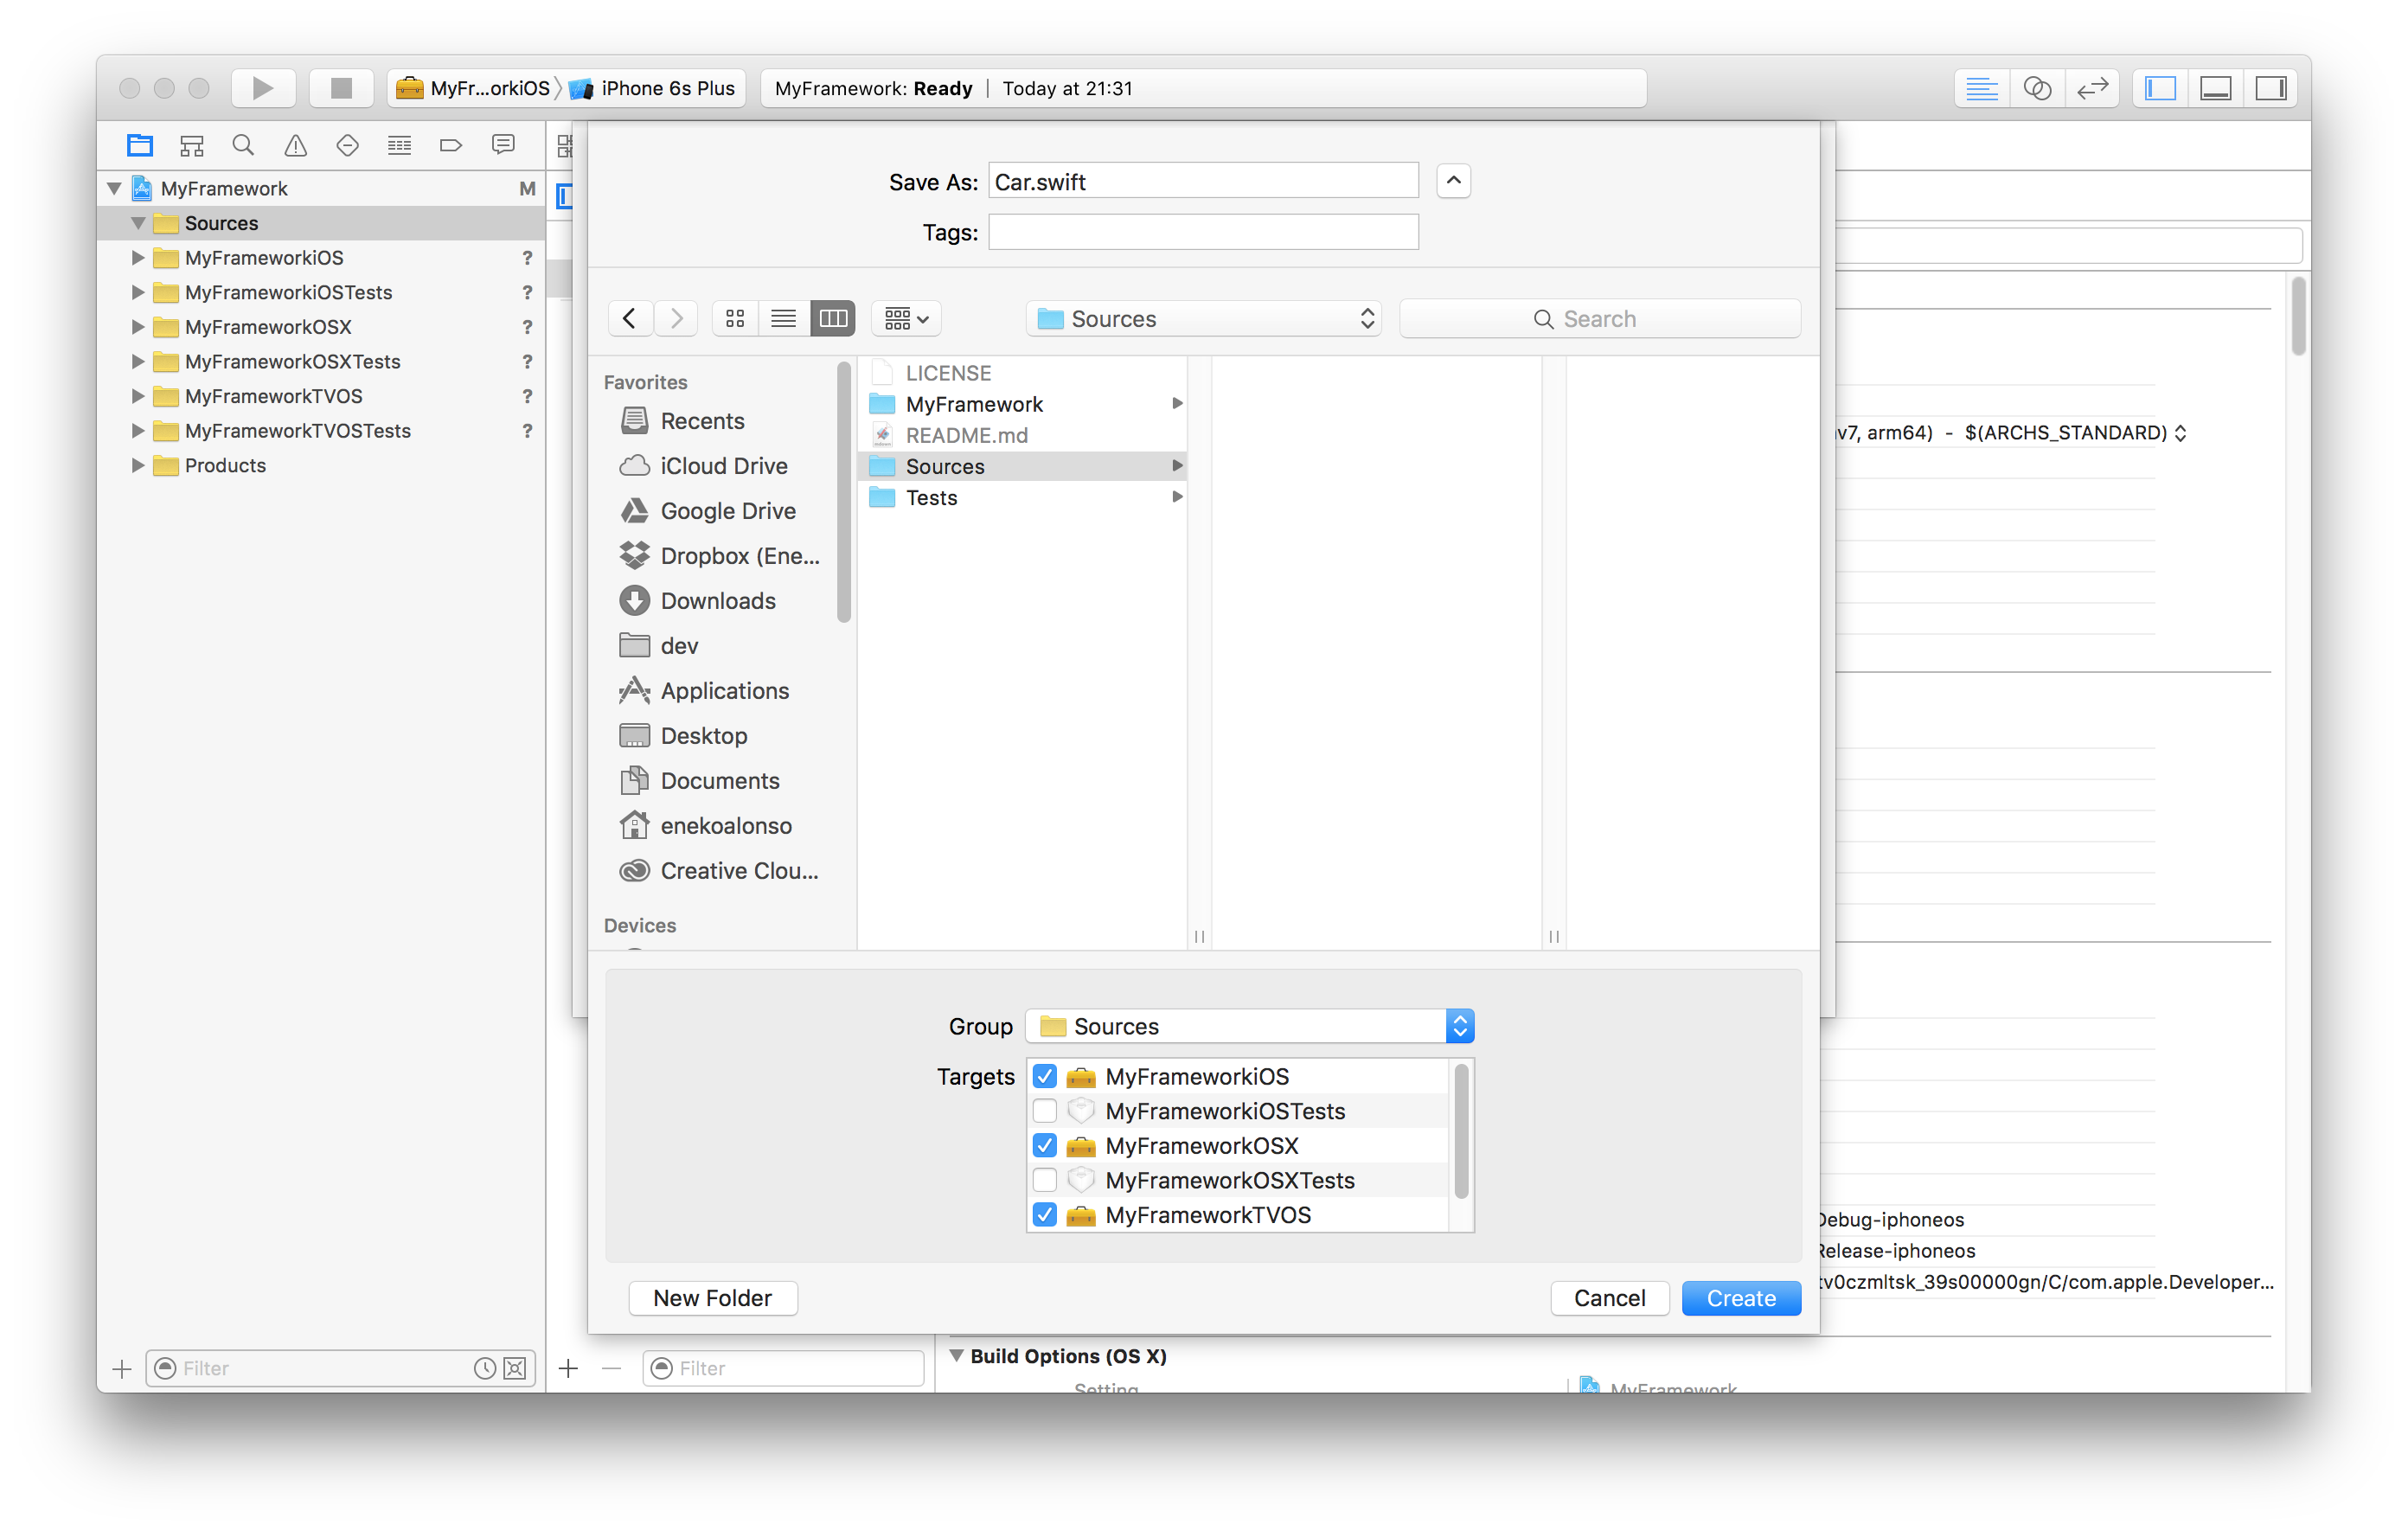 Adding Swift source files to all targets
Copy the code from the class above and paste it in Xcode.
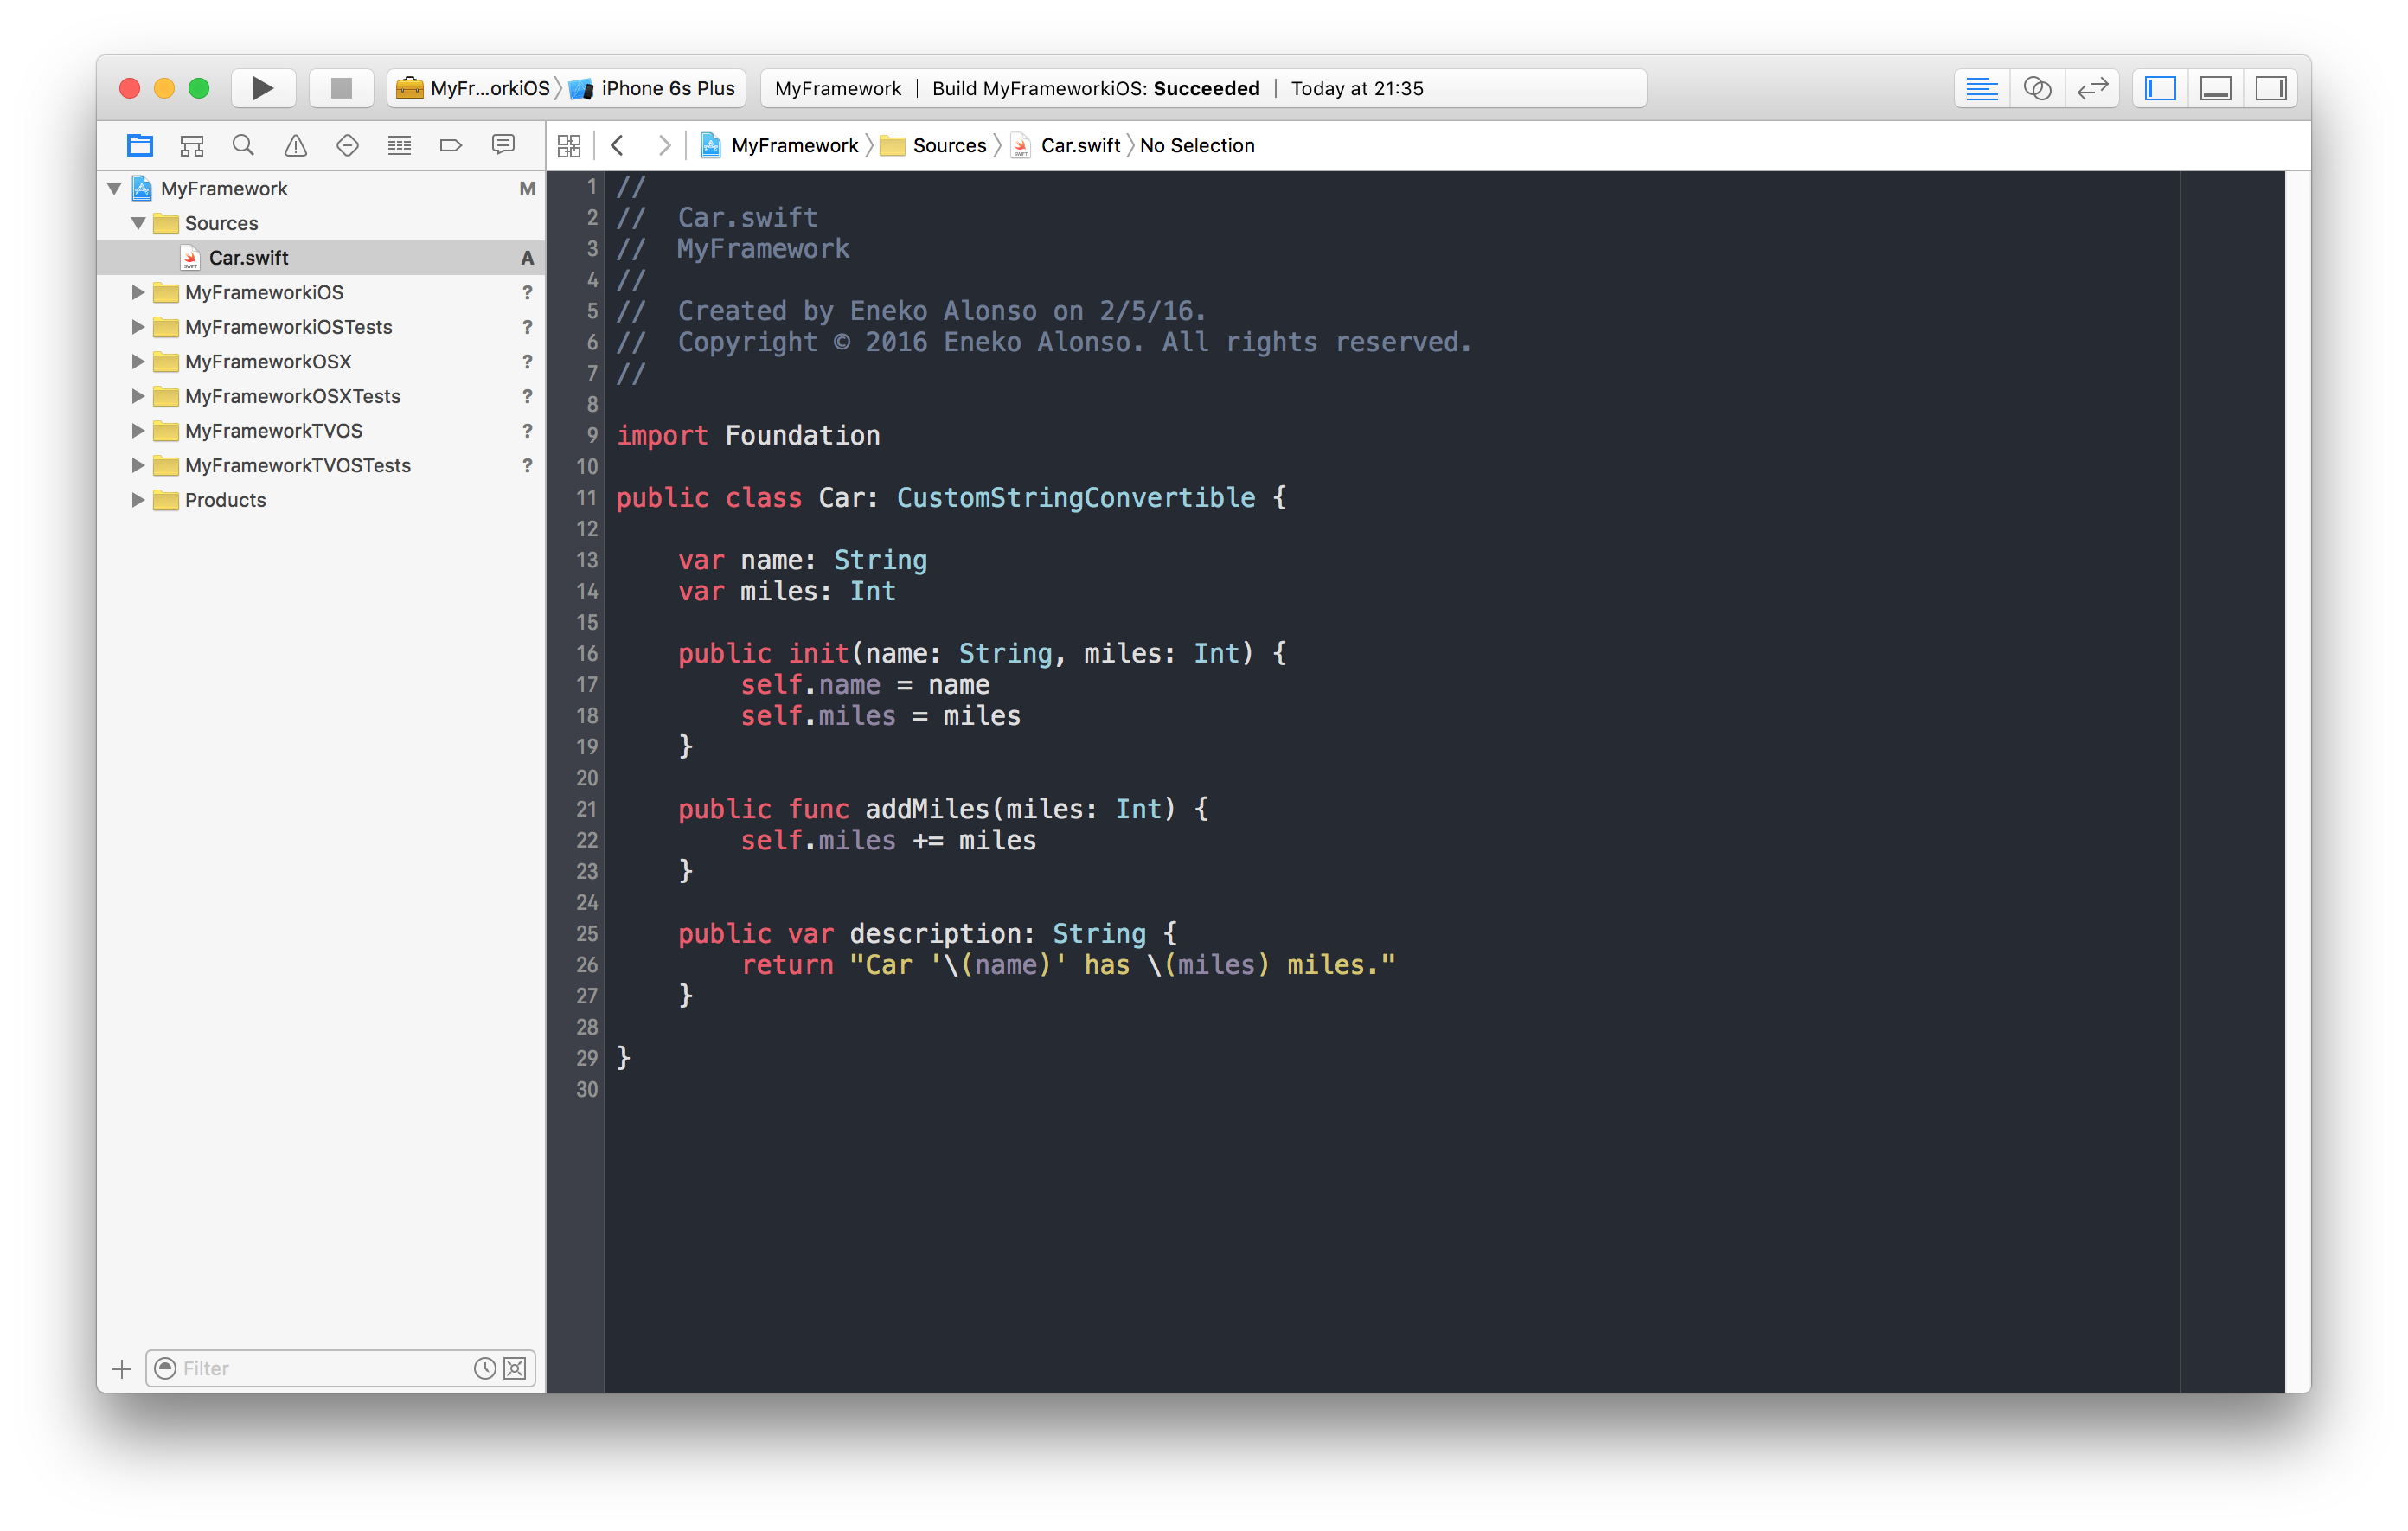 Car Class
Try building each one of the schemes (⌘ + B). You can navigate between schemes with the shortcuts Ctrl + ⌘ + [ and Ctrl + ⌘ + ].
About Public and Private
TL;DR: Only those entities flagged as public in your framework will be accessible from the outside.
In Swift, the public keyword indicates the code flagged as public will accessible from outside the current module.
Public access enables entities to be used within any source file from their defining module, and also in a source file from another module that imports the defining module. You typically use public access when specifying the public interface to a framework. Access Control in Swift
Using public in source code of an iOS, OS X or tvOS application does not provide any direct value, since all files added to the application will be within the application module.
However, for an application to be able to access the source code inside a framework, it is necessary to use public to expose the entities that we want to make accessible.
Contrary to public, using private can actually make your code harder to test. Xcode 7 has a new feature that enables importing frameworks with @testable import, which makes it possible to test non-public code. However, it cannot test private code.
Because modules do not expose non-public entities outside of the module, there is no need to use private anywhere in the framework code.
Testing
Now that we have some working code, it is time to test it! How else could we guarantee our code does what we designed it to do?
Same as our source code, our goal for our tests is to share as many tests as possible between all three frameworks. To do this, we will add our shared test source files into the Tests folder we created when setting up the project. Then we will assign the test source files to all three unit test targets.
We are going to write two tests.
The first test will create a new car and check the description is correct.
func testCarDescription() {
    let car = Car(name: "Test", miles: 0)
    XCTAssertEqual(car.description, "Car 'Test' has 0 miles.")
}
The second test, will create a new car, add some miles, and verify the description is the one expected.
func testCarDescriptionAfterAddingMiles() {
    let car = Car(name: "Test", miles: 0)
    car.addMiles(125)
    XCTAssertEqual(car.description, "Car 'Test' has 125 miles.")
}
Adding test files
Let’s create the test file and add it to the project.
On the project navigator, right-click on the project item and choose “New Group” and call it Tests.
Next, right-click on Sources and select New File... -> iOS -> Unit Test Case Class.
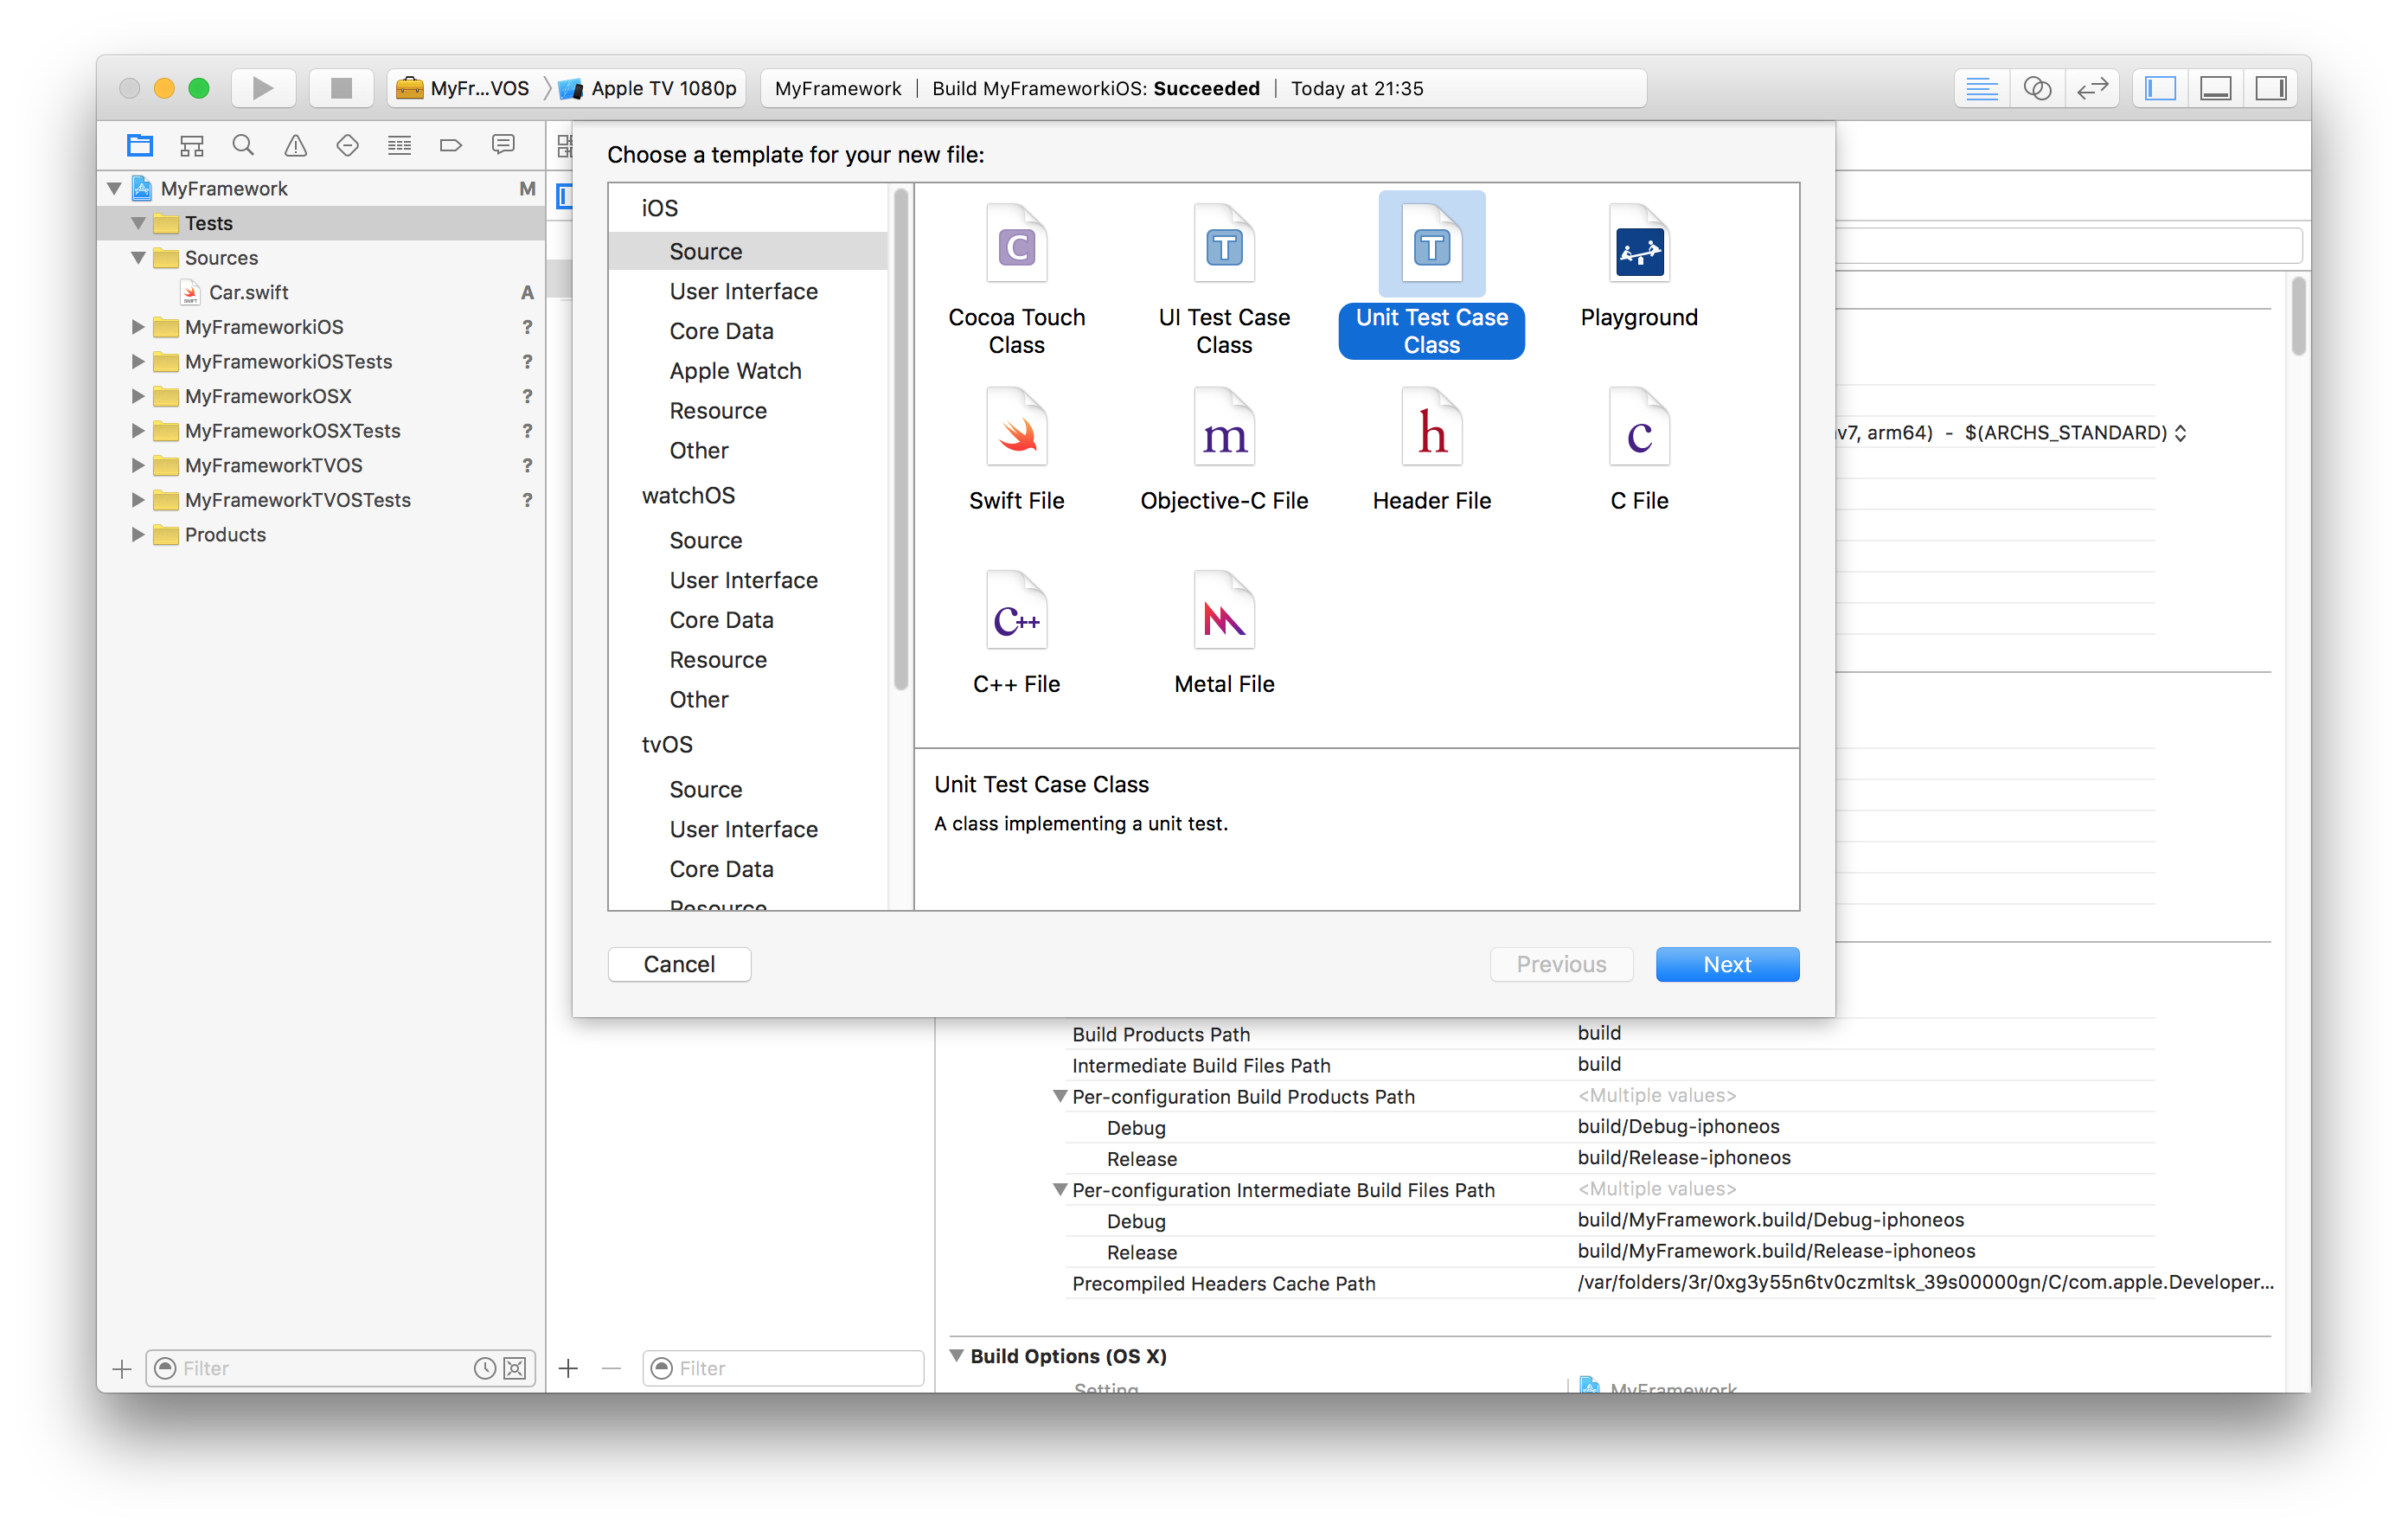 Creating a new Unit Test Case
Name the class CarTests and inherit from XCTestCase.
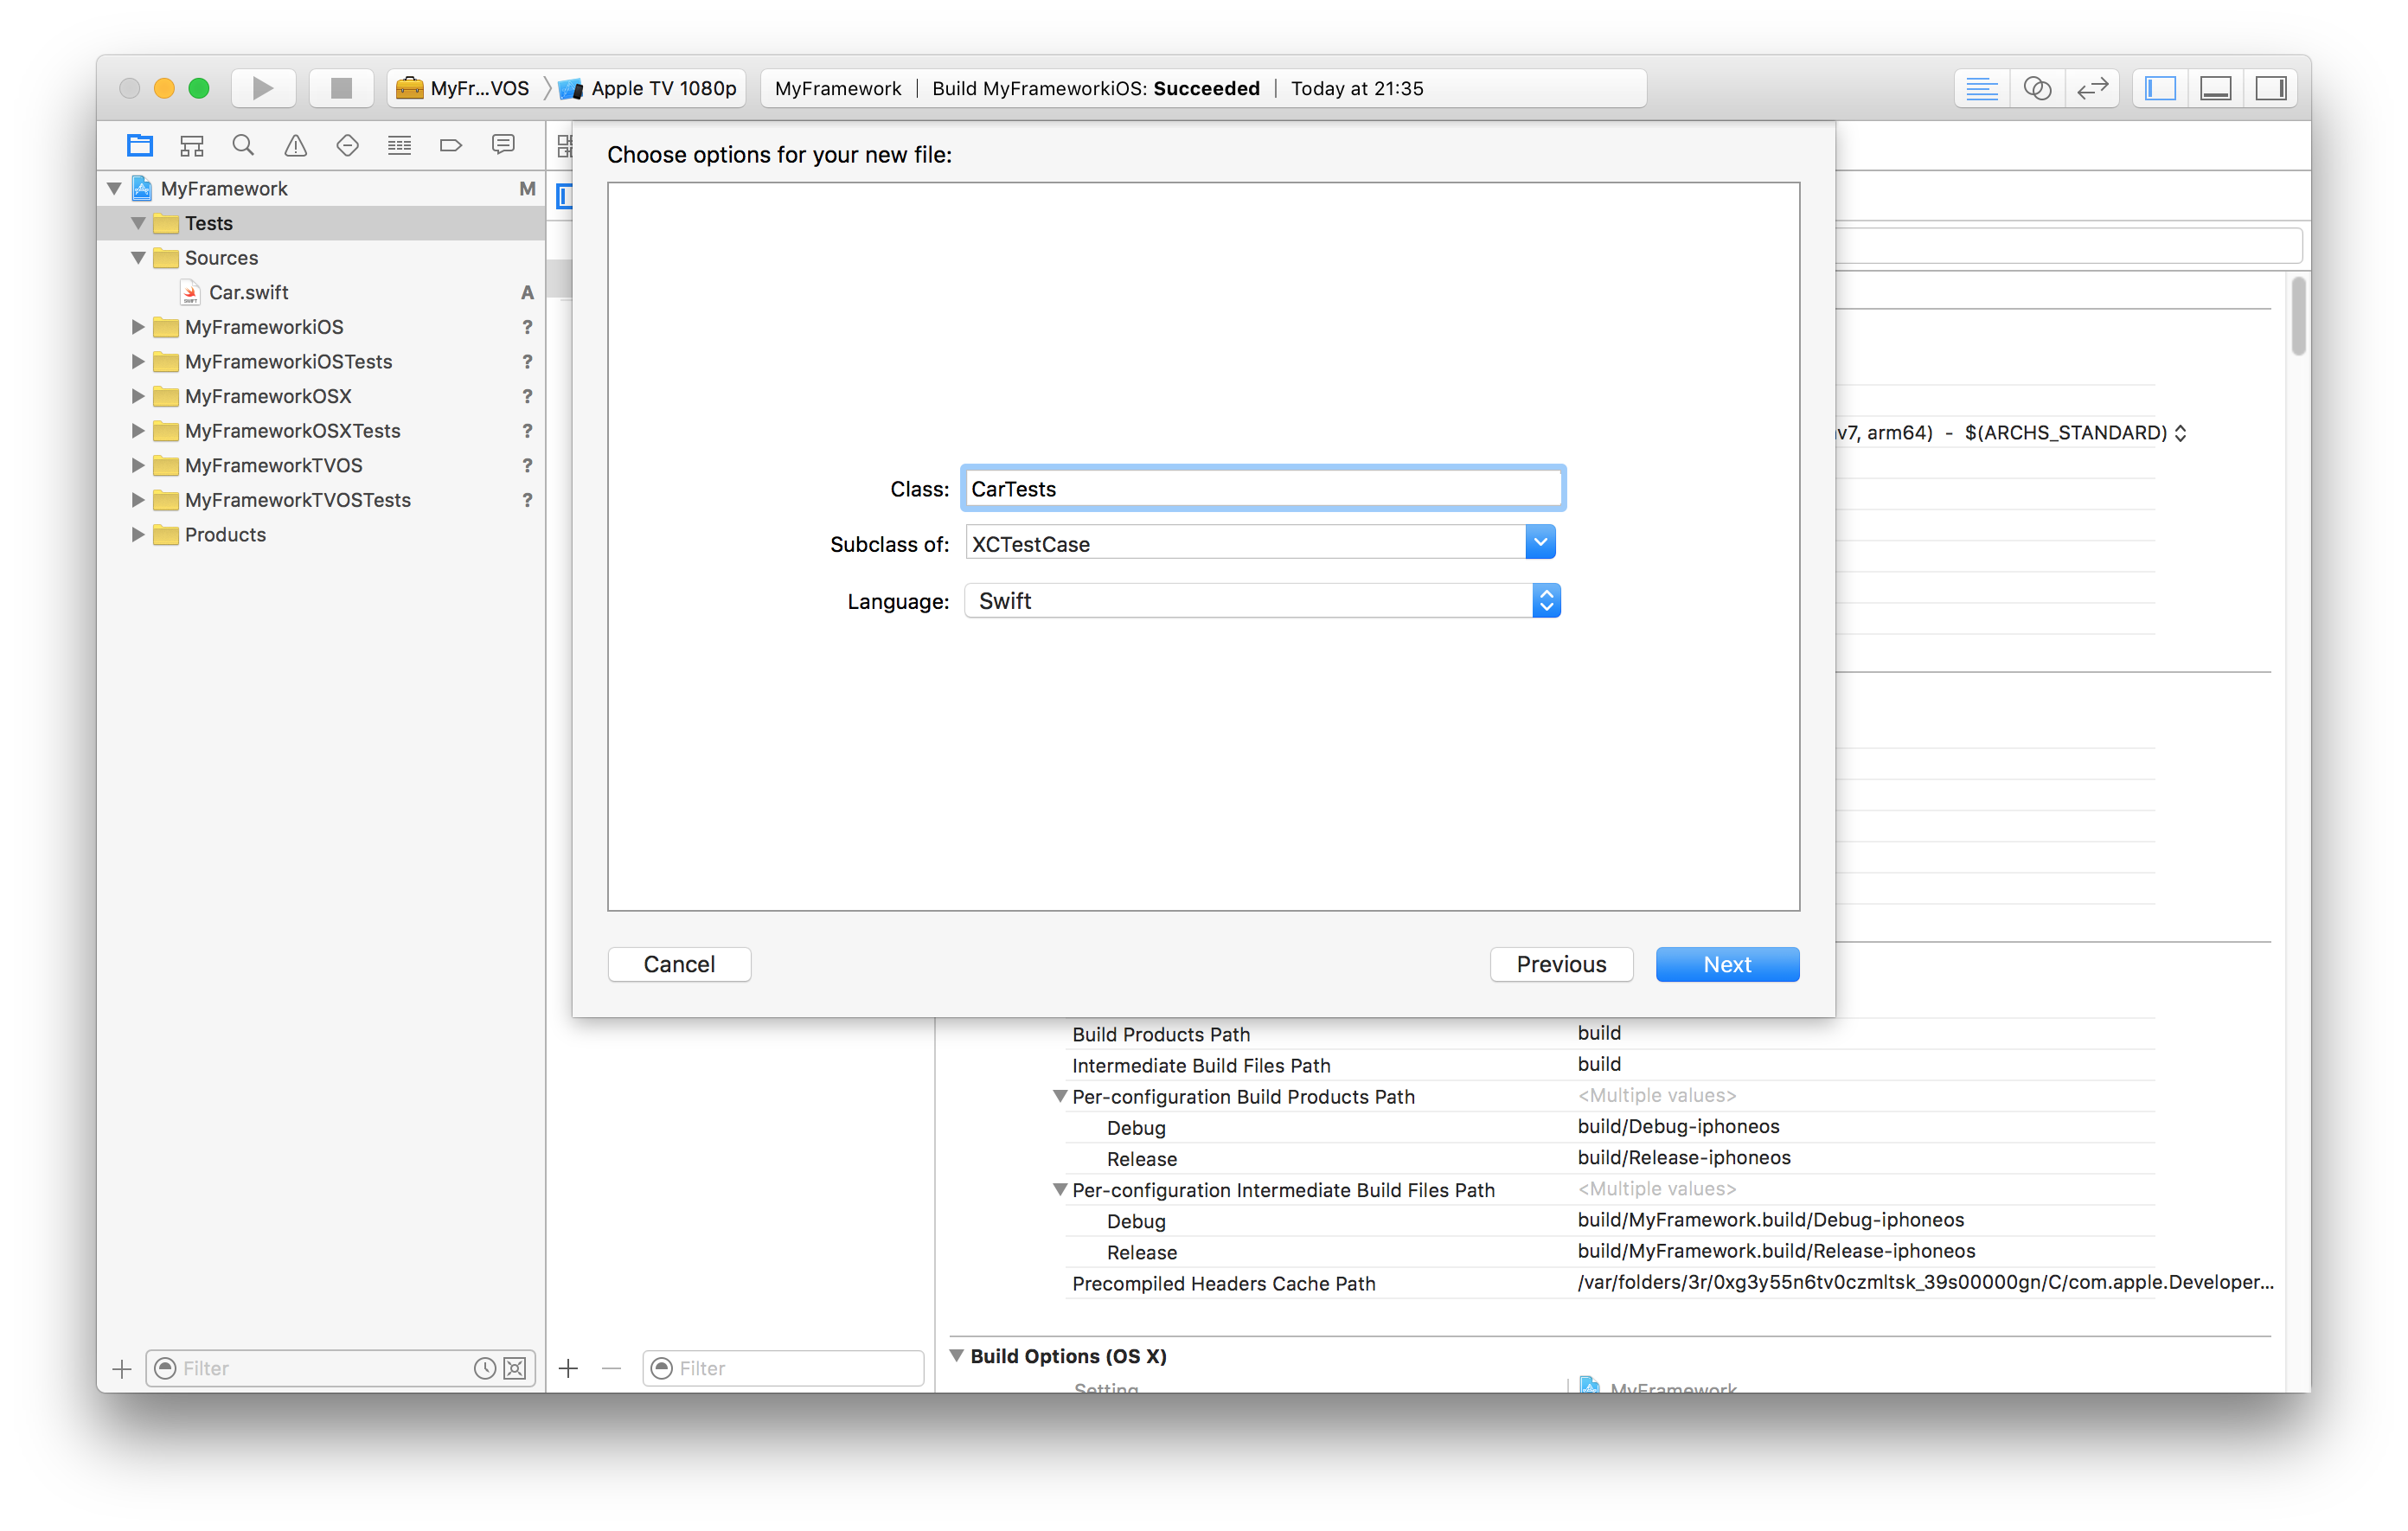 Creating a new Unit Test Case
Name the file CarTests.swift and save it in the Tests folder. Check that it is being added to the Tests group and that all unit test targets are selected.
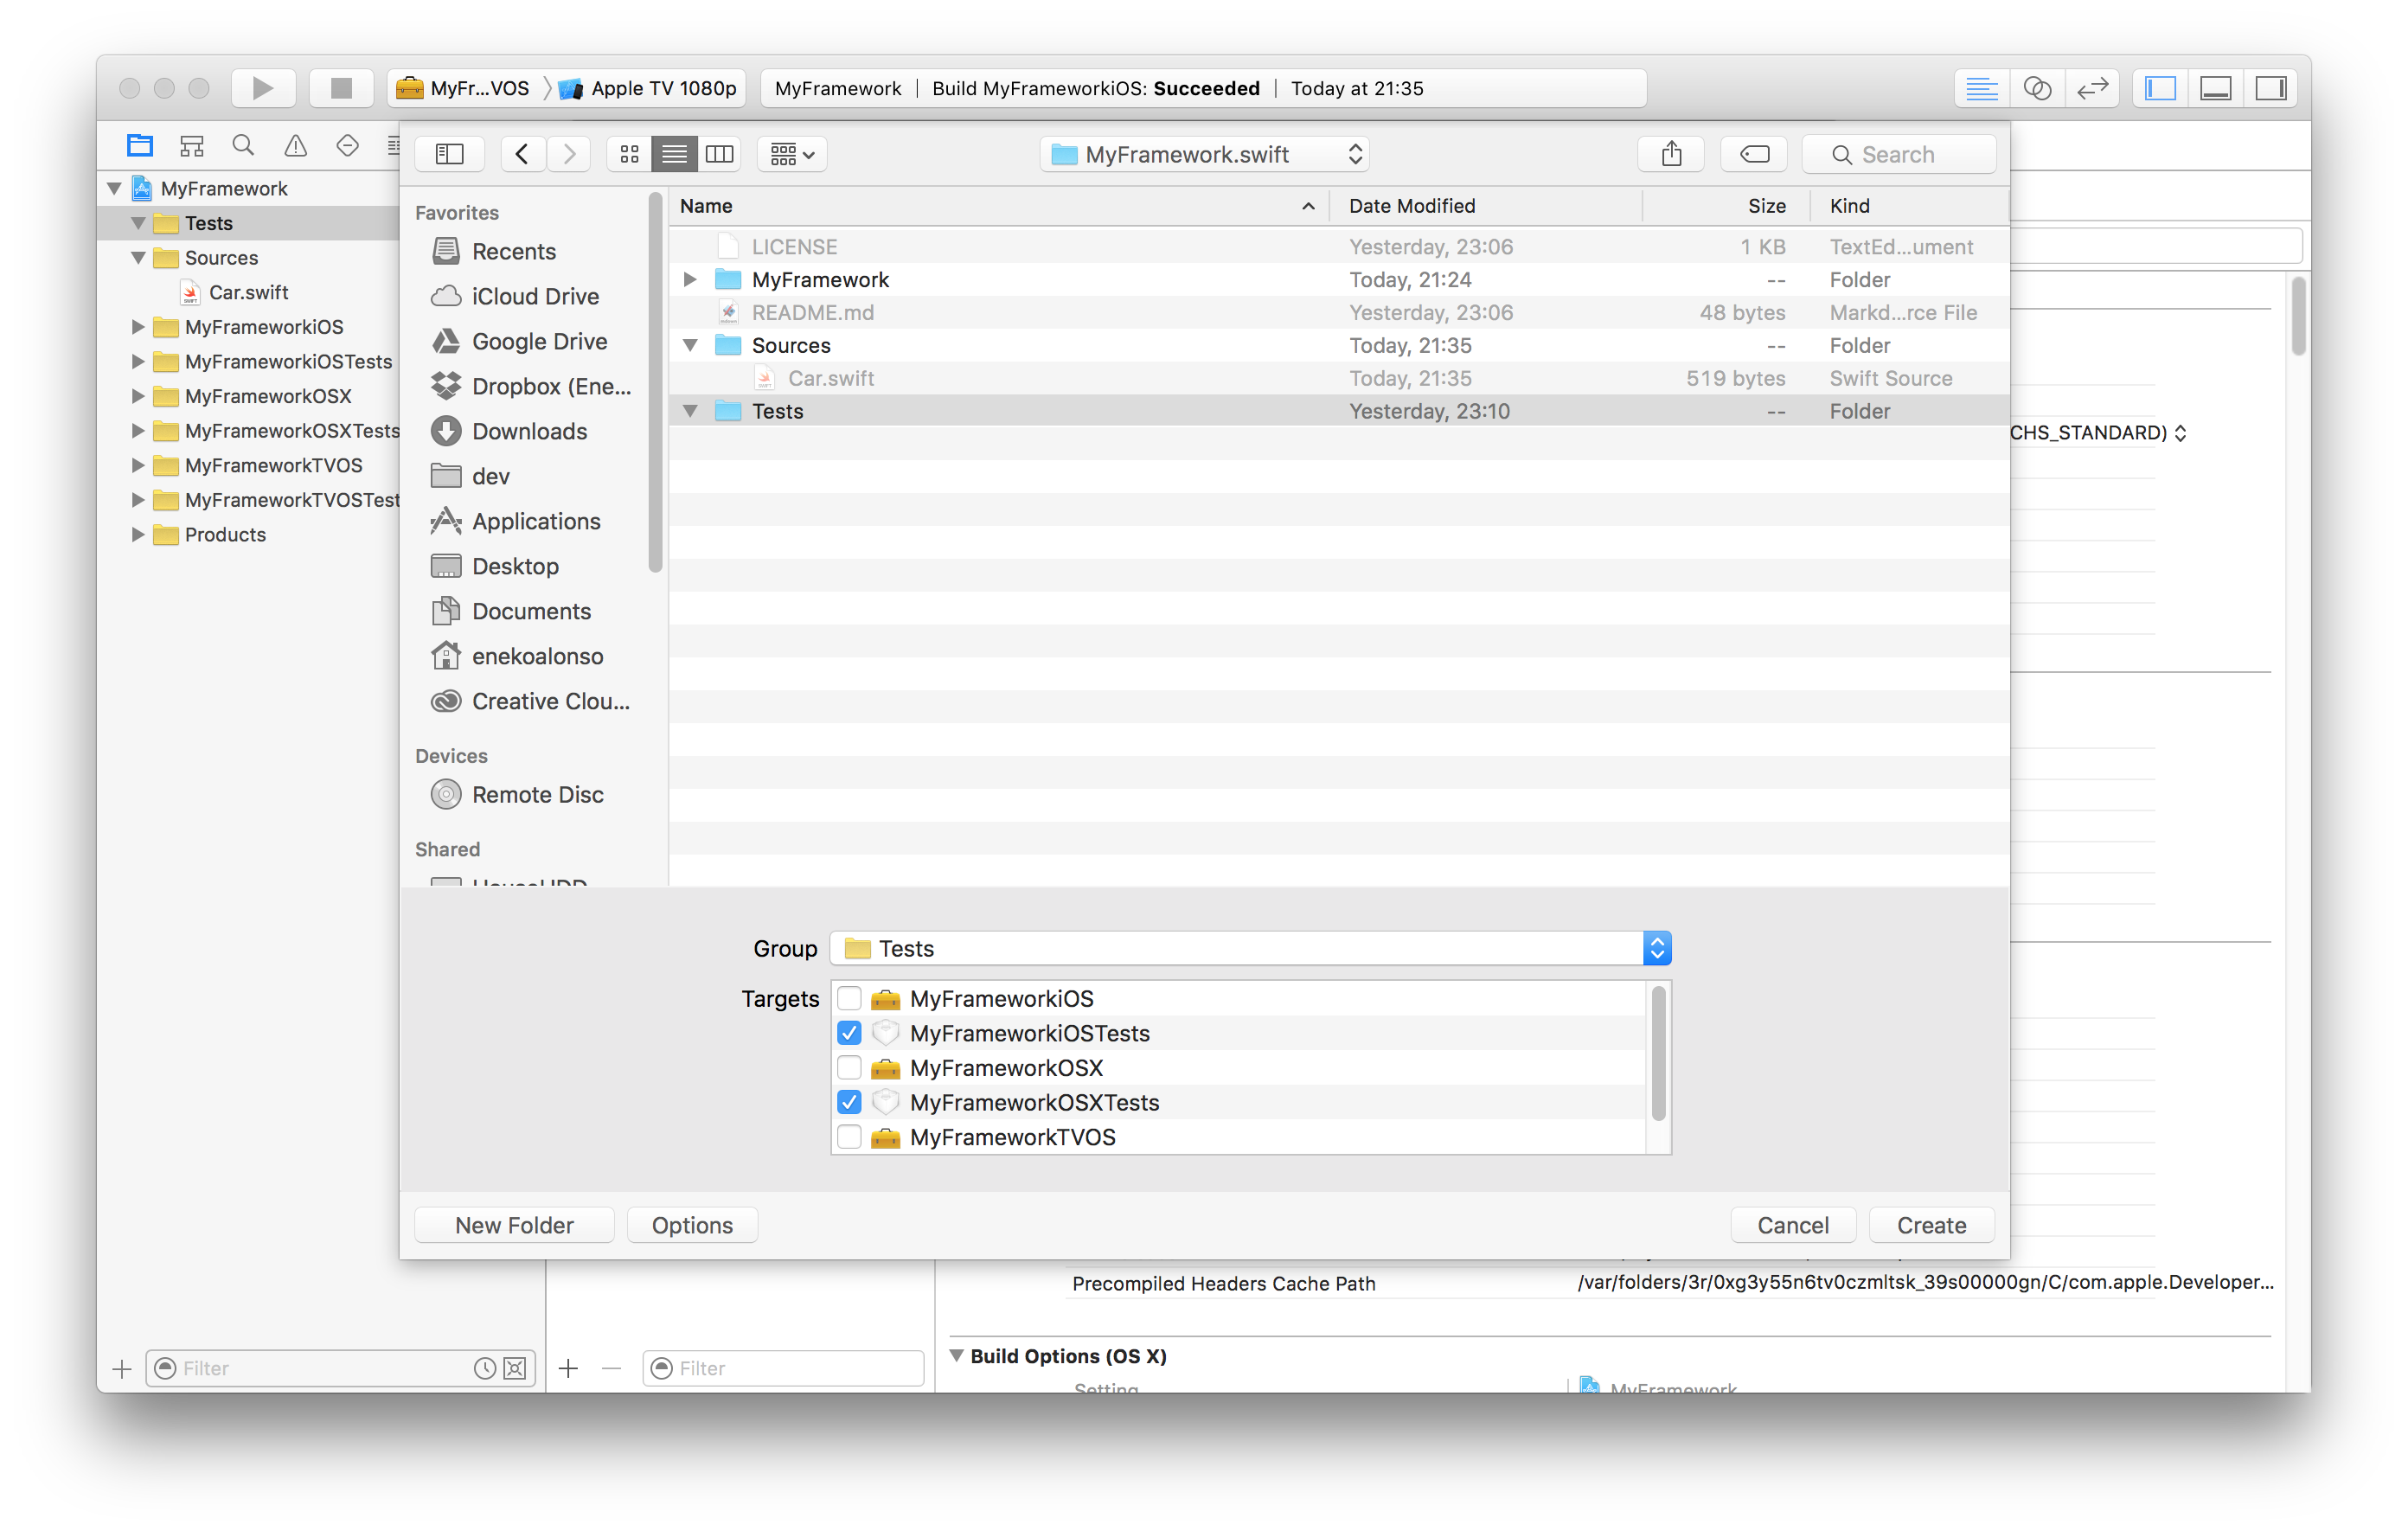 Adding source files to all unit test targets
Copy the tests from above and paste them in Xcode.
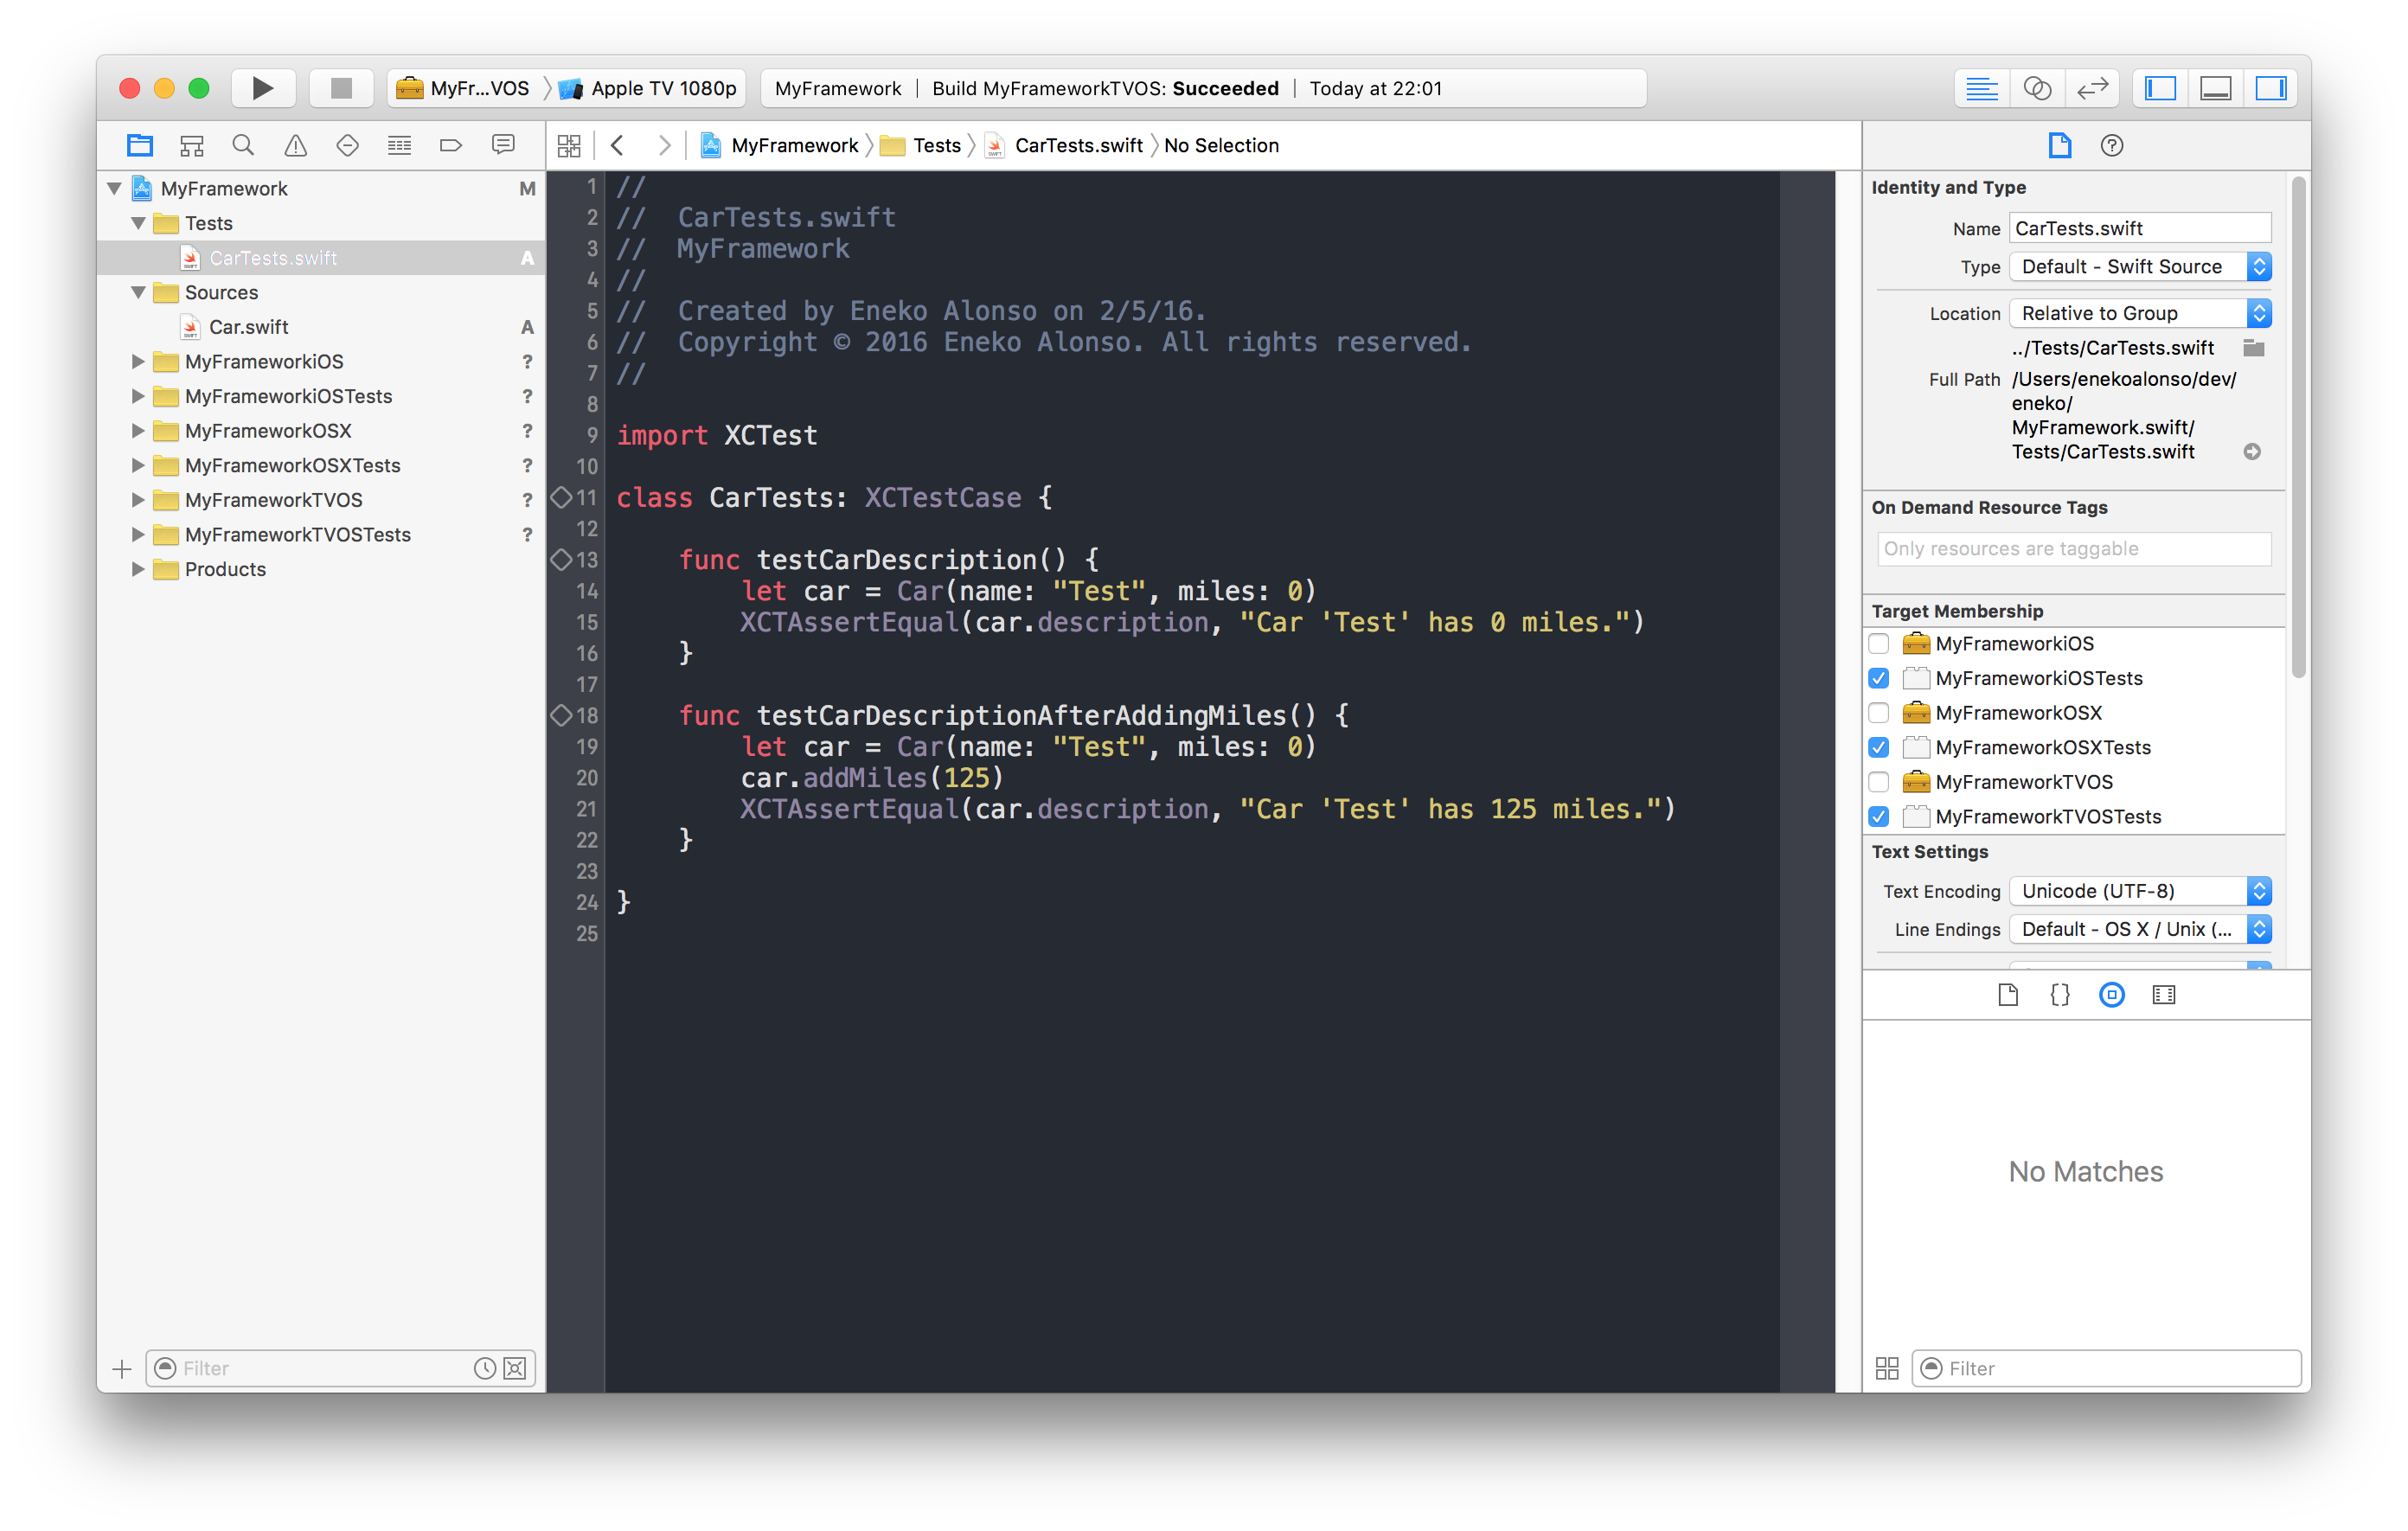 Unit Tests for our Car class
Note that, because we want our CarTests Unit Test Case to be used on all three frameworks, we wont be able to use @testable import to import our Car class.
Instead, we will have to add the Car.swift file to all our unit test targets.
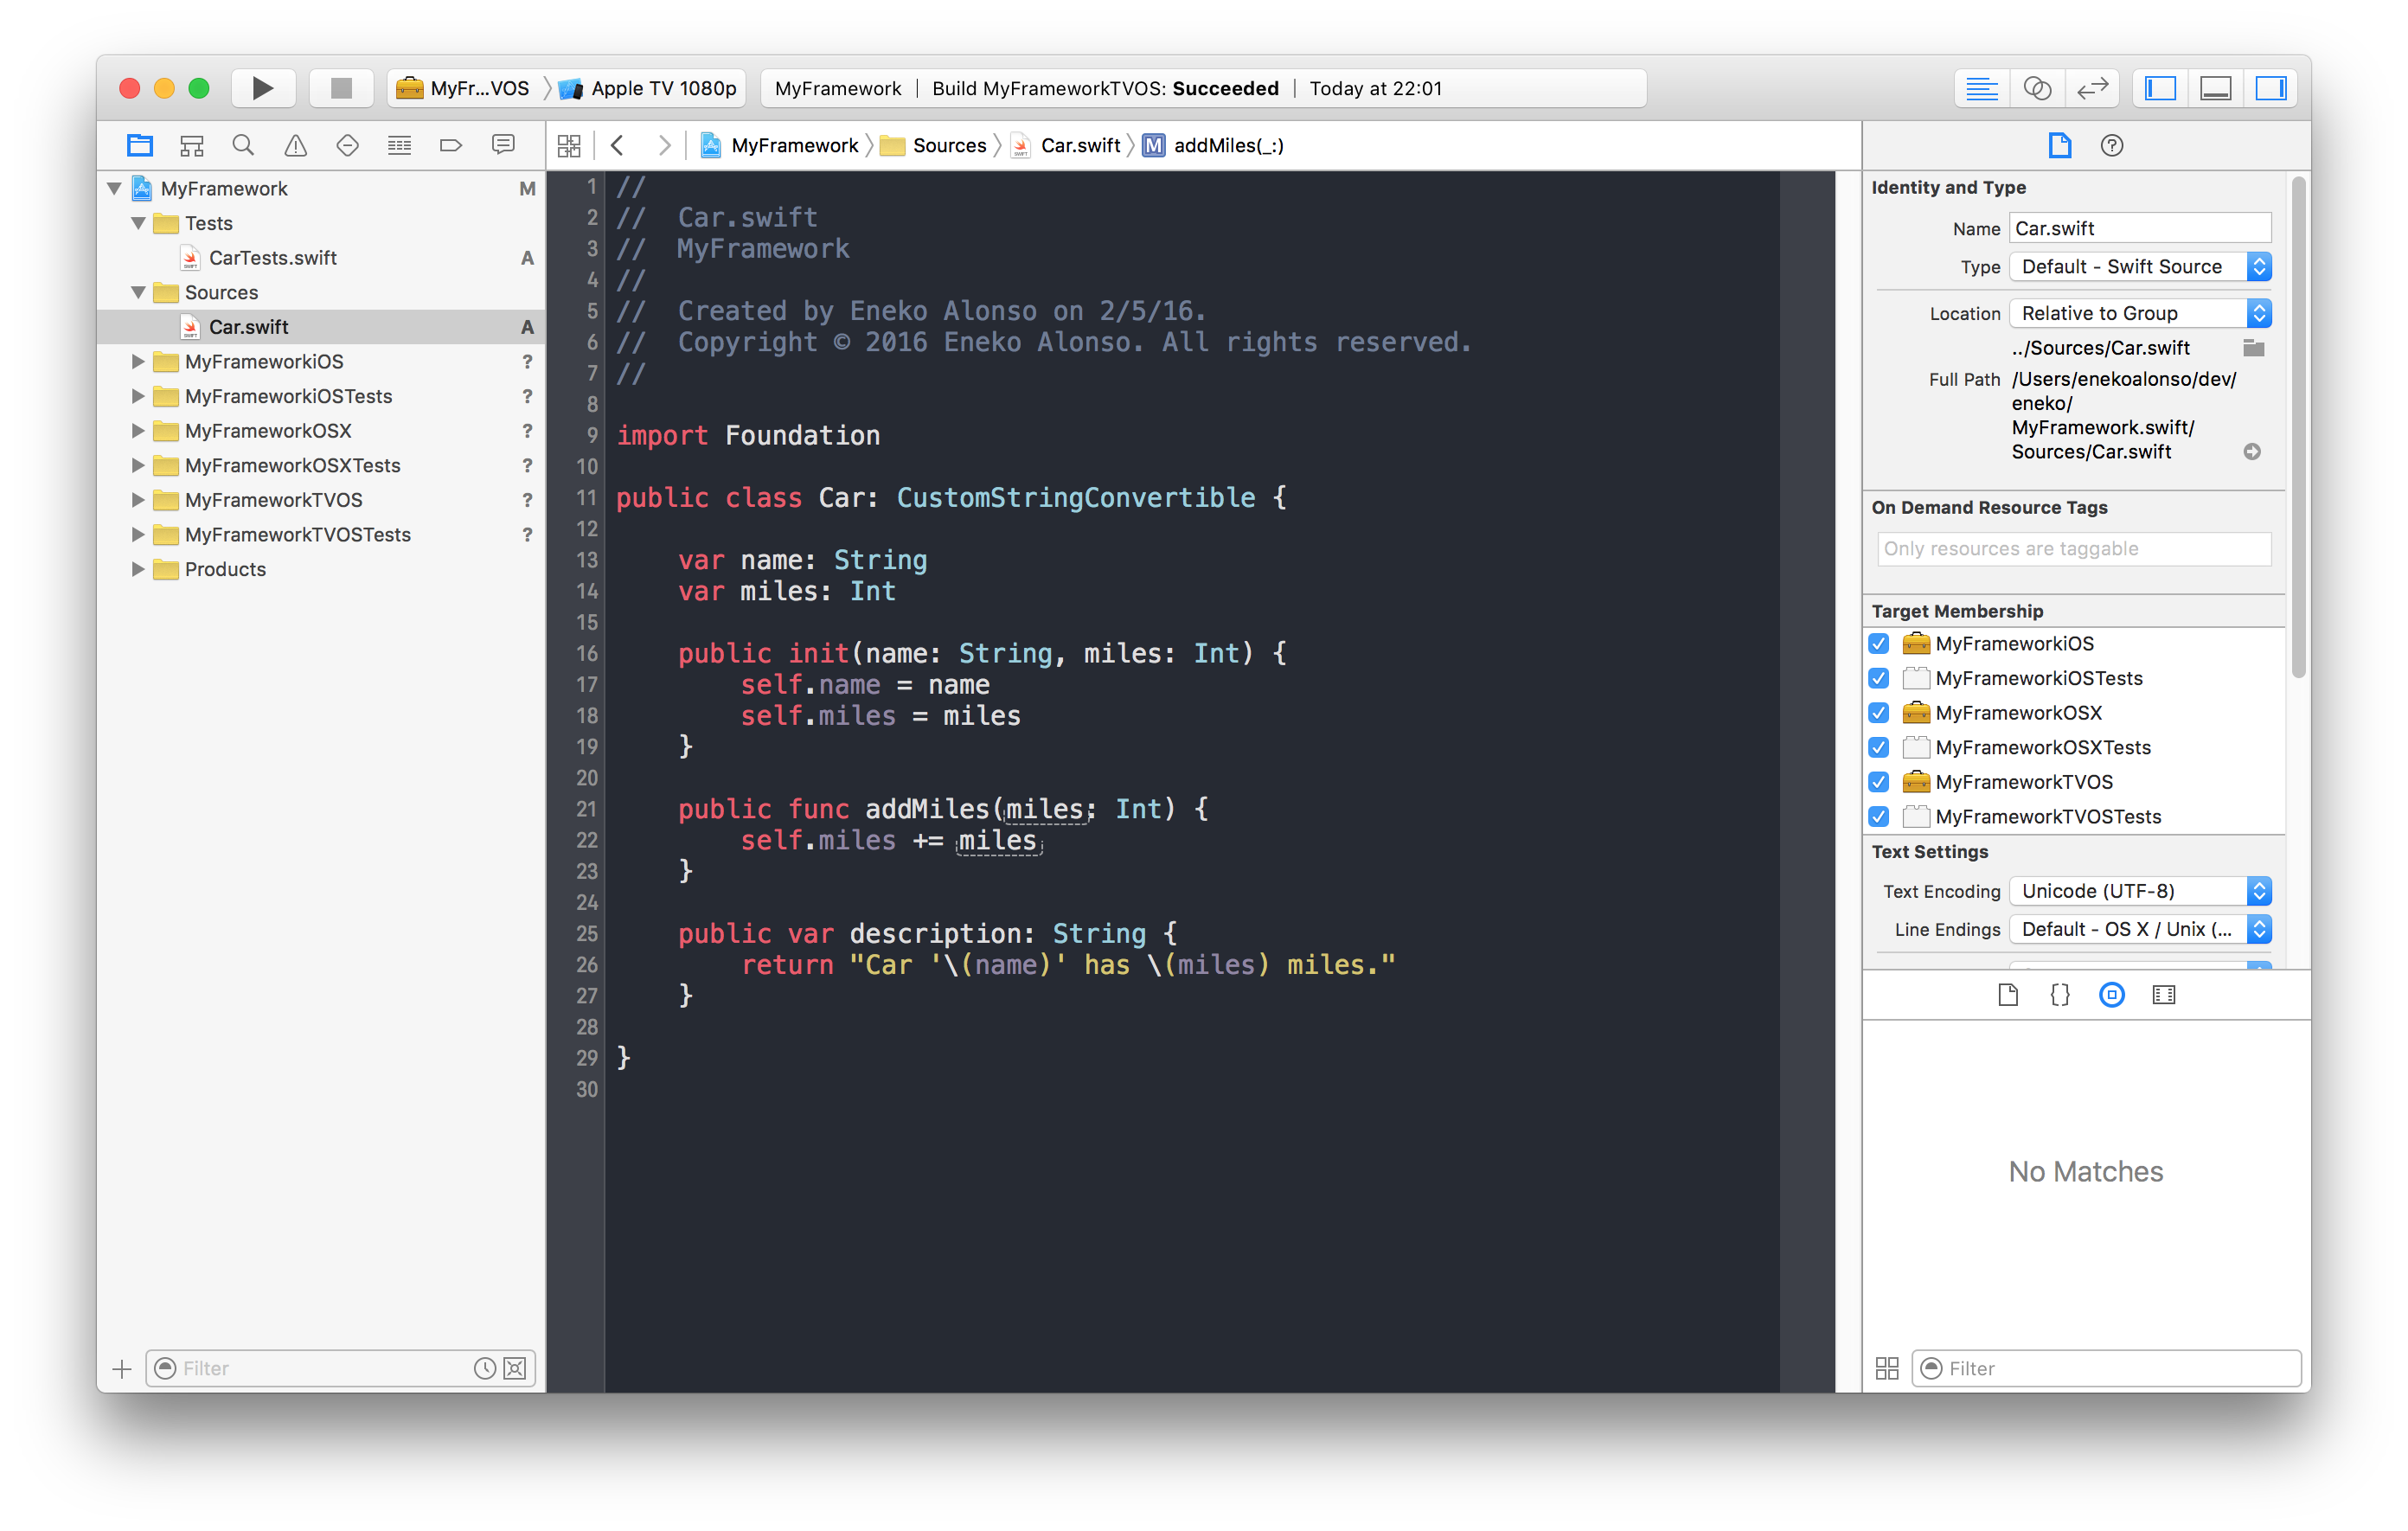 Car class target membership
Testing each target manually
Testing each target manually is as simple as selecting the correct scheme in the Xcode build configuration and then running the tests (⌘ + U).
Our tests results should be all green for each of our frameworks.
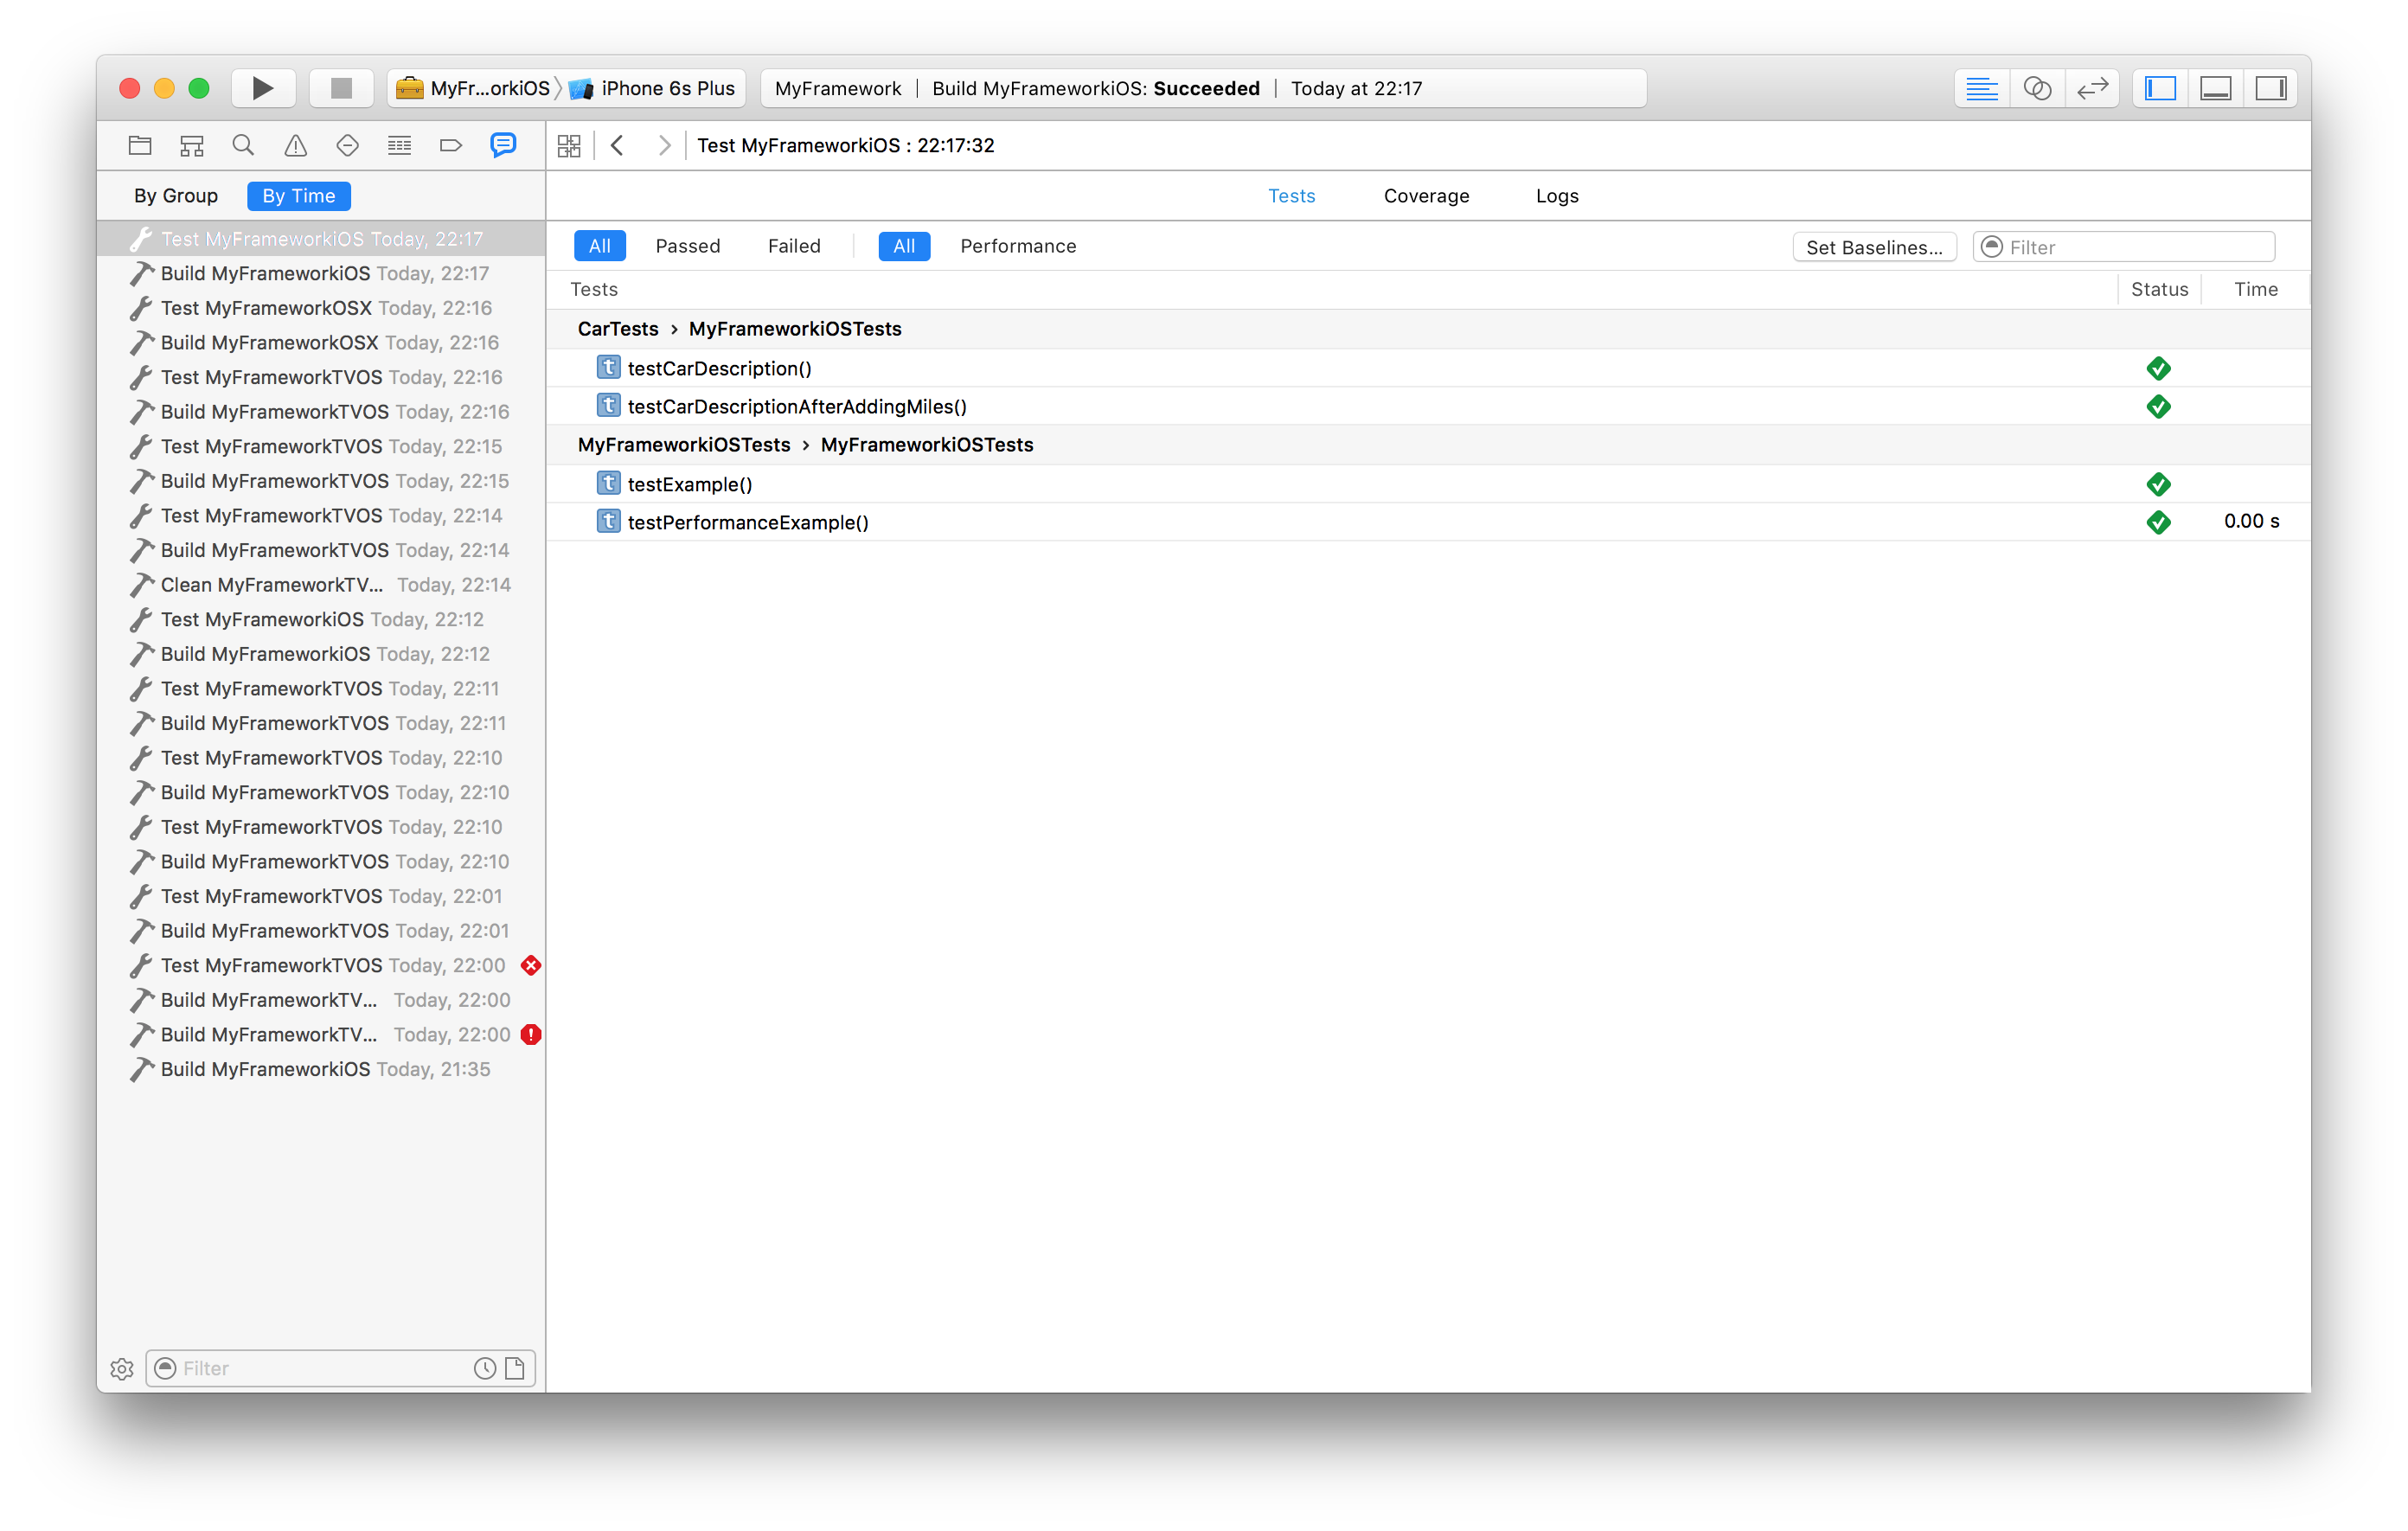 Test results are green
In addition, our coverage should be 100%.
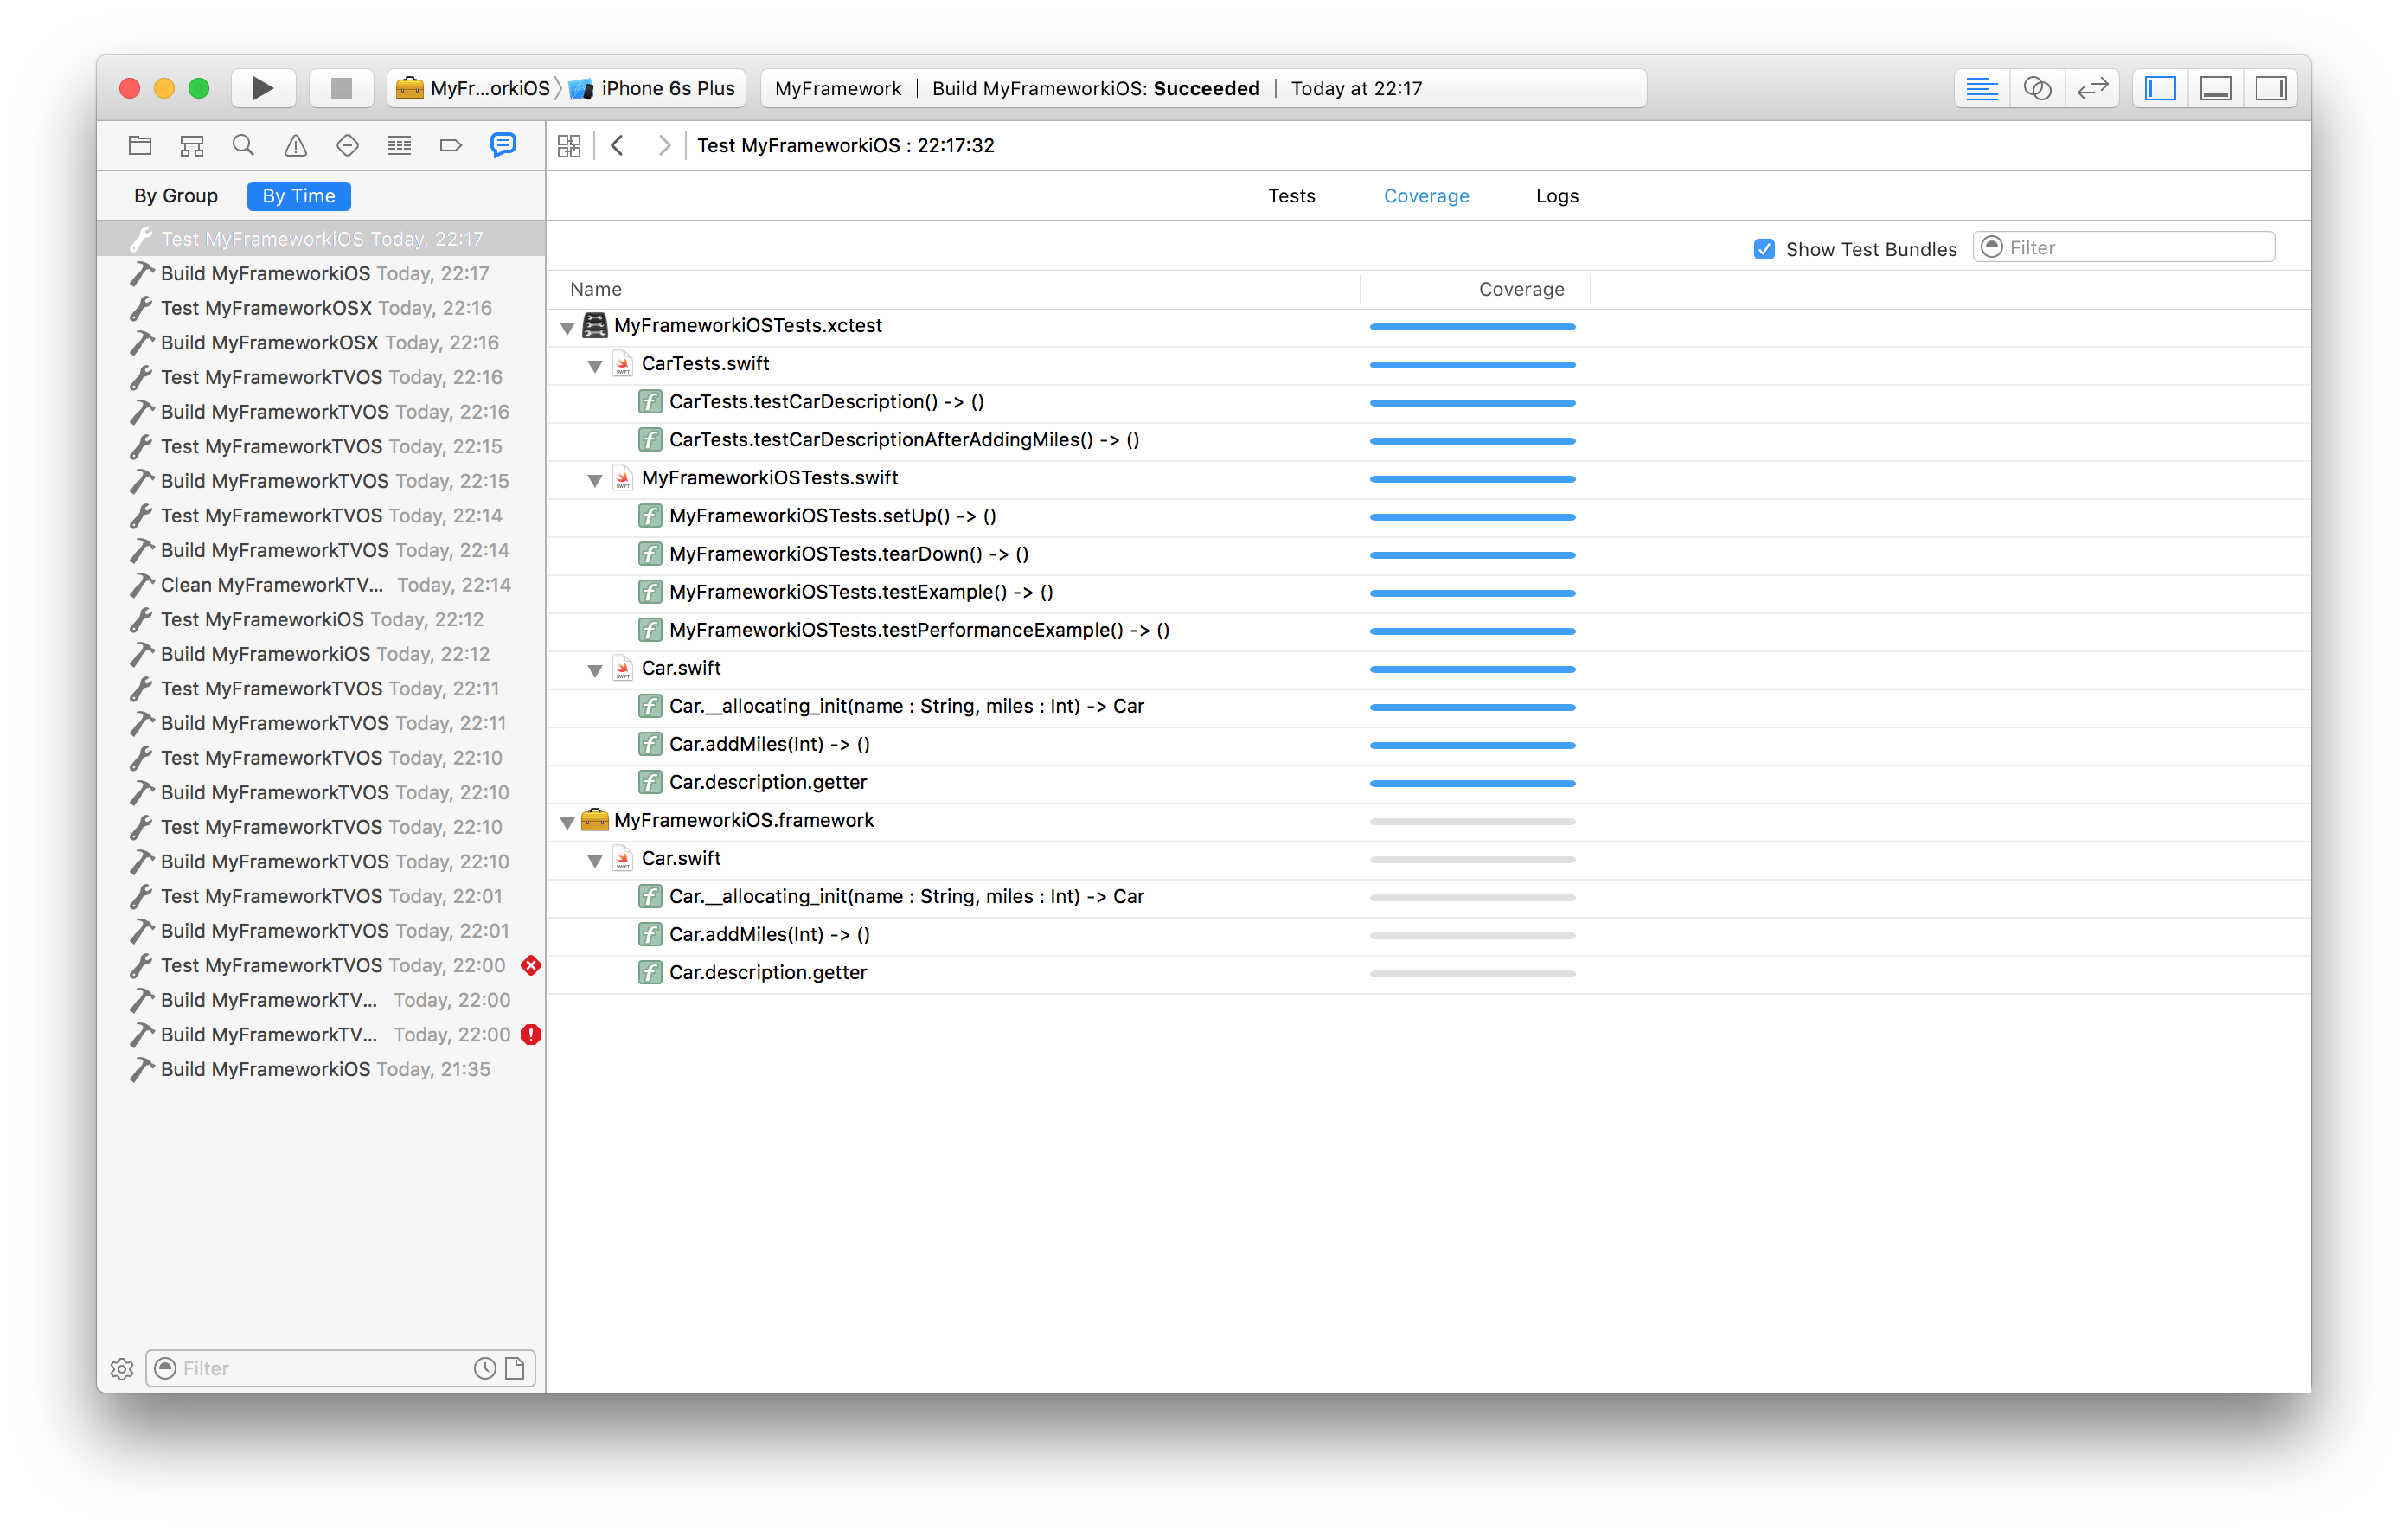 100% Code Coverage
Note that since we are including the source files directly into the test bundle, the coverage will only appear when selecting ‘Show Test Bundles’ on the coverage report screen.
Configuration for Travis CI (Continuous Integration)
For continuous integration we will use Travis CI. Travis CI pulls out your code from your GitHub repository, and looks at the .travis.yml configuration file to build your project.
In our case, we are going to configure a build matrix to build and test all our targets.
language: objective-c
osx_image: xcode7.2
env:
  global:
  - LC_CTYPE=en_US.UTF-8
  - LANG=en_US.UTF-8
  - WORKSPACE=MyFramework/MyFramework.xcworkspace
  - IOS_SCHEME="MyFrameworkiOS"
  - IOS_SDK=iphonesimulator9.2
  - OSX_SCHEME="MyFrameworkOSX"
  - OSX_SDK=macosx10.11
  - TVOS_SCHEME="MyFrameworkTVOS"
  - TVOS_SDK=appletvsimulator9.1
  matrix:
    - DESTINATION="OS=9.2,name=iPhone 4S"        SCHEME="$IOS_SCHEME"     SDK="$IOS_SDK"     RUN_TESTS="YES" POD_LINT="NO"
    - DESTINATION="OS=9.2,name=iPhone 5"         SCHEME="$IOS_SCHEME"     SDK="$IOS_SDK"     RUN_TESTS="YES" POD_LINT="NO"
    - DESTINATION="OS=9.2,name=iPhone 5S"        SCHEME="$IOS_SCHEME"     SDK="$IOS_SDK"     RUN_TESTS="YES" POD_LINT="NO"
    - DESTINATION="OS=9.2,name=iPhone 6"         SCHEME="$IOS_SCHEME"     SDK="$IOS_SDK"     RUN_TESTS="YES" POD_LINT="NO"
    - DESTINATION="OS=9.2,name=iPhone 6 Plus"    SCHEME="$IOS_SCHEME"     SDK="$IOS_SDK"     RUN_TESTS="YES" POD_LINT="NO"
    - DESTINATION="OS=9.2,name=iPhone 6S"        SCHEME="$IOS_SCHEME"     SDK="$IOS_SDK"     RUN_TESTS="YES" POD_LINT="NO"
    - DESTINATION="OS=9.2,name=iPhone 6S Plus"   SCHEME="$IOS_SCHEME"     SDK="$IOS_SDK"     RUN_TESTS="YES" POD_LINT="NO"
    - DESTINATION="arch=x86_64"                  SCHEME="$OSX_SCHEME"     SDK="$OSX_SDK"     RUN_TESTS="YES" POD_LINT="NO"
    - DESTINATION="OS=9.1,name=Apple TV 1080p"   SCHEME="$TVOS_SCHEME"    SDK="$TVOS_SDK"    RUN_TESTS="YES" POD_LINT="NO"

script:
  - set -o pipefail
  - xcodebuild -version
  - xcodebuild -showsdks

  # Build Framework in Debug and Run Tests if specified
  - if [ $RUN_TESTS == "YES" ]; then
      xcodebuild -workspace "$WORKSPACE" -scheme "$SCHEME" -sdk "$SDK" -destination "$DESTINATION" -configuration Debug ONLY_ACTIVE_ARCH=NO test | xcpretty -c;
    else
      xcodebuild -workspace "$WORKSPACE" -scheme "$SCHEME" -sdk "$SDK" -destination "$DESTINATION" -configuration Debug ONLY_ACTIVE_ARCH=NO build | xcpretty -c;
    fi

  # Run `pod lib lint` if specified
  - if [ $POD_LINT == "YES" ]; then
      pod lib lint --private --verbose;
    fi
The above matrix includes a pod lib lint command to be run once for each platform, we will get to that later once we add the CocoaPods podspec file.
Once you have added the .travis.yml configuration file, enable your repository on travis-ci.org or travis-ci.com and push your travis configuration file to GitHub.
 Enable repository on Travis CI
The push will trigger a new build.
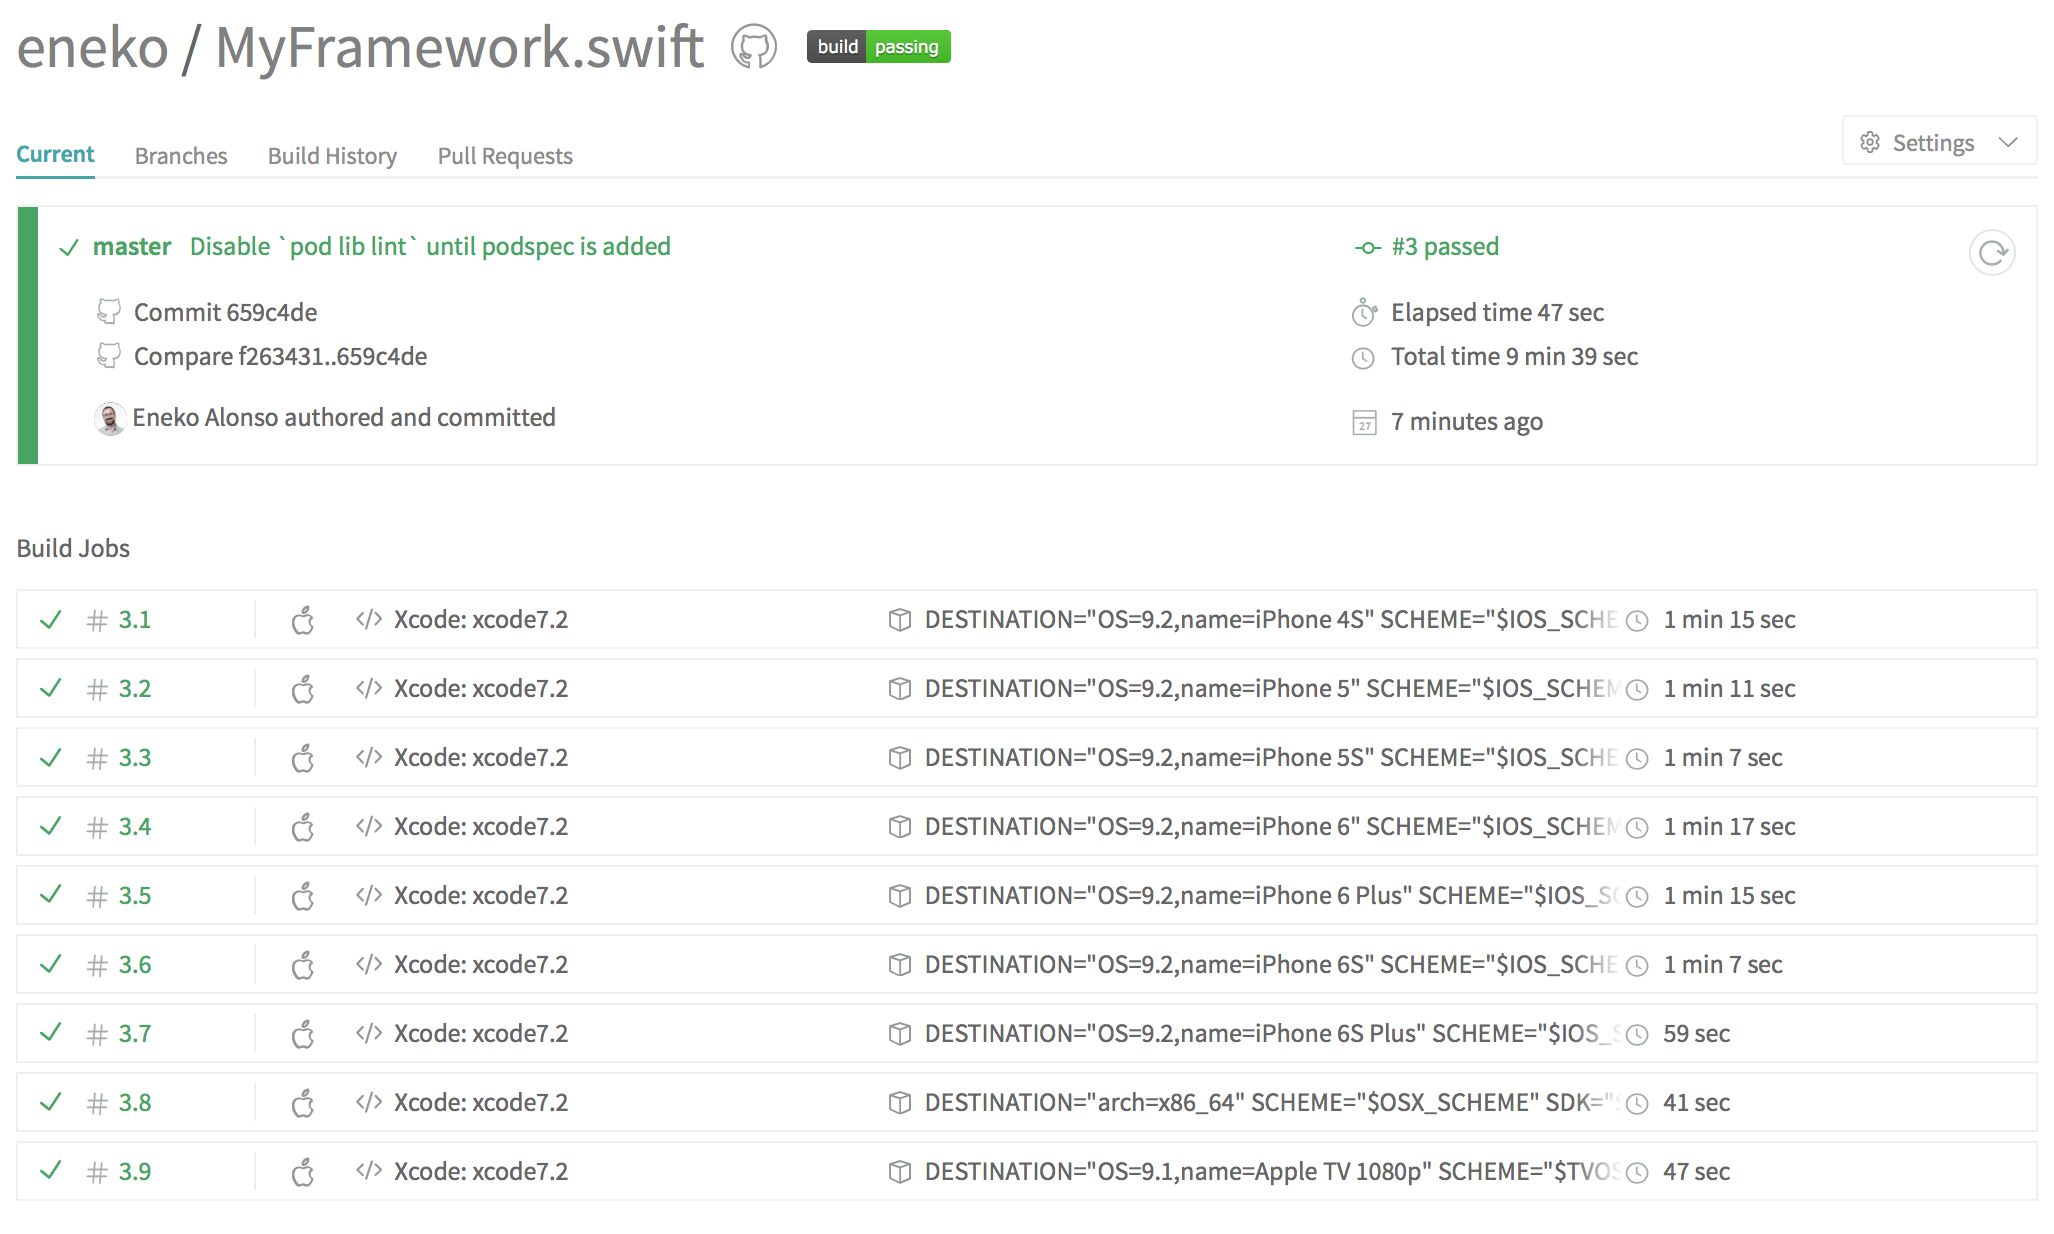 Our build is passing in all platforms and devices
Distribution
Archiving our Frameworks
The defacto way to distribute a framework is by archiving it. Select the generic device destination on your project build configuration. You can switch between destinations by pressing ^ + ⌥ + ⌘ + [ and ^ + ⌥ + ⌘ + ].
Before we can archive our frameworks, we need to set the Skip Install setting to NO.
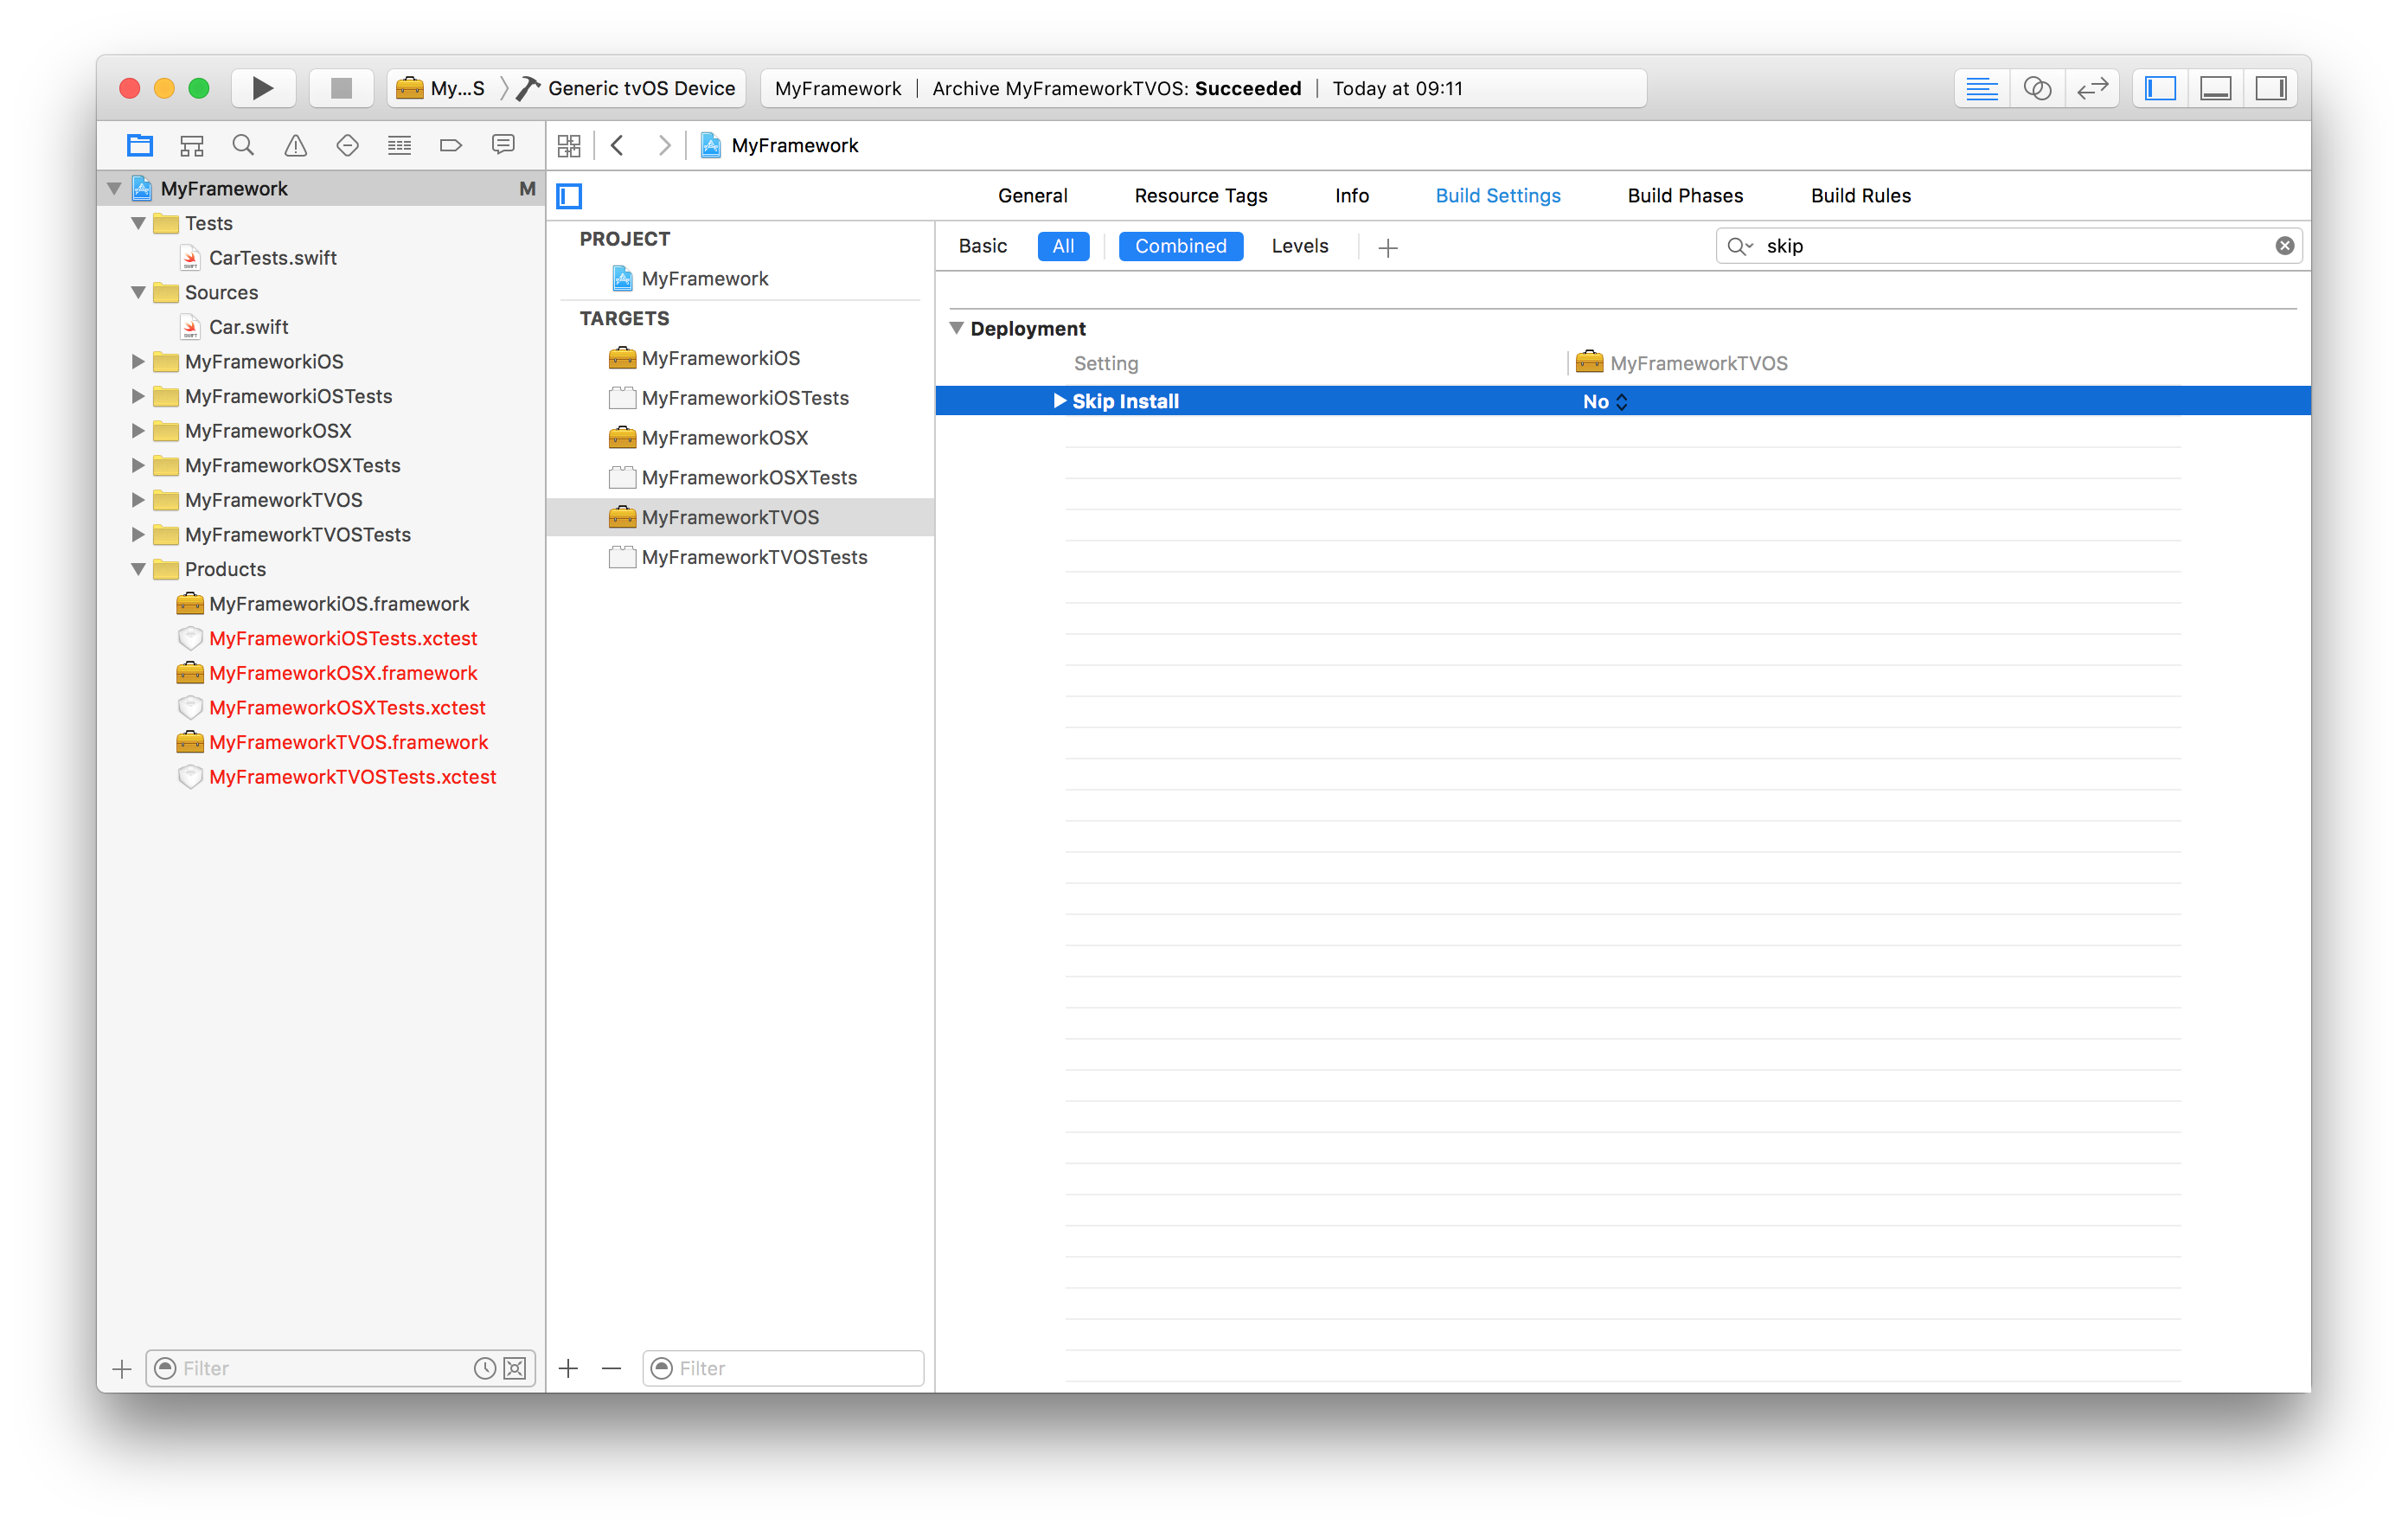 Set Skip Install to NO for all framework targets
To archive your framework, choose Product -> Archive in the menu. The archive will appear on the Organizer. To export it, select Export -> Save Built Products.
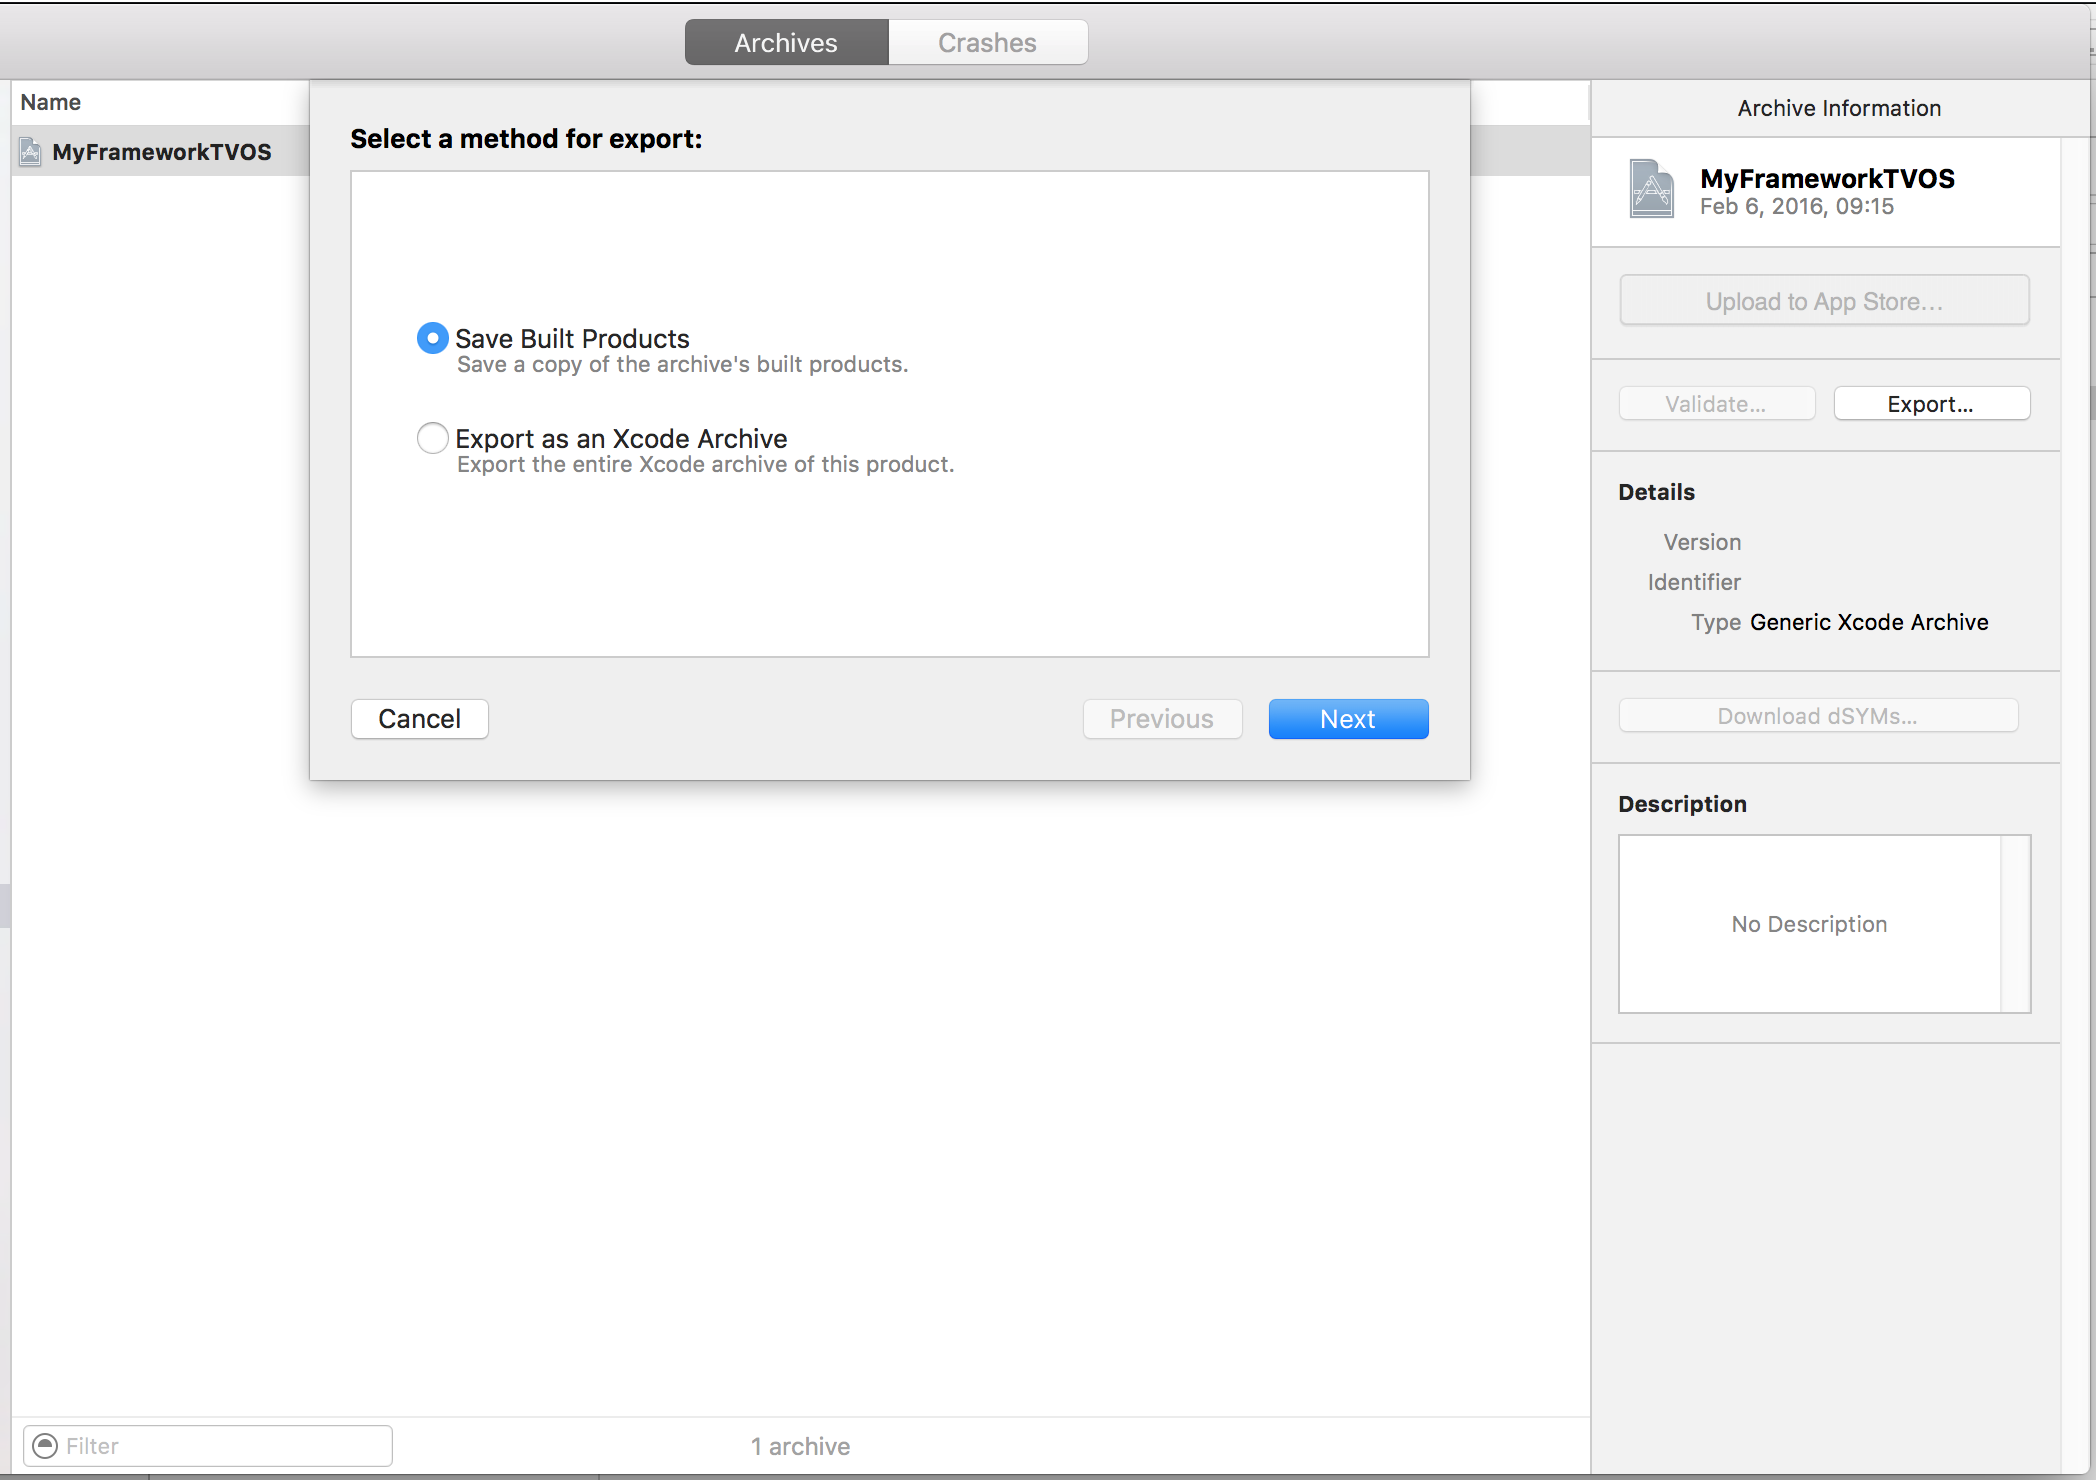 Export Framework
Your framework will be exported to a folder with the framework name and export date.
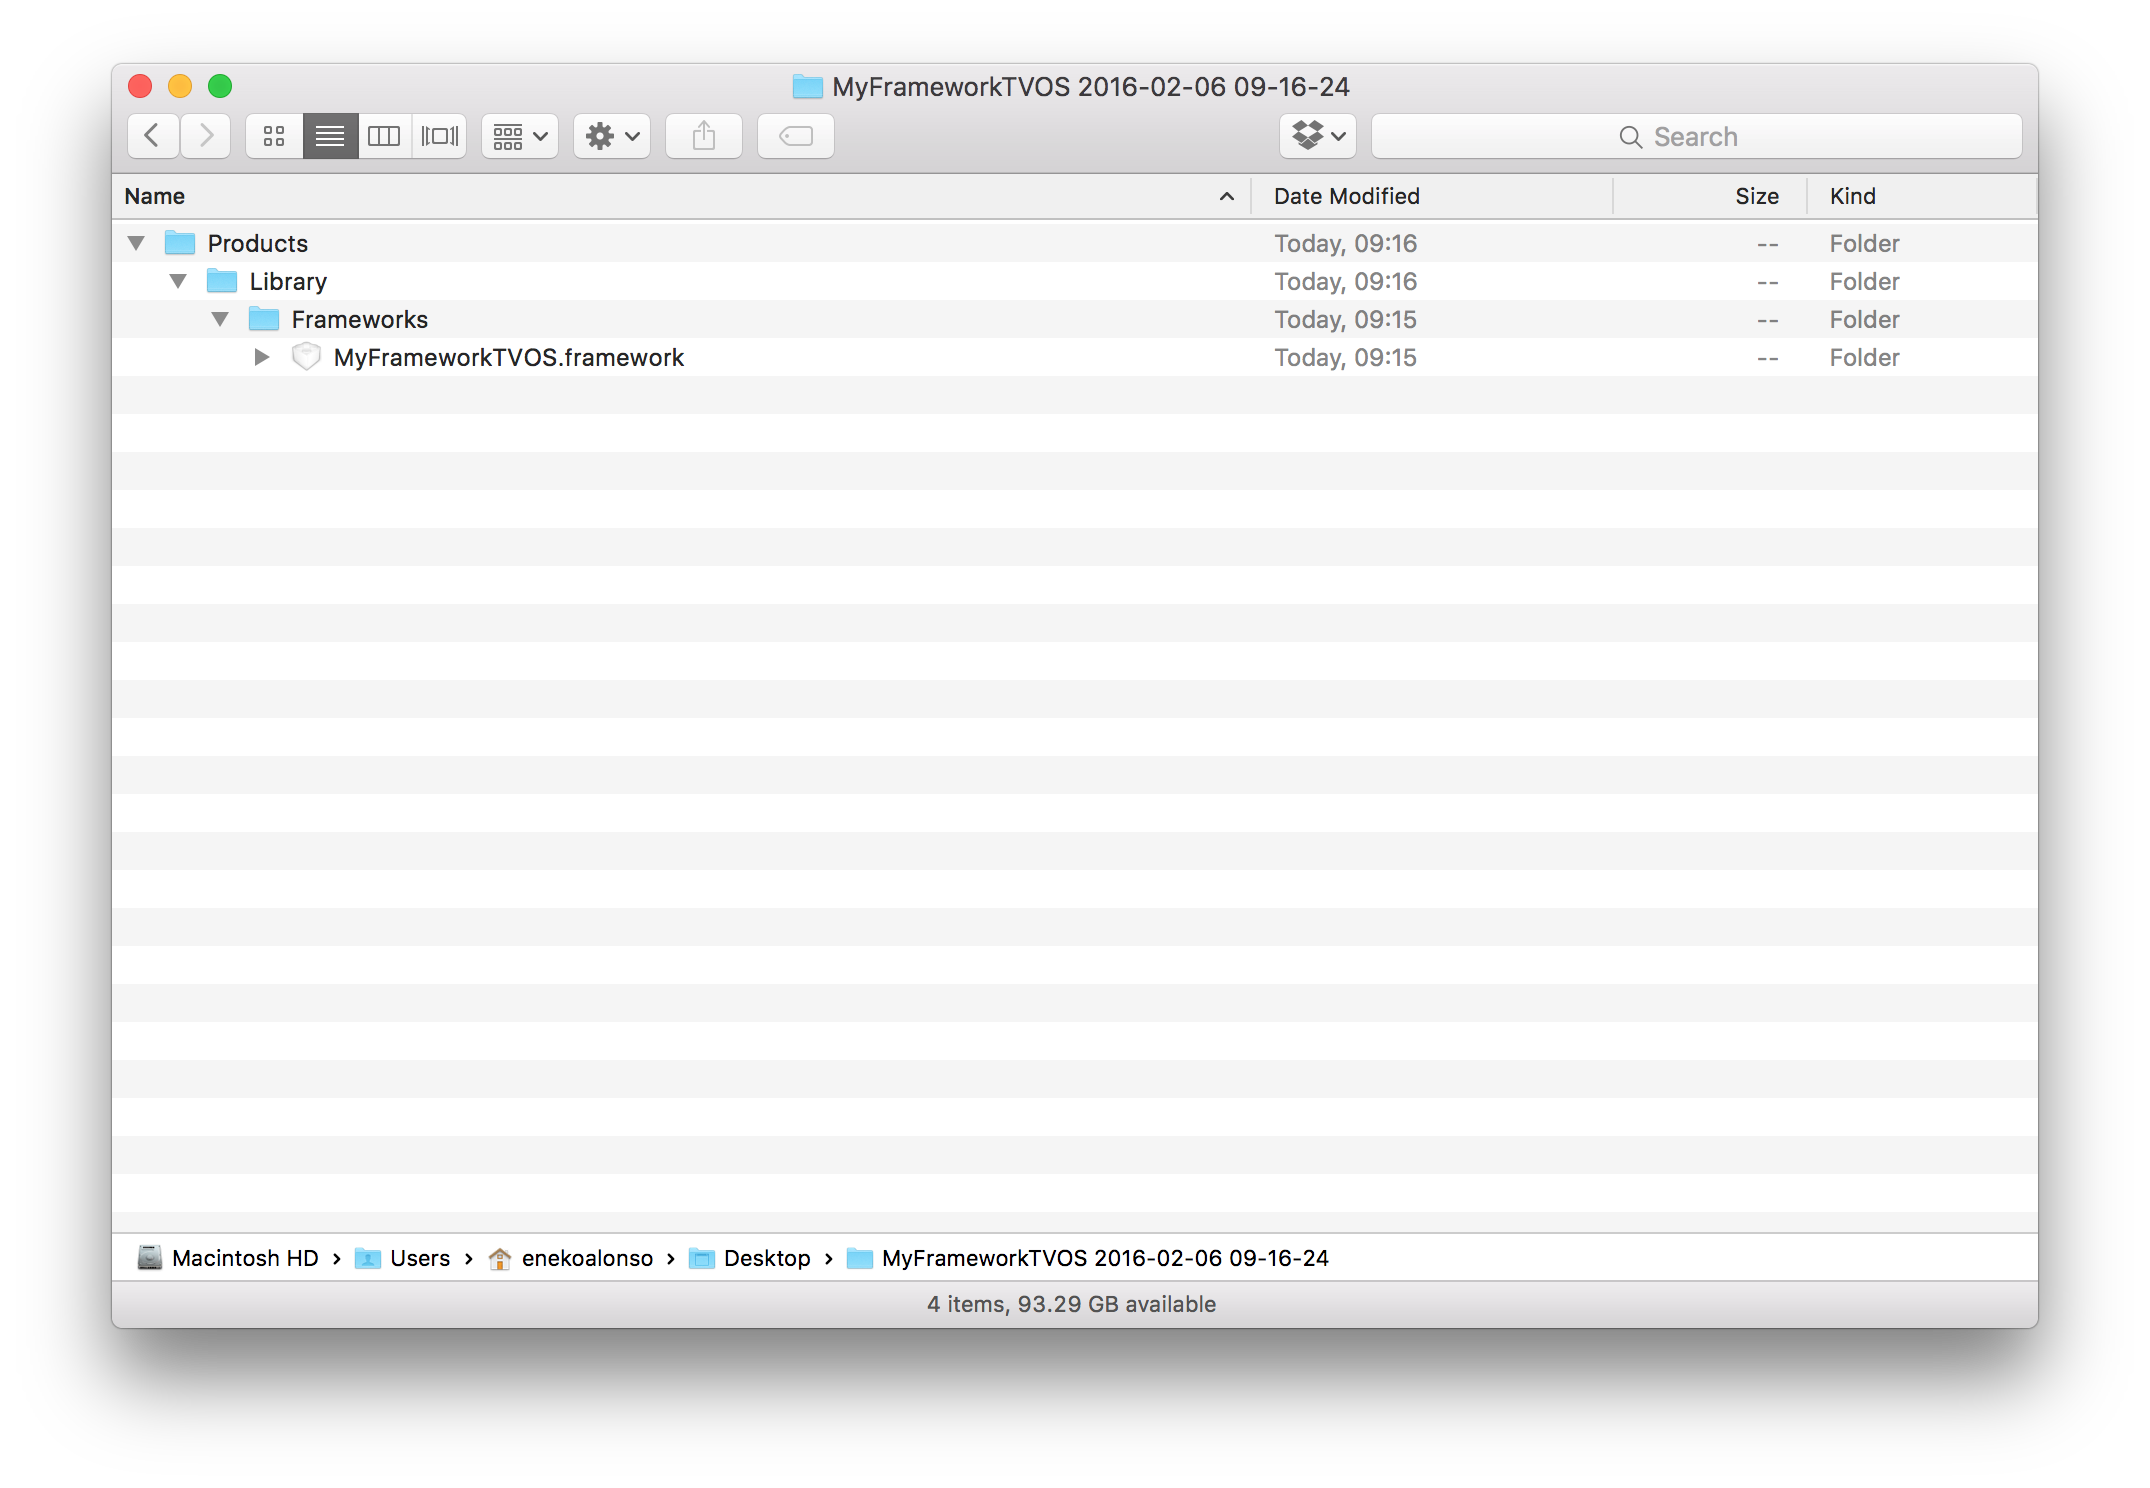 Exported Framework
At this point we can zip our framework and distribute it.
CocoaPods PodSpec
To distribute our frameworks via CocoaPods, we need to create a podspec file. In the root of your repository type:
$ pod spec create MyFramework
Specification created at MyFramework.podspec
Now, let’s add the podspec file to Xcode, for easy editing, but without adding it to any of the targets. Right-click on the project navigator and select Add Files to "MyFramework"....
Then proceed to edit the MyFramework.podspec file as follows:
Pod::Spec.new do |s|
  s.name         = "MyFramework"
  s.version      = "0.0.1"
  s.summary      = "MyFramework with a Car to track miles."
  s.homepage     = "https://github.com/eneko/MyFramework.swift"
  s.license      = "MIT"
  s.author       = { "Eneko Alonso" => "eneko.alonso@gmail.com" }

  s.ios.deployment_target = "8.0"
  s.osx.deployment_target = "10.9"
  s.tvos.deployment_target = "9.0"

  s.source       = { :git => "https://github.com/eneko/MyFramework.swift.git", :tag => s.version }
  s.source_files = "Sources/*.swift"
end
To verify the pod works as expected, use the command (add --private if your repository is not public):
$ pod lib lint
-> MyFramework (0.0.1)
MyFramework passed validation.
The minimum platform versions for a Swift application/framework are iOS 8.0, OS X 10.9 and tvOS 9.0.
For more information about making Pods see Making a CocoaPod, Using Pod Lib Create and Private Pods.
Swift Package Manager
To distribute your library via Swift Package Manager, all that is required is to create an empty Package.swift configuration file on the root of your repository.
This is because Swift Package Manager will include by default only those files in the Sources folder, which in our case, contains the source code we want to distribute.
For more information about the Swift Package Manager see Swift Page Manager
CocoaPod dependencies
As mentioned before, Framework projects can import dependencies via CocoaPods. Since we have created only one project for all three frameworks, adding CocoaPods will be super easy.
In the terminal, navigate to the folder containing your Xcode project and type the following command:
$ pod init
This will create a Podfile file with some content for your multiple targets. Alternatively, you can also create the Podfile manually with any text editor.
Add any pod dependencies. In most cases, the dependencies will be the same for all three frameworks, so we can create a ruby function to contain all the pods as follows:
use_frameworks!

def pods()
    # Your favorite pods here
    # pod 'SwiftyJSON'
end

target 'MyFrameworkiOS' do
    pods()
end

target 'MyFrameworkiOSTests' do
    pods()
end

target 'MyFrameworkOSX' do
    pods()
end

target 'MyFrameworkOSXTests' do
    pods()
end

target 'MyFrameworkTVOS' do
    pods()
end

target 'MyFrameworkTVOSTests' do
    pods()
end
Once you have listed your dependencies, run this command to install them (it is a good habit to close your project on Xcode, since moving forward we will use the workspace instead):
$ pod install
Open the new workspace created by CocoaPods:
$ open MyFrameworks.xcworkspace
At this point, your workspace should contain two projects our framework project with our three targets and a second project from CocoaPods.
 Project Workspace with CocoaPods dependencies
Build and test your schemes, everything should work as before, and all dependencies included in the Podfile should be available for import.
Source Code
The entire source code for this tutorial is available on GitHub:
Build reports are available on Travis CI:
MyFramework.swift Build Report
Footnotes: